Text to Pay
This help topic is applicable to the following TireMaster applications:
|
TireMaster Point of Sale |
TireMaster Plus |
TireMaster Corporate |
|---|---|---|

|

|

|
With Text to Pay for TireMaster, a customer can pay you with a credit card via a mobile device, typically a cell phone. The Text to Pay functionality is possible because of the integration of the 1st Mile Pay app and TireMaster.
The following credit card types can be used with the Text to Pay application:
Visa
MasterCard
Discover
American Express (AMEX)
Credit First National Association (CFNA)
To use Text to Pay, you need to know how to do the following in TireMaster:
Retrieve customers’ work orders
Complete customers’ invoices
Add and edit customer contact information
Before you can install Text to Pay, do one of the following to locate the installation program:
Access the automatically-deployed installer from the apps directory. For instructions, see Access Automatically-Deployed Installers.
Download the installer from the TireMaster Support site. For instructions, see Download the Text To Pay Installer.
Once you’ve located the installer, complete the installation. For instructions, see Complete the Text to Pay Installation.
If your TireMaster system is set up to download automatically-deployed installers as part of the nightly backup process, the installer for Text to Pay is already available to you. Typically, installers are placed in one of the following locations:
|
c:\TireMaster\apps |
c:\TMPOS\apps |
d:\QDSTM\apps |
|
c:\QDSTM\apps |
d:\TireMaster\apps |
d:\TMPOS\apps |
To access automatically-deployed installers
| 1. | Right-click  and select File Explorer from the menu that appears. and select File Explorer from the menu that appears. |
| 2. | In the Quick Access navigation pane, scroll to This PC. |
| 3. | Double-click the letter or icon for the drive that TireMaster is installed in. (Usually, it’s the c: or d: drive.) |
| 4. | Double-click the TireMaster, qdstm, or tmpos program folder. |
| 5. | Double-click the apps folder, and locate the file TMTextPay00000000-01010000.exe. Once you have located the installer, complete the installation. For instructions, see Complete the Text to Pay Installation. |
The installer for Text to Pay is available for download from the TireMaster Support site. When you download the installer, save it on your TireMaster server. To log on to the TireMaster Support Site, you need your TireMaster customer number and password. If you no longer have that information, log an online support request via the online portal or by email.
To download the Text to Pay Installer
| 1. | Close all applications. |
| 2. | Log on to support.tiremaster.com. |
| 3. | Type your customer number and password, and click Login. The Support Center home page opens. |
| 4. | Click Download Programs on the menu. The Download Center page opens. |
| 5. | Under Update Files, click the link for Text to Pay. You’ll be prompted to save the file and possibly run the installation, depending on your browser. |
| 6. | Save the installer on your computer. |
| 7. | Exit the TireMaster Support site. |
| 8. | Once you have finished downloading the installer, you can complete the installation. For instructions, see Complete the Text to Pay Installation. |
After you’ve located the installer for Text to Pay, you can complete the installation. Install Text to Pay on computers that you want to use for processing payments via text. The 1st Mile payment processing application must be installed on these computers, and they must be connected to a 1st Mile credit card terminal.
To install Text to Pay
| 1. | Right-click TMTextPay00000000-01010000.exe, and select Run as Administrator. A confirmation message appears. |
| 2. | Click Yes. The TireMaster - Installation Program screen opens. |
| 3. | Click OK. The TireMaster - Search Results screen opens. |
| 4. | Select the TireMaster location in which you want to install the interface, and click Install. |
| 5. | At the end of the installation, click Finish. |
To prepare your TireMaster system for payment processing with Text to Pay, complete the following setup tasks.
To successfully complete invoices for customers who pay with mobile devices, the descriptions in your TireMaster credit card configuation must match the names of the payment types supported by the Text to Pay application.
Go to Setup > Credit Cards, open the edit screen for each credit card supported by Text to Pay, and look at the description. If a card’s description differs from the card name listed below, update it and save your changes.
For Visa, use the description Visa.
For MasterCard, use the description MasterCard.
For Discover, use the description Discover.
For American Express, use the description AMEX.
For Credit First National Association, use the description CFNA.
Before you can send messages and invoices to customers by text, you need to do the following:
Make sure their contact information includes at least one cell phone number.
Make sure they have verbally agreed to receive message and invoice texts from your business.
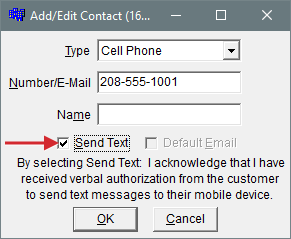
You can indicate that customers have provided verbal authorization for texting in the contact settings for their cell phone numbers.
To authorize payment by text
| 1. | Add a new customer to TireMaster, search for an existing customer record, or start a work order for a customer. |
| 2. | Do one of the following: |
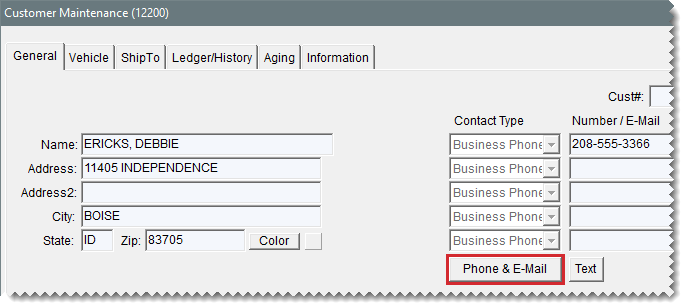
If you’re adding or editing a customer, click Phone & Email on the Customer Maintenance screen.
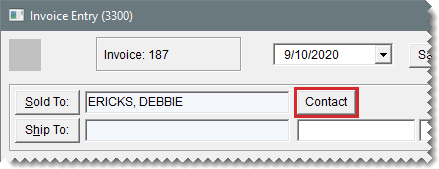
If you’re starting a work order for a customer, click Contact on the Invoice Entry screen.
| 3. | When the Contact List opens, do one of the following: |
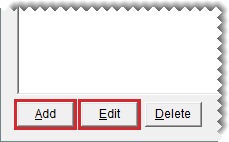
Click Add, and enter the customer’s cell phone information.
Select the customer’s cell phone number, and click Edit.
| 4. | To indicate that the customer has verbally given you permission to send messages to him/her by text, select the Send Text check box. |
| 5. | Click OK to save your changes. |
When work on a customer’s vehicle is done, you can send the customer a text message that includes a link to the 1st Mile Pay application. By tapping the link, the customer can begin the payment process.
To send a pay link to a customer
| 1. | Retrieve the customer’s work order. |
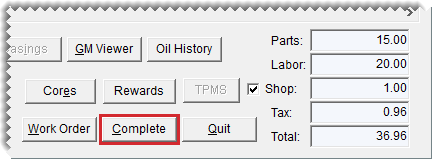
| 2. | On the Invoice Entry screen, click Complete. The Invoice Completion screen opens. |
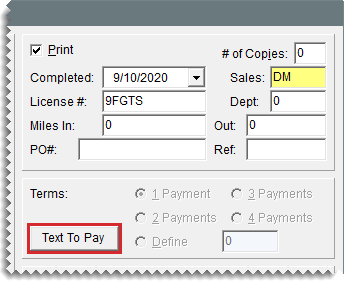
| 3. | Click Text To Pay. The Text to Pay screen opens. |
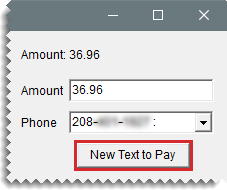
| 4. | If you want to send the customer a pay link for part of the invoice total, change the entry in the Amount field. Otherwise, leave it alone. The invoice total is entered by default. |
| 5. | If you want to send the pay link to a different cell phone, select another number from the drop-down. |
| 6. | Click New Text to Pay. The 1st Mile Pay Launcher screen opens. |
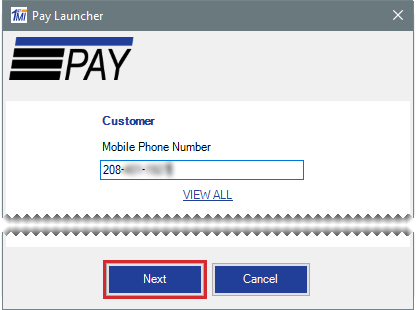
| 7. | Make sure the correct phone number is listed and click Next. If you need to change the phone number, click Cancel and choose a different one on the TireMaster Text to Pay screen. |
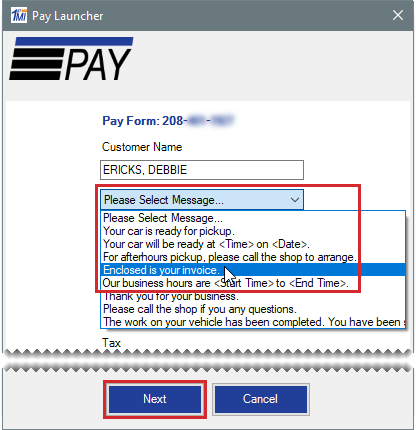
| 8. | Select a message from the drop-down, and click Next (again). A basic invoice appears on the Pay Launcher screen. |
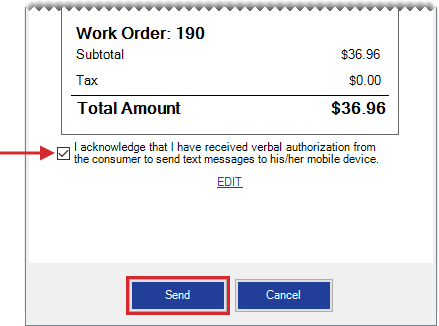
| 9. | Select the verbal authorization check box, and click Send. Once the payment is sent, the activity list on the Text to Pay screen is updated. |
| 10. | Close the open screens. On the Open Work Order List, the Text to Pay status is set to S (sent). |
A status column for Text to Pay is available on the Open Work Order List in TireMaster. For customers who have been sent pay links, you’ll see one of the following in the TP column:
S means a pay link has been sent.
V means a pay link has been viewed.
P means a payment was made.
To check for changes in Text to Pay activity, click Scan PayLinks.
When a customer doesn’t receive a pay link or accidentally deletes one, you can resend it. Only viewed and unpaid pay links can be resent.
To resend an unpaid pay link
| 1. | Open the Text to Pay screen if it isn’t already open. |
| a. | Retrieve the customer’s work order. |
| b. | On the Invoice Entry screen, click Complete. |
| c. | On the Invoice Completion screen, click Text to Pay. |
| 2. | If multiple pay links are listed, select the one you want to resend. |
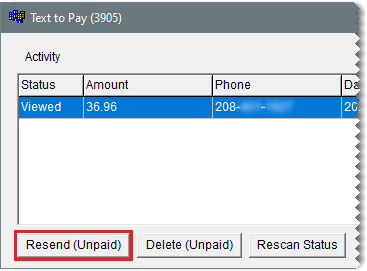
| 3. | Click Resend (Unpaid). |
| 4. | Close the open screens. |
If you accidentally send a customer a duplicate or unnecessary pay link, you can delete it. A pay link can be deleted as long as the customer has not initiated the payment for it.
To delete an unpaid pay link
| 1. | Open the Text to Pay screen if it isn’t already open. |
| a. | Retrieve the customer’s work order. |
| b. | On the Invoice Entry screen, click Complete. |
| c. | On the Invoice Completion screen, click Text to Pay. |
| 2. | If multiple pay links are listed, select the one you want to delete. |
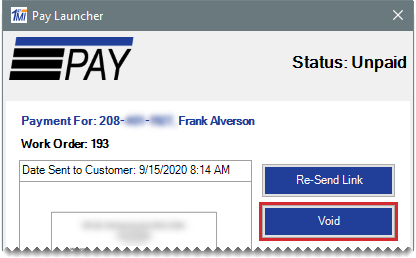
| 3. | Click Delete (Unpaid). The Pay Launcher screen opens, and you have the option to void the link. |
| 4. | Click Void. A confirmation message appears. |
| 5. | Click Yes. A second confirmation message appears. |
| 6. | Click OK. |
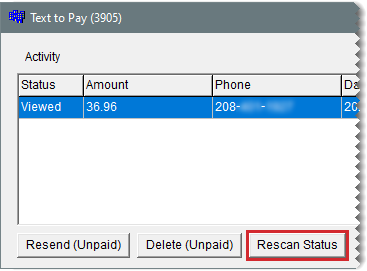
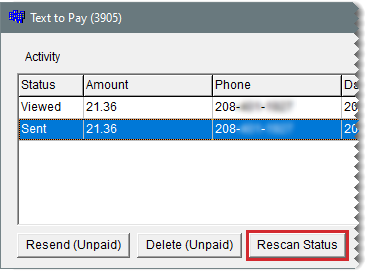
| 7. | On the Text to Pay screen, click Rescan Status. The status of the deleted link changes to Voided. |
| 8. | Close the open screens. |
When a customer’s payment has been received, it will be assigned the status Paid. You can then apply the payment to the customer’s invoice and complete the sale.
To apply a payment received by text
| 1. | Open the Text to Pay screen if it isn’t already open. |
| a. | Retrieve the customer’s work order. |
| b. | On the Invoice Entry screen, click Complete. |
| c. | On the Invoice Completion screen, click Text to Pay. |
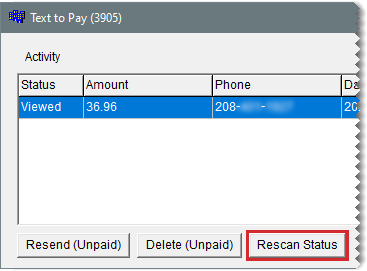
| 2. | To verify that the customer has sent you the payment, click Rescan Status. |
| 3. | Click Apply (Paid/Closed). |
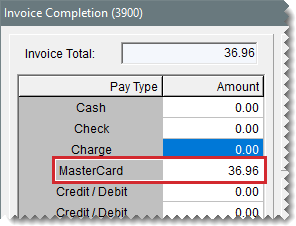
The Text to Pay screen closes and the payment information is added to the Invoice Completion screen.
| 4. | Complete the invoice. |
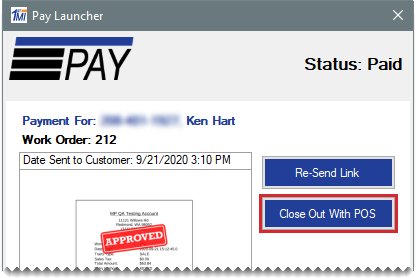
In some instances, the status of a pay link will be updated to Closed when running a rescan in TireMaster. This occurs when a customer has made a payment and then you or another employee closed the pay link in 1stMile MIddleware (by clicking Close Out With POS).
Because the payment has been processed, you can apply the closed pay link to the customer’s invoice in TireMaster. To do this, open the Text to Pay screen (click Text to Pay on the Invoice Completion screen). Then select the pay link, and click Apply (Paid/Closed).
Once the closed pay link is applied, you can complete the invoice.
