Bridgestone Driving Force Claim Interface
This help topic is applicable to the following TireMaster applications:
|
TireMaster Point of Sale |
TireMaster Plus |
TireMaster Corporate |
|---|---|---|

|

|

|
With the Bridgestone Driving Force Claim (DFC) Interface, you can electronically manage the process of registering employees for the Driving Force program and submit claims for eligible product sales from within TireMaster.
The means to submit claims for national account and government support sales was added to the integration. Bridgestone started offering B2B payouts for national account and government support sales, as well as sales of Duravis and Transforce products, on June 1, 2023.
Accommodations were made to allow product details for claims to be loaded into the database whenever product lists become available. Previously, new product details couldn't be loaded until the claims submissions deadline.
ITA Group becomes the claims processor.
The following changes were made:
A report for reviewing invoice and employee claim history was added.
The requirement to define which TireMaster customer types are used for wholesale customers replaced the requirement to define which customer types are used for retail customers.
The requirement to define which TireMaster customer types are used for retail customers was added.
The following options were added:
The means to modify claims data before submitting it to the claims processor
The means to enable automatic submission for claims
The following changes were made:
Secure File Transfer Protocol (SFTP), via WinSCP, was implemented for moving files from TireMaster to the claims processor.
The ability to define which employees receive Driving Force credits was added.
Initial release.
To use the Bridgestone Driving Force Claim (DFC) Interface, you need the following:
If your TireMaster system is set up to download automatically-deployed installers as part of the nightly backup process, the installer for the Bridgestone Driving Force Claim (DFC) Interface is already available to you. Typically, installers are placed in one of the following locations:
|
c:\TireMaster\apps |
c:\TMPOS\apps |
d:\QDSTM\apps |
|
c:\QDSTM\apps |
d:\TireMaster\apps |
d:\TMPOS\apps |
To access an automatically-deployed installer
| 1. | On the desktop of your TireMaster server, double-click This PC. The This PC screen opens. |
| 2. | Double-click the letter or icon for the drive in which TireMaster is installed. (Usually, it’s the c: or d: drive.) |
| 3. | Double-click the TireMaster program folder (usually c:\qdstm, d:\qdstm, c:\tiremaster, d:\tiremaster, c:\tmpos, or d:\tmpos). |
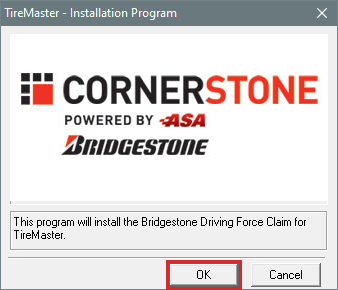
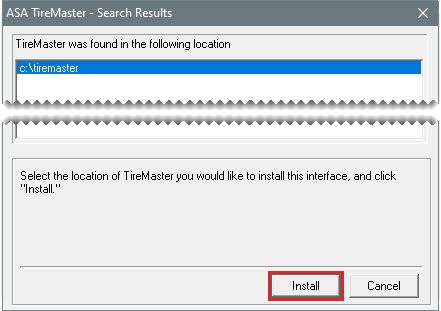
| 4. | Double-click the apps folder, and locate the file batoDFC00000000-08000000.exe. Once you’ve located the installer, complete the installation. For instructions, see Completing the Bridgestone Driving Force Claim Installation. |
| 1. |
|
| 2. |
|
| 3. |
|
| 4. |
|
| 5. |
|
| 1. |
|
| 2. |
|
| 3. |
|
| 4. |
|
| 5. |
|
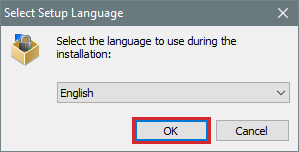
| 6. | Make sure English is selected and click OK. The Setup - WinSCP screen opens. |
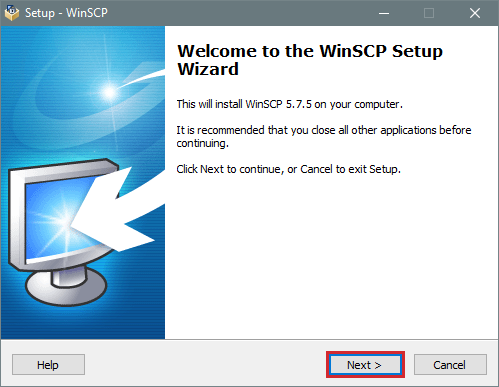
| 7. | Begin the WinSCP part of the installation. |
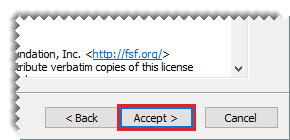
| a. | Click Next. The WinSCP license agreement appears. |
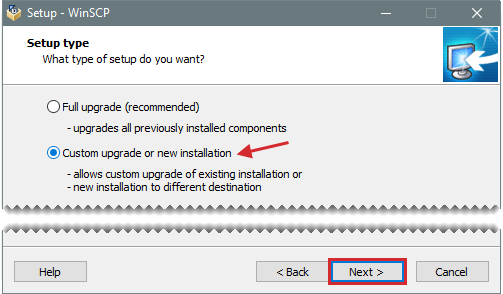
| b. | Click Accept. The setup type screen opens. |
| c. | Select the option for custom installation, and click Next. The destination location screen opens. |
| 8. | Assign WinSCP to the TireMaster root directory. |
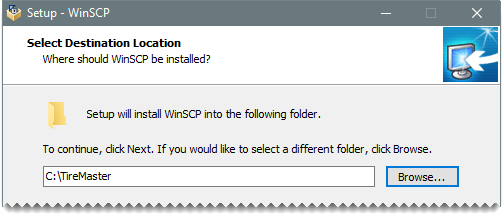
| a. | Click Browse and select your TireMaster program folder. |
| b. | If the entry \WinSCP was added to the location you selected, remove it. To ensure your TireMaster root directory is defined, your location should look similar to the following image. |
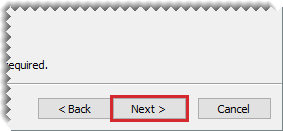
| c. | Click Next. A confirmation message appears. |
| d. | To continue, click Yes. |
| 9. | Finish the WinSCP part of the installation. |
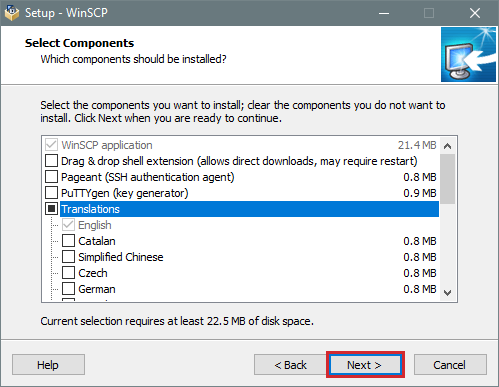
| a. | Make sure all of the check boxes on the Select Components screen are clear, and click Next. The select additional tasks screen opens. |
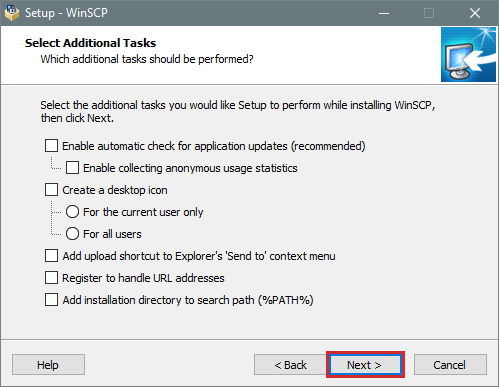
| b. | Clear all of the check boxes, and click Next. The user interface style screen opens. |
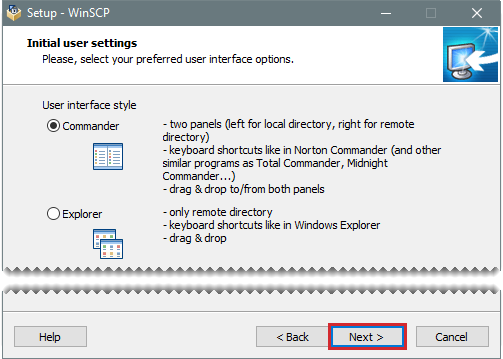
| c. | Make sure Commander is selected, and click Next. |
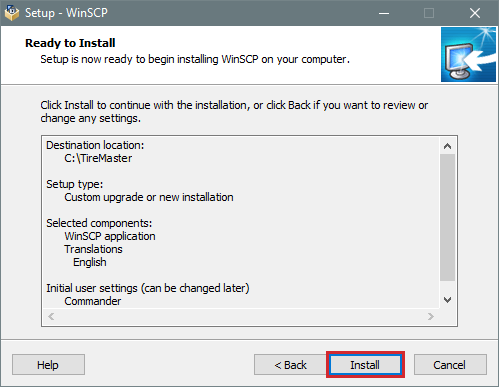
| d. | Review the settings listed. If you need to make changes, click Back and update your settings as needed. |
| e. | Click Install. The installation finished screen opens. |
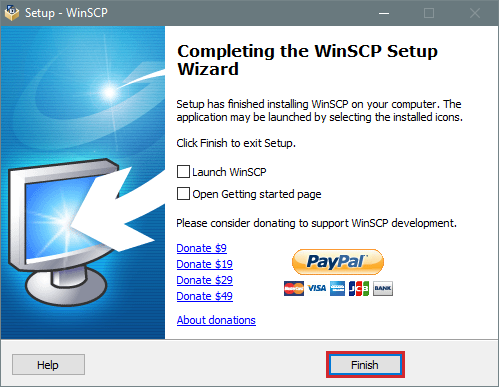
| f. | Clear the check boxes. Then click Finish. The TireMaster - Installation Program screen opens. |
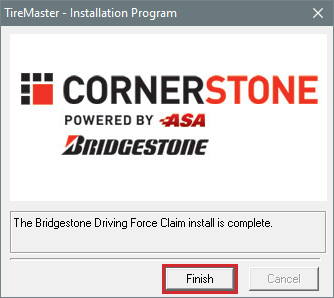
| 10. | At the end of the installation, click Finish. |
Before you can submit claims with the Driving Force integration, you need to complete the following tasks:
Contact ASA Support to schedule the WinSCP configuration. For more information, see Configuring WinSCP for Driving Force Claim Submissions
Define your dealer number.
Define whether you want to enable automatic claims submission.
Set the beginning date for claims processing.
Define which employees are allowed to generate DFC reports.
Define which of your TireMaster customer types are used for classifying wholesale customers.
Test your connection to the claims processing server at ITA Group.
Define which employees are participating in the Driving Force program.
To ensure Driving Force claim submission files can be transmitted from TireMaster to the claims processor, WinSCP needs to be configured.
This configuration is performed on your behalf by ASA Support. To schedule the WinSCP configuration, log a support request via the online portal, by email, or call 800-891-7437
Setting the system controls for the Bridgestone Driving Force Claim (DFC) Interface allows you to accomplish the following:
Define your location’s dealer number, which is used to identify the claims submitted by your business. This is the six-digit dealer number assigned by Bridgestone.
Define whether claims will be sent to the processor via an automatic or manual submission process.
Set the beginning date for claims processing.
To set the Driving Force Claim controls
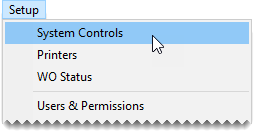
| 1. | Select Setup > System Controls. The System Controls screen opens. |
| 2. | Click the Other tab. |
| 3. | Define whether your claims will be submitted to the processor automatically. |
| a. | Select DFC - Auto Send File and press Enter. |
| b. | For automated submission, select Yes. Otherwise, leave the control set to No. |
| 4. | Define the dealer number |
| a. | Select DFC - Location # and press Enter. |
| b. | Type the dealer number provided by Bridgestone and click OK. |
| 5. | Define the claims processing start date. |
| a. | Select DFC - Start Date and press Enter. |
| b. | Select the date on which claims processing will start from the pop-up calendar, and click OK. |
| 6. | Close the System Controls screen. |
Users who are responsible for generating Driving Force Claim reports and submitting claims need to belong to security groups that are allowed to access this document. You can give them access by assigning the report to their security groups.
To assign the Driving Force Claim report
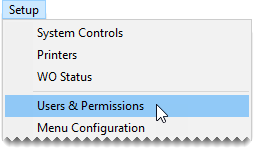
| 1. | From the Setup menu, select Users & Permissions. The User List opens. |
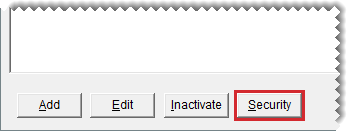
| 2. | Click Security. The Security Assignments screen opens. |
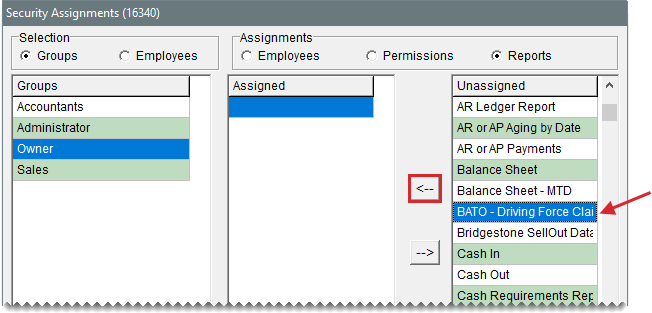
| 3. | In the Groups panel, select a security group that the report will be assigned to. |
| 4. | In the Assignments area, select Reports. |
| 5. | On the Unassigned panel, select BATO - Driving Claim Report and click  . . |
| 6. | To assign the report to additional security groups, repeat steps 3 through 5. |
Because multiple customer types can be used to classify wholesale customers in TireMaster, you need to complete settings that allow the Driving Force integration to identify the types assigned to wholesale customers. Defining which customer types are used for wholesale customers ensures that eligible sales won’t be excluded from claim submissions.
To define wholesale customer types
| 1. | If the BATO - DFC Employee Setup screen is not already open, complete the following steps. |
| a. | Click Reports. The Report List opens. |
| b. | Click the Close tab. |
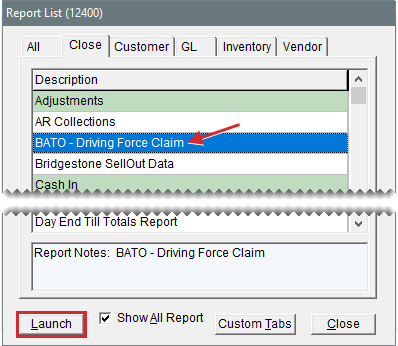
| c. | Select BATO - Driving Force Claim, and click Launch. The BATO - Driving Force Claim screen opens. |
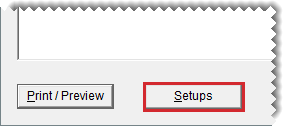
| d. | Click Setups. The BATO - DFC Employee Setup screen opens. |
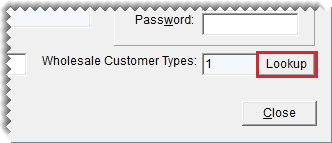
| 2. | Click Lookup. The Customer/Vendor Type List opens. |
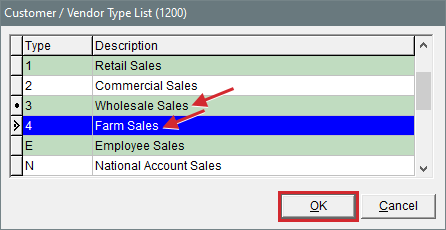
| 3. | Press the Ctrl key and select the row for each customer type that’s used to classify wholesale customers. Then click OK. The types that you selected are shown in the Wholesale Customer Type field on the BATO - DFC Employee Setup screen. |
Once you’ve defined your DFC credentials, you need to verify that your TireMaster system can successfully communicate with the claims processing server at ITA Group. To complete this step, contact TireMaster Support by logging a support request via the online portal, by email, or calling 800-891-7437
Before you can submit Driving Force claims for employees, you need to register them for the Driving Force program.
To register employees for the Driving Force Claim program
| 1. | If the BATO - DFC Employee Setup screen is not already open, complete the following steps. |
| a. | Click Reports. The Report List opens. |
| b. | Click the Close tab. |
| c. | Select BATO - Driving Force Claim, and click Launch. The BATO - Driving Force Claim screen opens. |
| d. | Click Setups. The BATO - DFC Employee Setup screen opens. |
| 2. | For each employee participating in the DFC program, do the following: |
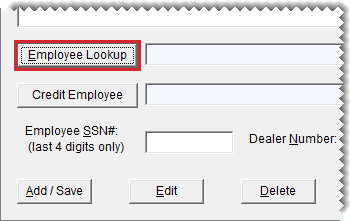
| a. | Click Employee Lookup. The User List opens. |
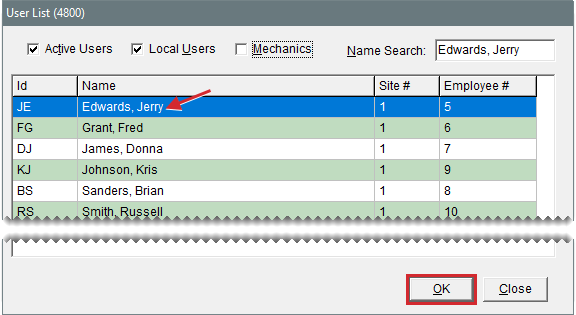
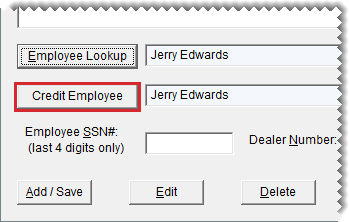
| b. | Select the employee’s name from the list and click OK. The employee’s name appears in both the Employee Lookup and Credit Employee fields on the BATO - DFC Employee Setup screen. |
| c. | If you want a different employee to receive the DFC credit for the sale, click Credit Employee and select a name from the list. If the employee who performed the sale should receive the DFC credit, disregard this step. |
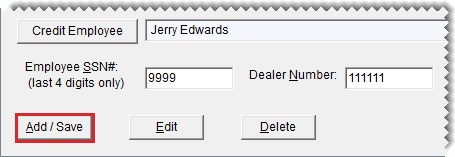
| d. | Type the last four digits of the employee’s social security number. |
| e. | Type the dealer number provided by Bridgestone. |
| f. | Click Add/Save. |
| 3. | Close the open screens. |
Driving Force claims can be set up for automatic submission at 10:00 AM daily, or you can choose to manually send claims to the processor at any time. Occasionally, you might also need to add employees to or remove employees from the list of Driving Force program participants. All of these tasks can be easily handled with the DFC Interface.
You can set up the Bridgestone Driving Force Claim Interface so claims are submitted automatically at the same time every day. With automatic claims submission, the data for eligible sales that occurred during the previous business day is transmitted to the claims processor at 10:00 AM. In this scenario, employee information for eligible sales cannot be changed prior to submission.
To enable automatic claims submission, you need to set a system control. For more information, see Setting the Driving Force Claim Controls.
Submitting claims for processing includes previewing a list of employees who will receive compensation and then completing the submission.
To manually submit Driving Force claims
| 1. | Click Reports. The Report List opens. |
| 2. | Click the Close tab. |
| 3. | Select BATO - Driving Force Claim, and click Launch. The BATO - Driving Force Claim screen opens. |
| 4. | Set the sale date range for the claims you want to submit. |
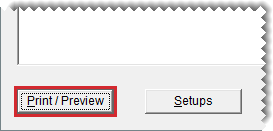
| 5. | Click Print/Preview. The BATO - DFC Preview Report opens on the screen. For each eligible item sold, the report lists the employee who sold the item, along with the quantity, sale date, invoice number, and the classification of retail or wholesale. |
| 6. | Print the report and close the Report Window. |
| 7. | If you want to change the selling employee, credit employee, or both for any of the items sold, do the following. Otherwise, disregard this step. |
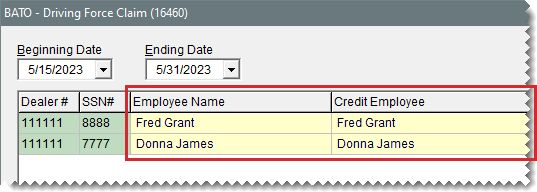
| a. | Click Change Claim Data. TireMaster lists the eligible items sold. |
| b. | Do one of the following: |
To change the selling employee for an item, click the Employee Name field. Then select a name from the list that appears, and click OK.
To change the credit employee for an item, click the Credit Employee field. Then select a name from the list that appears, and click OK.
| c. | To change employee information for additional items, repeat step 7b. |
| d. | Review your changes and make corrections, as needed. |
| 8. | Click Submit Claim. A confirmation message appears. |
| 9. | Close the confirmation message. |
| 10. | Close the BATO - Driving Force Claim screen and the Report List. |
When you hire new employees who want to participate in the DFC program or if existing employees decide to sign up, you’ll need to add them to your list of DFC participants. For instructions, see Registering Employees for the Driving Force Claim Program.
Occasionally, an employee’s settings for the BridgestoneDriving Force program can change. In this scenario, you can update the registration for that individual.
To update Driving Force registration settings
| 1. | If the BATO - DFC Employee Setup screen is not already open, complete the following steps. |
| a. | Click Reports. The Report List opens. |
| b. | Click the Close tab. |
| c. | Select BATO - Driving Force Claim, and click Launch. The BATO - Driving Force screen opens. |
| d. | Click Setups. |
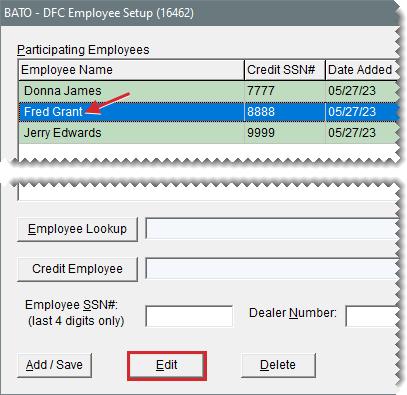
| 2. | Select the name of the employee whose settings you want to change, and click Edit. |
| 3. | Make the needed changes for the selected employee. |
If you want a different employee to receive the DFC credit for sales, click Credit Employee and select a name from the list.
If you need to correct the employee’s social security number, type the last four digits in the Employee SSN# field.
If you need to correct the dealer number, type the change in the Dealer Number field.
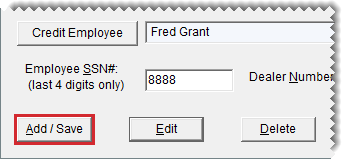
| 4. | Then click Add/Save. |
| 5. | Close the open screens. |
When employees no longer work for you or stop participating in the Driving Force Program, you can remove them from the list of employees eligible for Driving Force compensation.
To remove an ineligible employee
| 1. | If the BATO - DFC Employee Setup screen is not already open, complete the following steps. |
| a. | Click Reports. The Report List opens. |
| b. | Click the Close tab. |
| c. | Select BATO - Driving Force, and click Launch. The BATO - Driving Force Claim screen opens. |
| d. | Click Setups. |
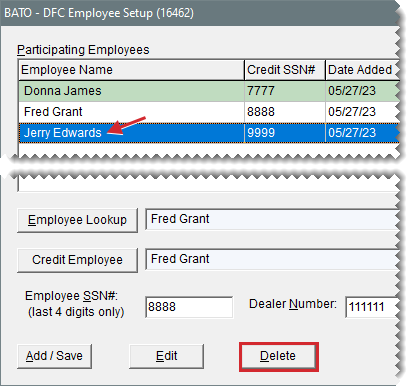
| 2. | Select the name of the employee you want to remove, and click Delete. A confirmation message appears. |
| 3. | To continue the deletion, click Yes. |
| 4. | Close the open screens. |
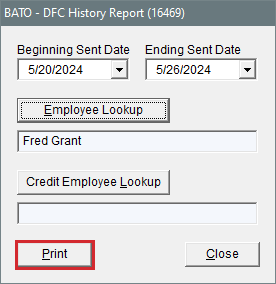
When you need to see if an invoice was sent, the date it was sent, or which employee received credit, you can obtain the information for a specific date range from the BATO - DFC History Report.
To print a DFC History report
| 1. | If the BATO - DFC Employee Setup screen is not already open, complete the following steps. |
| a. | Click Reports. The Report List opens. |
| b. | Click the Close tab. |
| c. | Select BATO - Driving Force Claim, and click Launch. The BATO - Driving Force Claim screen opens. |
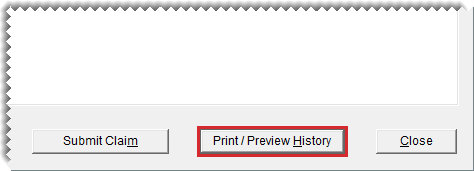
| d. | Click Print/Preview History. The BATO - DFC History Report screen opens |
| 2. | Do one of the following |
For invoice claim history, select the beginning and ending sent dates.
For employee claim history, select the beginning and ending sent dates. Then click either Employee Lookup or Credit Employee Lookup, select the employee’s name from the list that appears, and click OK.
| 3. | Click Print. The BATO - DFC History Report opens on the screen. |
| 4. | Print the report and close the report window. |
