Accounting Interface for QuickBooks
This help topic is applicable to the following TireMaster applications:
|
TireMaster Point of Sale |
TireMaster Plus |
TireMaster Corporate |
|---|---|---|

|

|
With the Accounting Interface for QuickBooks, you can move journal entries from TireMaster to QuickBooks®.
This section describes changes made to the QuickBooks Interface:
Update, January 2022:
Individual journal entry lines with $0.00 debit and credit amounts are no longer included in the data files exported to QuickBooks (online version only). This change prevents errors that stopped exported entries from posting in QuickBooks.
Vendor charges and purchase orders for a date range can now be excluded from data moved from TireMaster to QuickBooks. Buttons for excluding both of these document types have been added to the Exclude Transactions screen.
Document numbers and reference numbers from AP entries in TireMaster are now exported to QuickBooks and can be viewed on the QuickBooks A/P Register screen.
Update, May 2018:
The Accounting Interface for QuickBooks is now compatible with QuickBooks Online.
The Accounting Interface for QuickBooks can be used with QuickBooks Enterprise (only on TireMaster systems using the Data Exchange application).
To use the QuickBooks Interface, you need to meet the following requirements:
TireMaster 9.3.0 must be installed on your computer.
QuickBooks needs to be installed and set up on the same computer running TireMaster. (If you’re using QuickBooks Desktop.)
Installing and updating the QuickBooks Interface is a two-step process. First, do one of the following to locate the installation program:
Access the automatically-deployed installer from the apps shared directory. For instructions, see Access Automatically-Deployed Installers.
Download the installer from the TireMaster Support site. For instructions, see Download the QuickBooks Interface Installer.
Once you’ve located the installer, complete the installation. For instructions, see Complete the QuickBooks Interface Installation.
If your TireMaster system is set up to download automatically-deployed installers as part of the nightly backup process, the installer for the QuickBooks Interface is already available to you. Typically, installers are placed in one of the following locations:
|
c:\TireMaster\apps |
c:\TMPOS\apps |
d:\QDSTM\apps |
|
c:\QDSTM\apps |
d:\TireMaster\apps |
d:\TMPOS\apps |
To access automatically-deployed installers
| 1. | Right-click  and select File Explorer from the menu that opens. and select File Explorer from the menu that opens. |
| 2. | In the Quick Access navigation pane, scroll to This PC. |
| 3. | Double-click the letter or icon for the drive that TireMaster is installed in. (Usually, it’s the c: or d: drive.) |
| 4. | Double-click the TireMaster, qdstm, or tmpos program folder. |
| 5. | Double-click the apps folder, and locate the file tmqb00000000-06000000.exe. Once you have located the installer, complete the installation. For instructions, see Complete the QuickBooks Interface Installation. |
The installer for the QuickBooks Interface is available for download from the TireMaster Support site. When you download the installer, save it on your TireMaster server. To log on to the TireMaster Support Site, you need your TireMaster customer number and password. If you no longer have that information, log an online support request (use the link at support.tiremaster.com) or call ASA Support at 800-891-7437.
To download the QuickBooks Interface Installer
| 1. | Close all applications. |
| 2. | Log on to support.tiremaster.com. |
| 3. | Type your customer number and password, and click Login. The Support Center home page opens. |
| 4. | Click Download Programs on the menu. The Download Center page opens. |
| 5. | Under Update Files, click the link for the QuickBooks Interface. You’ll be prompted to save the file and possibly run the installation, depending on your browser. |
| 6. | Save the installer on your computer. |
| 7. | Exit the TireMaster Support site. |
| 8. | Once you have finished downloading the installer, you can complete the installation. For instructions, see Complete the QuickBooks Interface Installation. |
After you’ve located the installer for the QuickBooks Interface, you can complete the installation. Install the applications on the TireMaster server and workstations.
To install the Accounting Interface for QuickBooks
| 1. | Right-click tmqb00000000-06000000.exe, and select Run as Administrator. A confirmation message appears. |
| 2. | Click Yes. The TireMaster - Installation Program screen opens. |
| 3. | Click OK. The TireMaster - Search Results screen opens. |
| 4. | Select the TireMaster location in which you want to install the interface, and click Install. |
| 5. | At the end of the installation, click Finish. |
You’ll be prompted to register the Accounting Interface for QuickBooks the first time you log in to TireMaster after the installation. When the Interface Registration screen opens, click Register.
The QuickBooks Interface is launched from the TireMaster menu. Starting the interface differs slightly, depending on whether you’re using QuickBooks Desktop or QuickBooks Online.
QuickBooks Online: In TireMaster, select Interfaces > Accounting. The QuickBooks Online login screen opens in a browser. Type your credentials and authorize QuickBooks access when the prompt appears.
QuickBooks Desktop: Make sure QuickBooks is running. Then select Interfaces > Accounting in TireMaster. If you use QuickBooks to maintain financial records for multiple companies, make sure to open the appropriate company file before launching the Accounting Interface in TireMaster.
Before you can export data from TireMaster to QuickBooks, you need to complete the following tasks.
Establishing a connection between TireMaster and QuickBooks makes it possible for you to transfer data from TireMaster to your accounting application. The manner in which the connection is made depends on which QuickBooks product you’re using.
If you’re using QuickBooks Online, the connection is established automatically when you open the QuickBooks Interface.
If you’re using QuickBooks Desktop, complete the following steps to establish a connection with TireMaster.
To establish a connection between TireMaster and QuickBooks Desktop
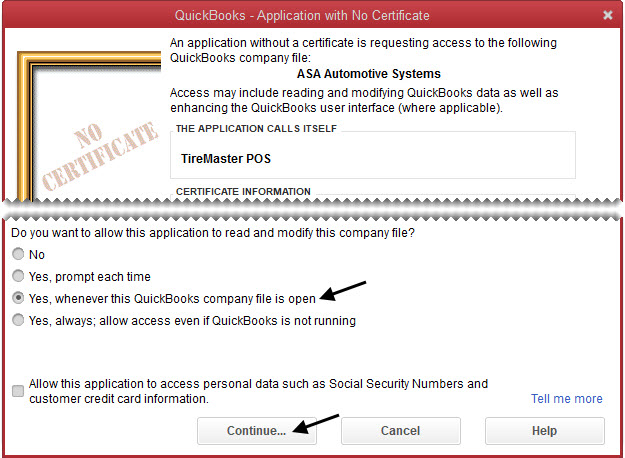
| 1. | In TireMaster, start the Accounting Interface. For more information, see Start the Accounting Interface. The QuickBooks - Application with No Certificate screen opens. |
| 2. | Select Yes, whenever this QuickBooks company file is open. |
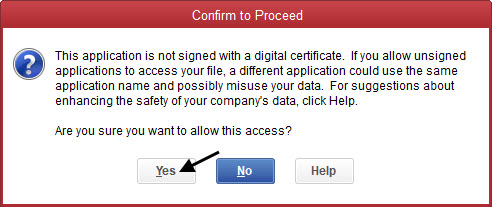
| 3. | Click Continue. The Confirm to Proceed screen opens. |
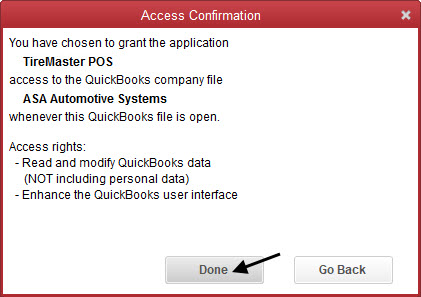
| 4. | Click Yes. The Access Confirmation screen opens. |
| 5. | Click Done. |
| 6. | In TireMaster, click OK to close the QuickBooks chart of accounts message. The TireMaster Accounting Interface screen opens. You can leave the screen open or close it. |
By setting a system control, you define whether you’re running QuickBooks Online or QuickBooks Desktop.
To set the QuickBooks Online control
| 1. | Select Setup > System Controls. |
| 2. | Click the Other tab. |
| 3. | Select QB Online Interface and press Enter. |
| 4. | If you’re running QuickBooks Online, select Yes. For QuickBooks Desktop, select No. |
| 5. | Close the System Controls screen. |
To ensure that TireMaster entries can post to the QuickBooks general ledger, you need to create five accounts in QuickBooks that meet certain requirements. These accounts will help you identify which entries originated in TireMaster, and it will prevent QuickBooks from prompting you for customer or vendor names every time you export entries. The following table lists the TireMaster entry accounts that you need to add to the QuickBooks chart of accounts.
|
Account Name |
Account Type |
|---|---|
|
TireMaster |
Other Current Asset |
|
Inventory |
Other Current Asset |
|
Accounts Receivable-TireMaster |
Other Current Asset |
|
Accounts Payable-TireMaster |
Other Current Liability |
|
Sales Tax Payable |
Other Current Liability |
The accounts receivable, accounts payable, and sales tax accounts that you add will be used later when you associate QuickBooks and TireMaster general ledger accounts.
If you’re using QuickBooks Online, follow these instructions to add TireMaster accounts.
To add TireMaster Entry Accounts to QuickBooks Online
| 1. | In QuickBooks, click Accounting on the menu. |
| 2. | Click  . . |
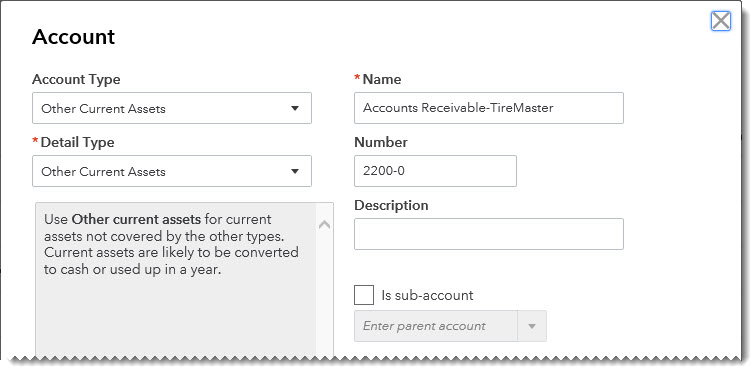
| 3. | Select Other Current Assets from the Account Type and Detail Type drop-downs. |
| 4. | For the name, type TireMaster. |
| 5. | Fill in the remaining fields as needed. |
| 6. | Click  . . |
| 7. | To add the four remaining accounts, repeat steps 2 through 6 and make the following assignments: |
For the second account, select Other Current Asset for the type and detail type and name it Inventory.
For the third account, select Other Current Asset for the type and detail type and name it Accounts Receivable-TireMaster.
For the fourth account, select Other Current Liability for the type and detail type and name it Accounts Payable-TireMaster.
For the fifth account, select Other Current Liability for the type and detail type and name it Sales Tax Payable-TireMaster.
If you’re using QuickBooks Desktop, follow these instructions to add TireMaster accounts.
To add TireMaster Entry Accounts to QuickBooks Desktop
| 1. | In QuickBooks Desktop, open the chart of accounts using one of the following methods: |
Click the Chart of Accounts icon on the home page.
Select Lists > Chart of Accounts.
| 2. | Add the account named TireMaster. |
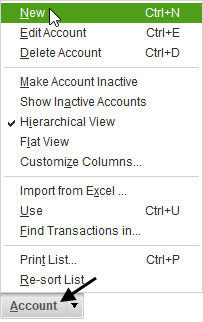
| a. | Click Account (bottom left of the screen), and select New. QuickBooks prompts you to choose an account type. |
| b. | Select Other Account Types. Then choose Other Current Asset from the drop-down. |
| c. | Click  . . |
| d. | For the account name, type TireMaster. |
| e. | Fill in the remaining fields as needed. |
| f. | Click Save & Close. |
| 3. | To create the four remaining accounts, repeat step 2 and make the following assignments: |
For the second account, select the type Other Current Asset and name it Inventory.
For the third account, select the type Other Current Asset and name it Accounts Receivable-TireMaster.
For the fourth account, select the type Other Current Liability and name it Accounts Payable-TireMaster.
For the fifth account, select the type Other Current Liability and name it Sales Tax Payable-TireMaster.
| 4. | Click  to close Chart of Accounts screen. to close Chart of Accounts screen. |
Before you can export TireMaster entries, you need to define how transactions completed in TireMaster will post to the QuickBooks general ledger. To enable this association, change the preset account names in TireMaster so they match account names used in the QuickBooks chart of accounts.
To link TireMaster and QuickBooks accounts
| 1. | Open QuickBooks and print the Chart of Accounts. If you’re using QuickBooks Online, keep it open. |
| 2. | In TireMaster, select Interfaces > Accounting. |
| 3. | When TireMaster displays the general ledger account message, click OK. |
| 4. | Review the list of TireMaster accounts that need to be linked with the chart of accounts in QuickBooks. Then click OK. The TireMaster Accounting Interface screen opens. |
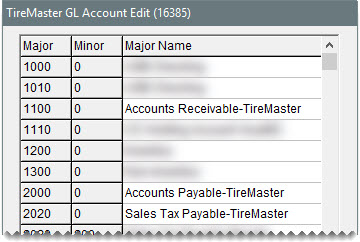
| 5. | Click Setup. The TireMaster GL Account Edit screen opens. |
| 6. | Click Print. The Report Window opens and displays the TireMaster Chart of Account Master List. |
| 7. | Print the account list and close the Report Window. Keep the TireMaster GL Account Edit screen open. |
| 8. | Compare the TireMaster and QuickBooks account lists. For each TireMaster account, identify a corresponding account in QuickBooks. |
Change the name of account 1110–0 to Accounts Receivable-TireMaster.
Change the name of account 2000–0 to Accounts Payable-TireMaster.
Change the name of account 2020–0 to be named Sales Tax Payable-TireMaster.
The spelling, punctuation, and number of spaces in account names must be the same in both TireMaster and QuickBooks. For the best results, copy account names in QuickBooks and paste them into the TireMaster GL Account Edit screen.
| 10. | Replace the name of each remaining TireMaster account with the name of the corresponding QuickBooks account. |
| 11. | When you’re finished changing the account names, click Save. |
| 12. | To close the confirmation message, click OK. |
| 13. | Close the TireMaster GL Account Edit screen and the Accounting Interface. Now you can link TireMaster vendor records to vendor records in QuickBooks. |
If you handle the accounting for multiple, independent stores that each run TireMaster and share data via the Data Exchange program, you need to add the QuickBooks classes for those stores to the Accounting Interface. If you’re running a single location using QuickBooks Desktop or QuickBooks Online, disregard this section.
To define classes for QuickBooks Enterprise
| 1. | In TireMaster, select Interfaces > Accounting. |
| 2. | Click Setup. The TireMaster GL Account Edit screen opens. |
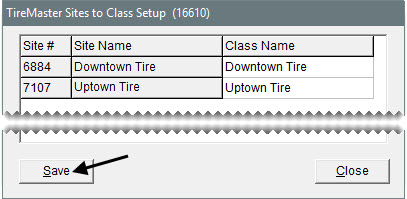
| 3. | Click Sites. The TireMaster Sites to Class Setup screen opens. |
| 4. | For each TireMaster location, type the corresponding class name from QuickBooks. |
The spelling, punctuation, and number of spaces in class names must be the same in both TireMaster and QuickBooks. For the best results, copy class names in QuickBooks and paste them into the TireMaster Sites to Class Setup screen.
| 5. | Click Save. A confirmation message appears. |
| 6. | Click OK to close the message. Then close the TireMaster Sites to Class Setup screen. |
The next step in setting up the Accounting Interface for QuickBooks is to make sure the vendor records in TireMaster are also available in QuickBooks. If you have any vendor records in QuickBooks that you have not yet added to TireMaster, you can also create TireMaster records for those vendors at this time. Adding QuickBooks vendors to TireMaster, however, is not required.
To link TireMaster and QuickBooks vendor records
| 1. | In TireMaster, generate a list of vendors: |
| a. | Select Vendors > List Editing. The Vendor Range Lookup screen opens. |
| b. | Leave all fields on the screen blank, and click OK. The Vendor List Editing screen opens. |
| c. | Click Print. The Report Window opens and displays the List Editing Report. |
| d. | Print the vendor list, and close the Report Window. |
| e. | Close the Vendor List Editing and Vendor Range Lookup screens. |
| 2. | In QuickBooks, print a vendor contact list. |
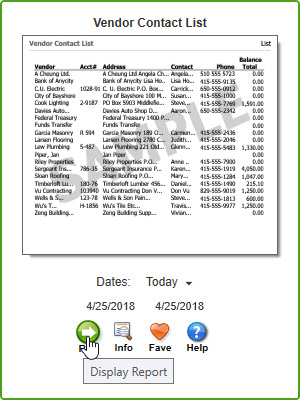
QuickBooks Desktop: Click Reports (left side of the screen). Then select Vendors & Payables from the list of standard report types. Scroll down to the vendor lists, select the date for the report, and click  .
.
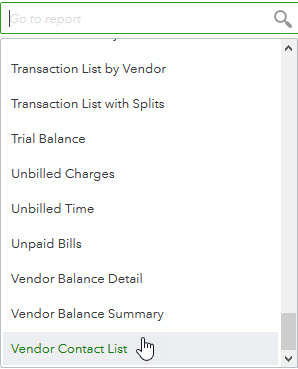
QuickBooks Online: Click Reports (left side of the screen). Then click the report search field and select Vendor Contact List from the drop-down.
| 3. | Compare the vendor lists to identify which TireMaster vendors do not have records in QuickBooks. |
| 4. | Add TireMaster vendors to QuickBooks Online as needed. If you’re using QuickBooks Desktop, go to step 5. |
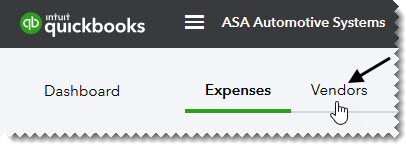
| a. | In QuickBooks, click Expenses (left side of screen). |
| b. | Click Vendors (top of screen). |
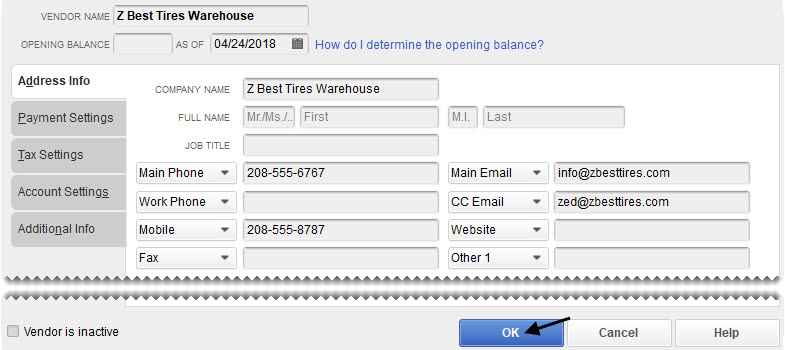
| c. | Click New Vendor. The Vendor Information screen opens. |
| d. | Add the new vendor’s information. |
| 5. | Add TireMaster vendors to QuickBooks Desktop as needed. If you’re using QuickBooks Online, see step 4. |
| a. | Click Vendors (left side of the screen). |
| b. | Click New Vendor, and select New Vendor from the drop-down. The New Vendor screen opens. |
| c. | Type the new vendor’s name. |
| d. | Fill in the remaining fields as needed. |
| e. | To save the new vendor record, click OK. |
| 6. | Add QuickBooks vendors to TireMaster (optional). |
| a. | Click Vendors. The Name Lookup/Entry screen opens. |
| b. | Click Cancel. Then click Add. |
| c. | Type the name of a vendor you want to add, and click OK. The Vendor Maintenance screen opens. |
| d. | Fill in the vendor’s contact information (optional), and click OK. |
| e. | For additional vendors, click Add. Then repeat steps 6c and 6d |
If you’re an existing QuickBooks user, it’s likely that you’ve already made manual entries for previous TireMaster transactions in QuickBooks. To ensure that the Accounting Interface does not post these entries, exclude them from QuickBooks. For more information, see Exclude Entries from QuickBooks.
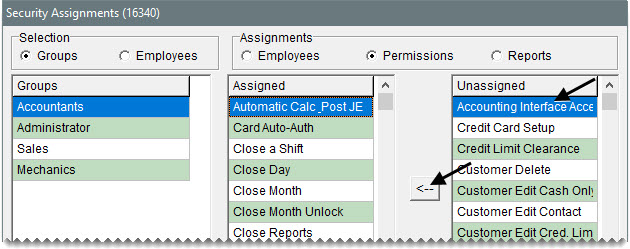
Access to the Accounting Interface for QuickBooks is allowed only for employees who belong to a security group that has been assigned the permission Accounting Interface Access.
To assign the Accounting Interface permission
| 1. | Select Setup > Users & Permissions. The User List opens. |
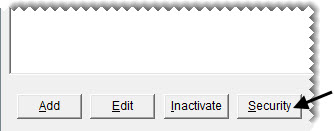
| 2. | Click Security. The Security Assignments screen opens. |
| 3. | On the Groups pane, select the group to which you want to assign the permission. |
| 4. | Under Assignments, select Permissions. The Accounting Interface Access permission is displayed on the Unassigned pane. |
| 5. | Make sure the Accounting Interface Access permission is selected, and click  . . |
| 6. | To assign the permission to other security groups, repeat steps 3 through 5. |
| 7. | To exit the Security Assignments screen, click Close. |
| 8. | To exit the User List, click Close. |
The Accounting Interface for QuickBooks reduces the need to manually post entries for TireMaster transactions in QuickBooks. With this utility, you can generate a batch of entries for the day’s TireMaster transactions, verify the data is correct, and export it to QuickBooks.
The following types of entries are exported from TireMaster to QuickBooks:
| Normal Sales | National Account Sales | Government Support Sales |
| Adjustment Sales | Invoice Reversals | Point of Sale Deposits |
| Paidouts | ROAs | Transfers |
| Finance Charges | Sales Tax Changes | Customer Balance Adjustments |
| Inventory Receivings (POs) | Inventory Returns | Inventory Corrections |
The way in which a TireMaster entry is handled by the Accounting Interface depends on the type of entry it is. Entries generated from inventory corrections and transactions that affect accounts receivable post as journal entries in the QuickBooks general ledger. Entries for completed purchase orders and inventory returns, however, post to individual vendor accounts in QuickBooks.
Entries for inventory corrections and transactions that affect accounts receivable are listed on the TireMaster Accounting Interface screen. You can export entries for one or multiple days to the QuickBooks general ledger.
To export inventory correction and accounts-receivable entries
| 1. | Open the Accounting Interface. When it opens, it displays all of the inventory correction and AR entries that can be exported. For more information, see Start the Accounting Interface. |
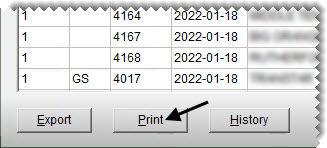
| 2. | For a list of entries that can be exported, click Print. Then print the report, and close the Report Window. |
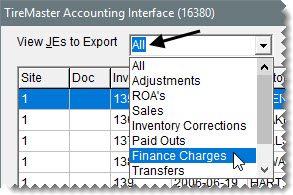
| 3. | If you want to view entries for a specific transaction type (such as sales, ROAs, or finance charges), make a selection from the View JEs to Export drop-down. |
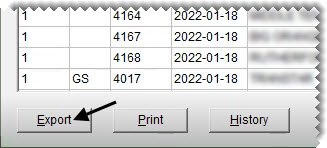
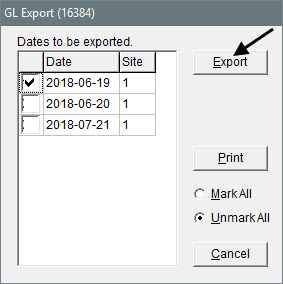
| 4. | Click Export. The GL Export screen opens and displays the date or dates for which there are entries to export. |
| 5. | If you don’t want to export entries for a specific date, clear its check box. |
| 6. | For a list of entries that can be exported, click Print. Then print the report and close the Report Window. |
| 7. | Click Export. The exported entries are removed from the TireMaster Accounting Interface screen. If you’re using QuickBooks Online, you’ll be prompted to connect before the export can be completed. |
Entries for completed purchase orders and inventory returns are displayed on the AP Export screen. You can export all of the entries to QuickBooks in one batch or export a single entry.
To export purchase order and inventory return entries
| 1. | If it isn’t already open, start the Accounting Interface. For more information, see Start the Accounting Interface. |
| 2. | Select the View AP to Export check box (upper-right corner). The AP Export screen opens. |
| 3. | For a list of entries that can be exported, click Print. Then print the report and close the Report Window. |
| 4. | Do one of the following: |
To move all entries to QuickBooks, click Export.
To move a single entry to QuickBooks, select it and click Export Single Transaction. When the confirmation message appears, click Yes.
The exported entry or entries are removed from the AP Export screen. If you’re using QuickBooks Online, you’ll be prompted to connect before the export can be completed.
The Accounting Interface includes information about which general ledger accounts an entry will post to when it’s exported. The way you look up this information depends on the type of entry. Information for entries generated from inventory corrections and transactions affecting accounts receivable is viewed on the Invoice Detail screen, while entries for purchase orders and inventory returns is available on the AP Export screen.
To view an entry’s general ledger information
| 1. | If it isn’t already open, start the Accounting Interface. For more information, see Start the Accounting Interface. |
| 2. | Do one of the following: |
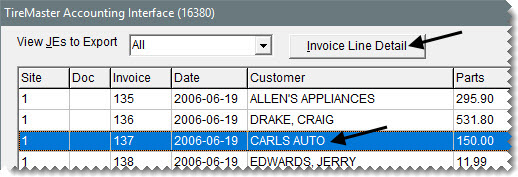
To view general ledger information for an inventory correction or an AR entry, select the entry and click Invoice Line Detail.
The Invoice Detail screen opens. The items sold, if any, are displayed on the upper portion of the screen. The general ledger accounts affected by the transaction are displayed on the lower half of the screen.
To view general ledger information for a purchase order or inventory return entry, select View AP to Export.
The AP Export screen opens. When you select an entry, the GL information is displayed near the bottom of the screen.
If you or a previous bookkeeper stopped using the Accounting Interface but you’ve decided to use it again, you need to exclude any TireMaster entries that were manually entered in QuickBooks. Excluding these entries prevents you from inadvertently posting them twice.
To exclude entries from QuickBooks
| 1. | If it isn’t already open, start the Accounting Interface. For more information, see Start the Accounting Interface. |
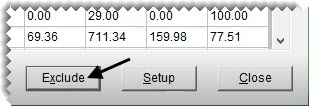
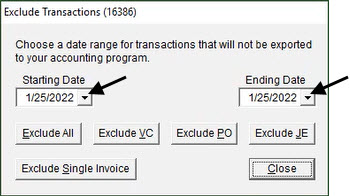
| 2. | Click Exclude. The Exclude Transactions screen opens. |
| 3. | Select a date range for excluded transactions from the Starting Date and Ending Date pop-up calendars. |
| 4. | Define which entries you want to exclude: |
For all entries, click Exclude All.
If you haven’t already generated bills for your vendors and you’d like to use QuickBooks to do so, click Exclude JE.
To exclude the vendor charges created during the date range, click Exclude VC.
To exclude the purchase orders created during the date range, click Exclude PO.
To exclude a specific sales invoice, click Exclude Single Invoice. Then select the invoice, and click Exclude.
| 5. | To finish excluding the entries, click Yes when the confirmation message appears. |
Occasionally, you might have questions about a TireMaster entry that you previously exported to QuickBooks. If you need to know which accounts the entry posted to, you can look up that information in the Accounting Interface.
To look up a previously exported entry
| 1. | If it isn’t already open, start the Accounting Interface. For more information, see Start the Accounting Interface. |
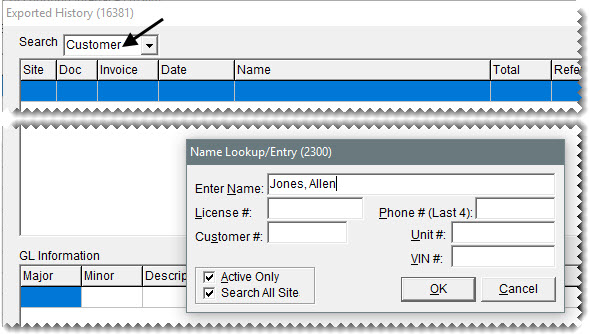
| 2. | Click History. The Exported History screen opens. |
| 3. | Look up the entry using one of the following methods. |
To look up the entry by customer name, select Customer from the Search drop-down. Then look up the customer’s name when prompted.
To look up the entry by vendor name, select Vendor from the Search drop-down. Then look up the vendor’s name when prompted.
To look up the entry by invoice or document number, select Invoice from the Search drop-down. Then type the invoice or document number and click Find.
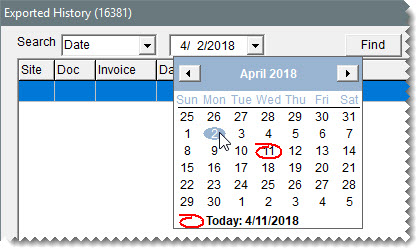
To look up the entry by date, select Date from the Search drop-down. Then select the date from the pop-up calendar, and click Find.
| 4. | In the upper part of the screen, select the entry whose general ledger information you want to view. The accounts that were posted to and the entry amounts are displayed in lower part of the screen. |
| 5. | To generate a list of the previously exported entries, click Print. The Report Window opens. |
| 6. | Print the report and close the Report Window. |
| 7. | To exit the Exported History screen, click Close. |
This section describes issues that could occur and how to resolve them.
The names of general ledger accounts and vendor records used in both TireMaster and QuickBooks must match exactly. If they do not, the Accounting Interface will prompt you to make a correction.
Problem: The following message appears: “The general ledger accounts in TireMaster do not match the general ledger accounts in your accounting program.”
Solution: This error occurs when an account has been renamed in QuickBooks but not in TireMaster. Click OK to close the message. The name of the TireMaster account that does not match the name of its corresponding QuickBooks account appears. To rename the TireMaster account, click Setup on the TireMaster Accounting Interface screen. Then replace the name of the TireMaster account with the name of the corresponding QuickBooks account.
Problem: The following message appears: “The vendor records in TireMaster do not match the vendor records in your accounting program.”
Solution: This error occurs when a vendor record exists in TireMaster but not QuickBooks. Click OK to close the message. The name of the TireMaster vendor record that doesn’t exist in QuickBooks appears. To eliminate the error, add a matching vendor record to QuickBooks or edit the vendor name so it is the same in both TireMaster and QuickBooks.
A posting error means a transaction could not post to the TireMaster general ledger. If a posting error exists, it must be resolved before TireMaster entries can be exported to QuickBooks.
Problem: The following message appears: “Warning. There are posting errors that require attention. Please call TireMaster Support.
Solution: Click OK to close the message. When the GL Temp Report opens, print it and email or fax a copy to TireMaster Support. Once a Support technician resolves the error, you’ll be able to export your TireMaster entries to QuickBooks.
If the Accounting Interface has not been configured to identify which accounts receivable, accounts payable, and sales tax entries originated in TireMaster, it will stop you from exporting the entries. This section describes the settings you need to change when entries cannot be exported.
Problem: The following message appears: “There was an error when saving a General Journal transaction. QuickBooks error message: Transaction split lines to accounts receivable must include a customer on that split line.”
Solution: In QuickBooks, create an account with the type Other Current Asset and name it Accounts Receivable-TireMaster. Then change the name of accounts 1100–0 and 1110–0 to Accounts Receivable‑TireMaster on the TireMaster GL Account Edit screen.
Problem: The following message appears: “There was an error when saving a General Journal transaction. QuickBooks error message: Sales tax detail line must have a vendor.”
Solution: In QuickBooks, create an account named Sales Tax Payable-TireMaster and assign it the type Other Current Liability. Then change the name of account 2020–0 to Sales Tax Payable‑TireMaster on the TireMaster GL Account Edit screen.
Problem: The following message appears: “There was an error when saving a General Journal transaction. QuickBooks error message: Transaction split lines to accounts payable must include a vendor on that split line.
Solution: In QuickBooks, create an account named Accounts Payable-TireMaster and assign it the type Other Current Liability. Then change the name of account 2000–0 to Accounts Payable‑TireMaster on the TireMaster GL Account Edit screen.
If you’re using QuickBooks Online, TireMaster is supposed to connect to it when you launch the Accounting Interface.
Problem: A message appears in a browser, and then the following error appears in TireMaster: “The remote server returned an error: (400) Bad Request.”
Solution: These errors appear when the TireMaster database is unable to connect to QuickBooks Online. Close both messages. Then do the following:
Make sure the Accounting Interface for QuickBooks is registered.
Make sure the permission Accounting Interface Access is assigned to you in TireMaster. For more information, see Assign the Accounting Interface Permission.
Make sure the system control QB Online Interface is set to Yes in TireMaster. For more information, Set the Quickbooks Online Control.
