GL Ranges
This help topic is applicable to the following TireMaster applications:
|
TireMaster Point of Sale |
TireMaster Plus |
TireMaster Corporate |
|---|---|---|

|

|
TireMaster uses GL ranges to verify that account numbers fall within the numerical range allowed for an account type, such as asset or liability. When you set up a new a general ledger account, TireMaster compares the major account number to the account type. If the account number doesn’t belong in the GL range for the account type, TireMaster displays a warning. To save the new account, you need to enter a valid account number or select a valid account type.
New TireMaster systems ship with a set of default GL ranges
|
ID |
Range Name |
Major Account Range |
|
1 |
Assets |
1000 – 1999 |
|
6 |
Accounts Receivable |
1100 – 1199 |
|
7 |
Inventory |
1200 – 1399 |
|
8 |
Cash |
1000 – 1099 |
|
9 |
Checking |
1010 – 1019 |
|
2 |
Liability |
2000 – 2999 |
|
10 |
Accounts Payable |
2000 – 2099 |
|
11 |
National Account, Government Support, Adjustment |
2000 – 2099 |
|
3 |
Equity |
3000 – 3999 |
|
4 |
Income |
4000 – 4999 |
|
12 |
Sales |
4000 – 4699 |
|
13 |
Commission |
4500 – 4599 |
|
14 |
Sales Offset |
4500 – 4599 |
|
15 |
Cost Offset |
4500 – 4599 |
|
16 |
Accounts Receivable Discount |
4600 – 4699 |
|
5 |
Expense |
5000 – 9999 |
|
17 |
Cost of Goods Sold |
5000 – 9999 |
|
18 |
Accounts Payable Discount |
5600 – 5699 |
The GL ranges can be updated by changing the account numbers used for a range or associating a secondary range with a different primary range.
To update the GL ranges
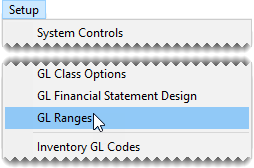
| 1. | Select Setup > GL Ranges. The GL Ranges screen opens. |
| 2. | To change the account numbers used for a range, type different major account numbers for the beginning and end of the range in the From and To columns. |
| 3. | To associate a secondary range with a different primary range, do one of the following in the Relate column: |
To associate the range with the asset account range, type 1.
To associate the range with the liability account range, type 2.
To associate the range with the equity account range, type 3.
To associate the range with the income account range, type 4.
To associate the range with the expense account range, type 5.
| 4. | Close the GL Ranges screen. |
If you don’t want TireMaster to verify account numbers for a particular account type, you can disable the GL range.
To disable a GL Range
| 1. | Select Setup > GL Ranges. The GL Ranges screen opens. |
| 2. | Type the number 0 in the From and To fields for the range you want to disable. |
| 3. | If the range’s Relate column contains a value, delete it. |
| 4. | To save the changes, click OK. |


