Menu Assignments
This help topic is applicable to the following TireMaster applications:
|
TireMaster Point of Sale |
TireMaster Plus |
TireMaster Corporate |
|---|---|---|

|

|

|
Menu assignments define which menu appears when users log in to TireMaster.
You can assign a menu to an entire location, one or more security groups, one or more users, or a combination of locations, groups, and users.
To assign menus
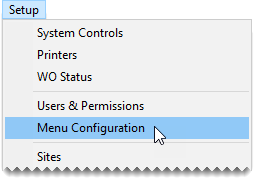
| 1. | If the Menu Setup screen isn’t already open, select Setup > Menu Configuration. |
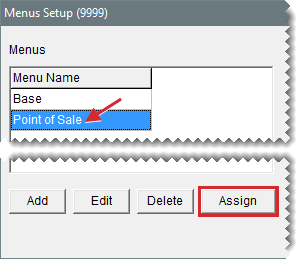
| 2. | Select the menu you want to work with, and click Assign. The Menu Assignments screen appears. |
| 3. | Do the following as needed: |
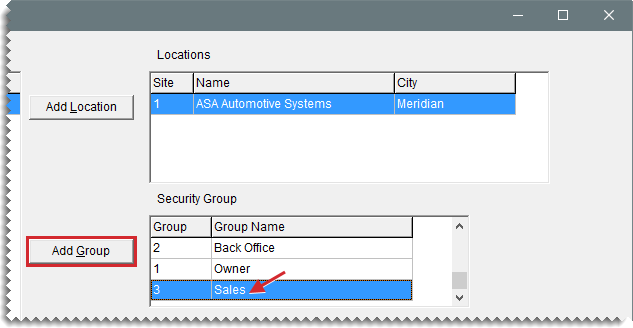
To assign locations, make one or more selections from the Locations list and click Add Location.
To assign security groups, make one or more selections from the Security Group list and click Add Group.
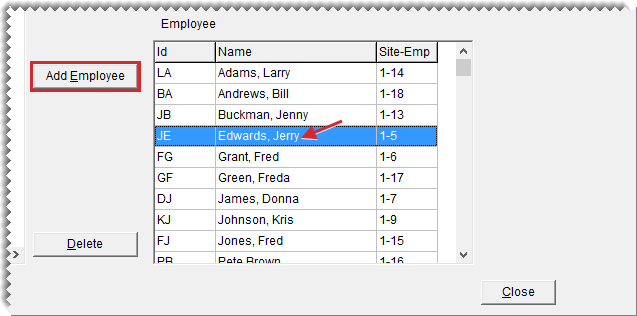
To assign employees, make one or more selections from the list and click Add Employee.
| 4. | Close the Menu Assignment screen. |
When a menu should no longer be assigned to a location, security group, or one or more users, you can undo the assignment.
To delete a menu assignment
| 1. | If the Menu Setup screen isn’t already open, select Setup > Menu Configuration. |
| 2. | Select the menu you want to work with, and click Assign. The Menu Assignments screen appears. |
| 3. | Select the name of the location, security group, employee whose assignment you want to remove, and click Delete. A confirmation message appears. |
| 4. | Click Yes. The assignment is removed. |
| 5. | To remove additional assignments, repeat steps 2 through 4. |


