Time Clock
TireMaster includes a basic time clock for recording employees’ time worked. Once the time clock is launched, it can be run continuously in the background while you use other TireMaster modules.
You can define which employees will record their time worked with the Time Clock. Typically, the Time Clock is used only by hourly employees. This functionality is available in TireMaster 9.4.0.
To add employees to the Time Clock
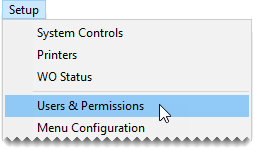
| 1. | Select Setup > Users & Permissions. The User List opens. |
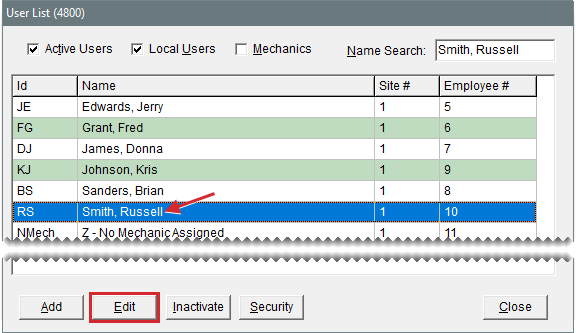
| 2. | Select the employee you want to add to the Time Clock, and click Edit. The Employee/User Edit screen opens. |
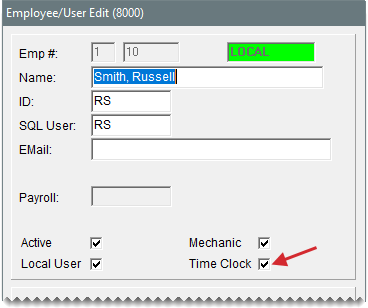
| 3. | Select the Time Clock checkbox. |
| 4. | Re-enter or change the employee’s password. |
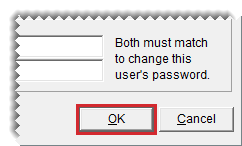
| 5. | To save your changes, click OK. |
| 6. | Close the User List. |
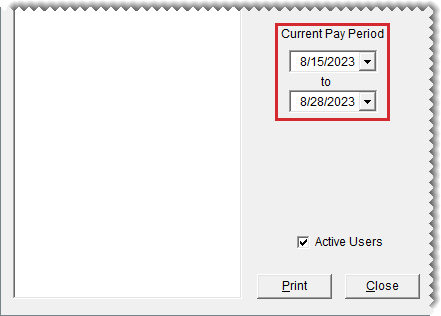
When a new pay period begins, the Time Clock's Current Pay Period date range needs to be updated. Updating the dates at the beginning of the pay period ensures that the total hours each employee works are accurate. Those totals are displayed in the Pay Period Hrs column. This functionality is available in TireMaster 9.4.0.
To update the current pay period
| 1. | Access the time clock using one of the following methods: |
If the time clock is already running, click ![]() on the Windows Task Bar.
on the Windows Task Bar.
If the time clock is not running, click Time Clock on the menu.
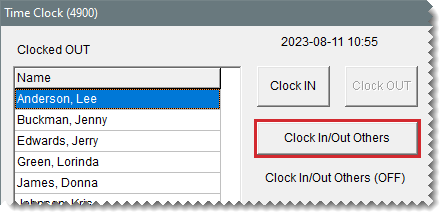
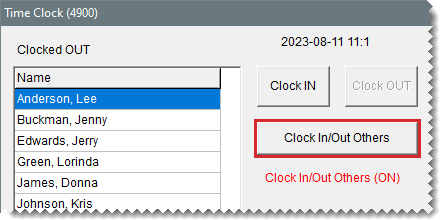
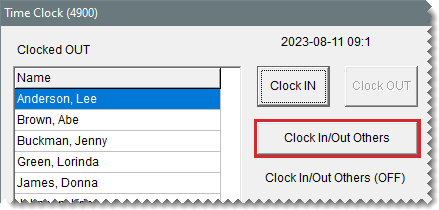
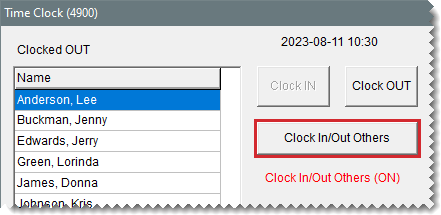
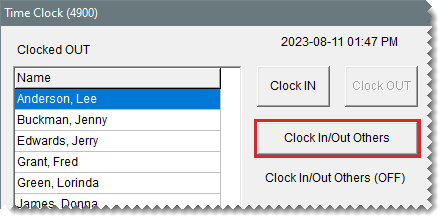
| 2. | Click Clock In/Out Others. The Clock In/Out Others status changes to On (red). |
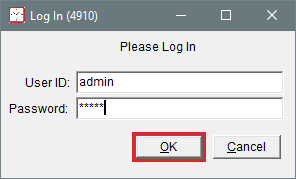
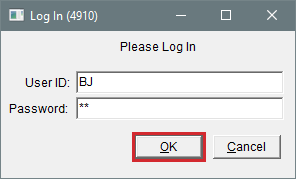
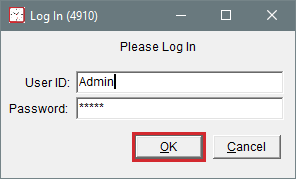
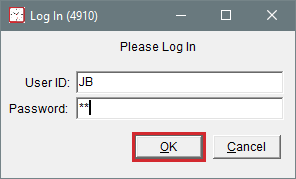
| 3. | When the login prompt appears, type your user name and password and click OK. |
| 4. | Select the new pay period’s beginning and ending dates. |
| 5. | Click Clock In/Out Others. The Clock In/Out Others status changes to Off (black). |
When you’re ready to begin or finish working, access the time clock and record your time in or out. The following instructions describe recording time in TireMaster 9.4.0.
To record in and out times
| 1. | Access the time clock using one of the following methods: |
If the time clock is already running, click ![]() on the Windows Task Bar.
on the Windows Task Bar.
If the time clock is not running, click Time Clock on the menu.
| 2. | Do one of the following: |
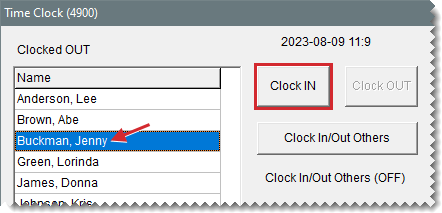
If you’re going to begin working, select your name from the list of clocked out employees (left side of screen) and click Clock IN.
If you’ve just finished working, select your name from the list of clocked in employees (right side of screen) and click Clock OUT.
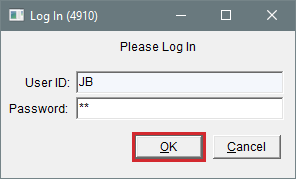
| 3. | When the login prompt appears, type your TireMaster password and click OK. Depending on whether you’re entering time in or time out, your name moves to the right side of the screen (list of clocked in employees) or the left side of the screen (clocked out employees). |
| 4. | When the login prompt appears, type your TireMaster password and click OK. |
One of the following occurs:
If you’re entering your starting time, the time in appears next to your name on the right side of the screen and your name disappears from the list of clocked out employees (left side of screen).
If you’re entering your ending time, the time out appears near your name on the right side of the screen and your name is added back to the list of clocked out employees (left side of screen).
| 5. | Do one of the following: |
Click away from the time clock. This allows the time clock to remain open while you perform other tasks in TireMaster.
Close the time clock.
In some instances, employees might need a manager or another authorized person to clock them in or out. For example, this would occur when an employee starts his or her work day off site or by picking up parts for an upcoming job on the way to work. The following instructions describe recording time for others in TireMaster 9.4.0.
To record in and out times for other employees
| 1. | Access the time clock using one of the following methods: |
If the time clock is already running, click ![]() on the Windows Task Bar.
on the Windows Task Bar.
If the time clock is not running, click Time Clock on the menu.
| 2. | Click Clock In/Out Others. A login prompt appears. |
| 3. | Type your TireMaster user name and password, and click OK. The Clock In/Out Others status changes to On (red). |
| 4. | Do the following for each employee who needs to be clocked in or out: |
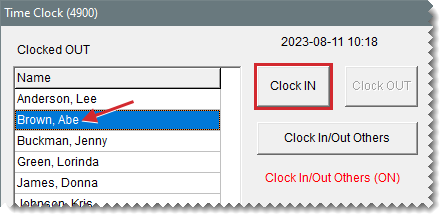
To record time in, select a name on the list of clocked out employees (left side of screen) and click Clock IN. The time in appears next to the employee’s name on the right side of screen, and the name disappears from the list of clocked out employees (left side of screen).
To record time out, select a name on the list of clocked in employees (right side of screen) and click Clock OUT. The time out appears near the employee’s name on the right side of screen, and the name is added back to the list of clocked out employees (left side of screen).
| 5. | When you are done recording in and out times for other employees, click Clock In/Out Others (again). The Clock In/Out Others status changes from On (red) to Off (black). |
| 6. | Do one of the following as needed: |
Click away from the time clock. This will allow it to continue running while you perform other TireMaster tasks.
Close the time clock.
You can record time manually in the following scenarios:
When you need to correct a mistake
When you were unable to enter your time for a previous shift
When you need to report unworked time due to holidays, vacation, illness, jury duty, or bereavement leave
Manual time entry can also be used to record or correct time entries for other employees. The following instructions describe manually recording time in TireMaster 9.4.0.
To manually enter time in and out
| 1. | Access the time clock using one of the following methods: |
If the time clock is already running, click ![]() on the Windows Task Bar.
on the Windows Task Bar.
If the time clock is not running, click Time Clock on the menu.
| 2. | Do one of the following: |
If you’re going to enter time for yourself, select your name.
If you’re going to enter time for another employee, select that person’s name.
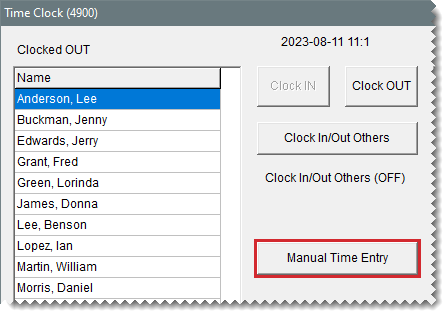
| 3. | Click Manual Time Entry. The login prompt appears. |
| 4. | Type your TireMaster user name and password, and click OK. The Manual Time Entry screen opens. |
| 5. | For a new entry, do the following. If you do not need to enter a new time, disregard this step. |
| a. | Select the week for the entry from the drop-down (upper-right corner). |
| b. | Click the day of the week for which you need to enter time. The day abbreviation turns red. |
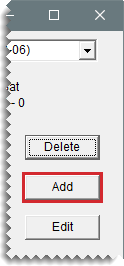
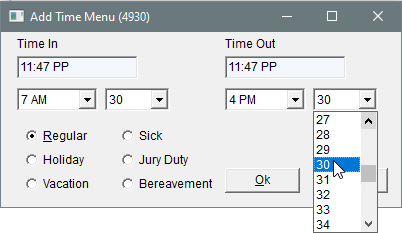
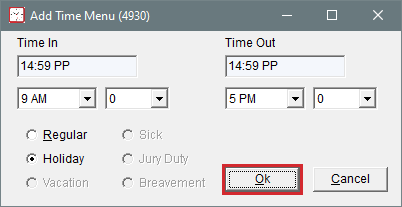
| c. | Click Add. The Add Time Menu opens. |
| d. | Select the hours and minutes as needed from the Time In and Time Out drop-downs. |
| e. | If the entry is not for regular work time, select the applicable time category. |
| f. | Click OK. |
| 6. | To correct an entry, do the following. If you do not need to correct a time entry, disregard this step. |
| a. | Select the week for the entry from the drop-down (upper-right corner). |
| b. | Click the day of the week for which you need to make a correction. The day abbreviation turns red. |
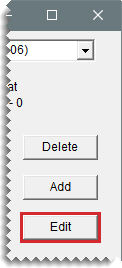
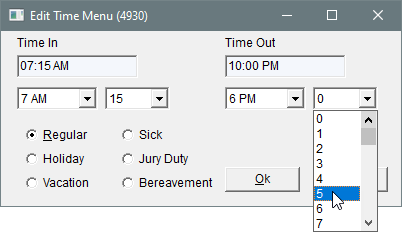
| c. | Click Edit.The Edit Time Menu opens. |
| d. | Change the hours and minutes as needed, using the Time In and Time Out drop-downs. |
| e. | If you need to change the time category, select the applicable option. |
| f. | Click OK. |
| 7. | To delete an entry, do the following. If you do not need to remove a time entry, disregard this step. |
| a. | Select the week for the entry from the drop-down (upper-right corner). |
| b. | Click the day of the week for which you need to delete a time. The day abbreviation turns red. |
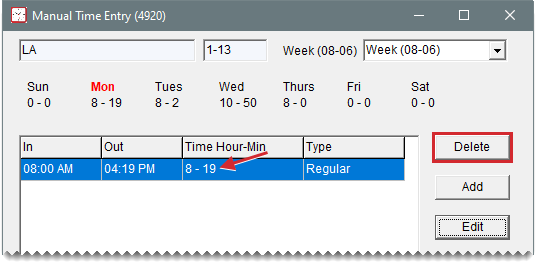
| c. | Select the entry you want to remove and click Delete. |
| 8. | Close the Manual Time Entry screen. |
The TireMaster Time Clock accommodates entries for scenarios in which employers often grant employees paid time off. Time entries for holidays, vacation, illness, jury duty, or bereavement need to be entered manually. Holiday time can also be entered for a group of employees by making a global entry. For more information, see Enter Time In and Out Manually or Add a Global Time Entry.
With a global entry, you can record time that affects all employees or a group of staff members. Global entries can be made for regular work time and holiday time. This functionality is available in TireMaster 9.4.0.
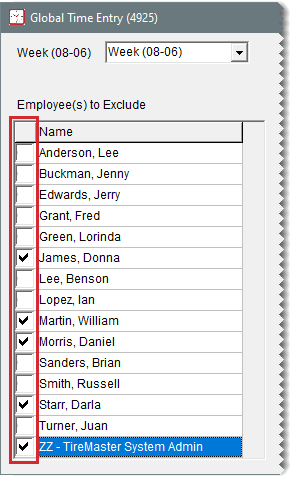
When you make a global time entry for a group of employees, you need to define the employees to whom the entry does not apply.
To add a global time entry
| 1. | Access the time clock using one of the following methods: |
If the time clock is already running, click ![]() on the Windows Task Bar.
on the Windows Task Bar.
If the time clock is not running, click Time Clock on the menu.
| 2. | Click Clock In/Out Others. A login prompt appears. |
| 3. | Type your TireMaster user name and password, and click OK. The Clock In/Out Others status changes to On (red). |
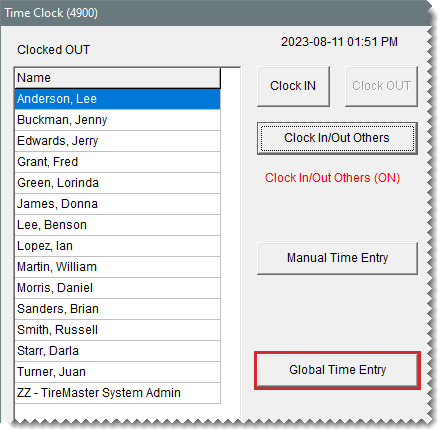
| 4. | Click Global Time Entry. The Manual Time Entry screen opens. |
| 5. | If the time entry will not apply to some employees, select the checkboxes next to their names. If none of the employees need to be excluded from the time entry, disregard this step. |
| 6. | Add the details for the global time entry. |
| a. | Select the week for the entry from the drop-down (upper-left). |
| b. | Click the day of the week for the entry. The day abbreviation turns red. |
| c. | Click Add. The Add Time Menu opens. |
| d. | To accept the default eight hour entry, leave the in and out times alone. For a different number of hours, change the in and out times. |
| e. | If this entry is not for a holiday, select Regular. Otherwise, disregard this step. |
| f. | Click OK. |
The following message appears: “Are you sure you want to add this time, except for those marked as excluded?”
| 7. | Click Yes. |
| 8. | Close the Manual Time Entry screen. |
| 9. | Click Clock In/Out Others. The Clock In/Out Others status changes to On (red). |
With the Time Clock Report, you can generate a list of time clock entries for a user-defined date range. Along with the time clock entries, the report also includes the following for each employee:
The total number of hours worked by time category
The total number of minutes worked during a date range
You also have the option to generate a breakdown of each employee’s regular and overtime hours for one or two work weeks. You can use this information to prepare paychecks.
Depending on your security settings, you can print a report for yourself or all employees.
The following instructions describe printing the report in TireMaster 9.4.0.
To generate a Time Clock Report
| 1. | If the time clock is not already displayed, do one of the following: |
If the time clock is already running, click ![]() on the Windows Task Bar.
on the Windows Task Bar.
If the time clock is not running, click Time Clock on the menu.
| 2. | Click Print. The login prompt appears. |
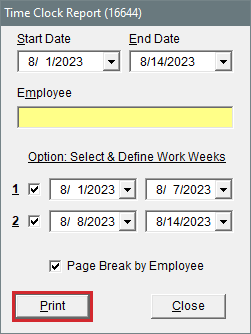
| 3. | Type your TireMaster user name and password, and click OK. The Time Clock Report screen opens. |
| 4. | Define the date or date range for the time clock entries you want to include on the report. For a single day, use the same date for both the beginning and end of the range. |
| 5. | Define whether the report is for one employee or all employees. |
For all employee times, leave the Employee field blank.
For one employee, click the Employee field and press  . When the User List opens, select a name and click OK.
| 6. | For a breakdown of each employee’s regular and overtime hours, define the dates for one or two weeks in a pay period. |
| a. | For one week, select checkbox 1. Then define the date range. |
| b. | For a second week, select checkbox 2. Then define the date range. |
| 7. | If you want to print a separate page for each employee, select the Page Break by Employee checkbox. |
| 8. | Click Print. The Report Window opens. |
| 9. | Print the report and close the Report Window. |
| 10. | Close the Time Clock Report screen. |
| 11. | Do one of the following as needed: |
Click away from the time clock. This will allow it to continue running while you perform other TireMaster tasks.
Close the time clock.
