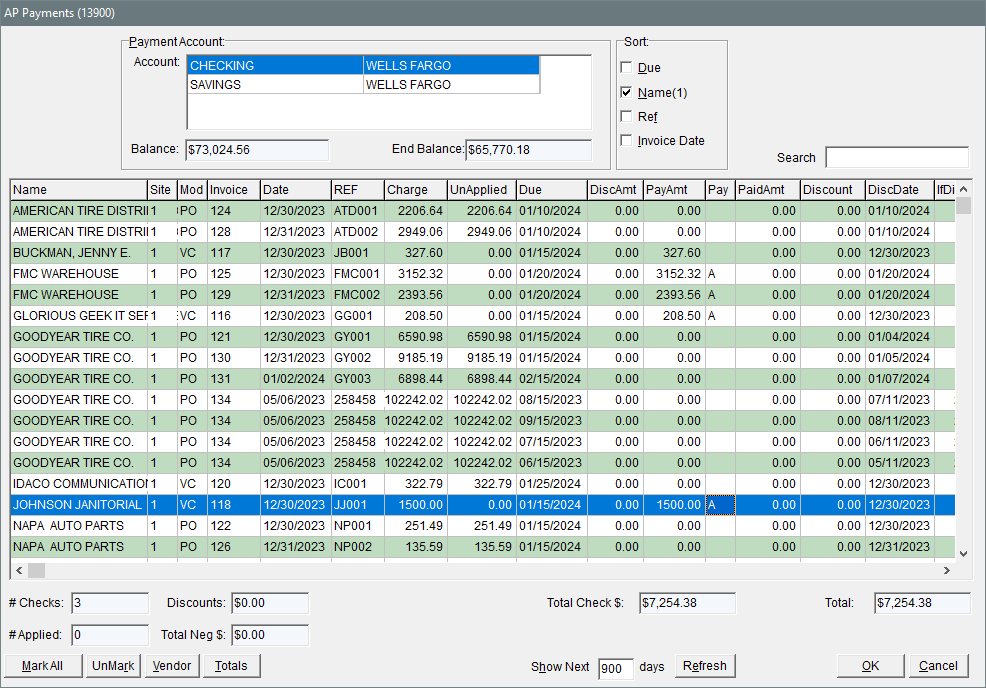
AP Payments Screen
This help topic is applicable to the following TireMaster applications:
|
TireMaster Point of Sale |
TireMaster Plus |
TireMaster Corporate |
|---|---|---|

|
|
The AP Payment screen lists the outstanding charges (purchase orders and vendor charges) for your vendors. It also provides the means to apply payments to those charges and generate payment checks.
|
Item |
Description |
|
Account |
Displays the bank accounts you’ve set up in TireMaster. |
|
Balance |
Displays the current balance for the selected account. |
|
End Balance |
Displays the projected ending balance after the total from all applied items is deducted from the selected checking account. |
|
Due |
Lists charges from oldest due date to newest due date. |
|
Name |
Lists charges alphabetically by vendor name. |
|
Ref |
Lists charges in numerical order by reference number (REF column). |
|
Invoice Date |
Lists charges from oldest invoice date to newest invoice date. Available in TireMaster 9.4.0. |
|
# Checks |
Displays the number of pending checks. Note: Only one check is created for each vendor. If you want to print separate checks for a vendor, apply each payment and print the resulting checks one at a time.
|
|
Search |
Lets you locate documents with criteria including vendor name, invoice number, reference, charge amount, unapplied amount, paid amount, address, and city. Available in TireMaster 9.4.0. |
|
Discounts |
Displays the total discount amount for all payments that are marked to be applied. |
|
Total Check $ |
Displays the total check amount for all payments that are marked to be applied, minus any discount amounts. |
|
Total |
Displays the total amount of the check plus any discounts. |
|
# Applied |
Displays the number of vendor accounts to which payments have been applied. |
|
Total Neg $ |
Displays the total amount of credits applied to one or more vendor accounts. |
|
Mark All |
Lets you quickly mark all payments to be applied. Note: When all items are marked, the name of this button changes to UnMark All.
|
|
UnMark |
Lets you remove the selected payment, all payments, or payments for a specific vendor. Tip: You can also unapply a payment by selecting the A in the PAY column for that payment and pressing the Backspace key or Space Bar.
|
|
Vendor |
Lets you display the charges for a particular vendor. Note: To display all vendors again, click Vendor and then click Cancel twice.
|
|
Totals |
Displays the total amount owed to each vendor for the items applied. |
|
Show Next ____ days |
Lets you specify and view the payments that are due within a certain number of days. |
|
Refresh |
Updates the table after you change the Show Next ___ days value. |
|
OK |
Accepts items marked to be applied. |
|
Cancel |
Exits the screen without saving any changes. |