Data Exchange 2.0
This help topic is applicable to the following TireMaster applications:
|
TireMaster Point of Sale |
TireMaster Plus |
TireMaster Corporate |
|---|---|---|

|

|

|
With the Data Exchange program, stores running TireMaster Plus or TireMaster Point of Sale can share information and transfer items to each other without being part of a centralized accounting system. In this environment, data is transferred via a process called replication. The types of data that can be shared include the following:
New inventory items
Price changes (both fixed prices and A–E price levels)
Item quantities
Vehicle history
Transactional records for posting to QuickBooks, so a bookkeeper at one store can manage books for the other stores
The Data Exchange program also includes an interstore transfer process for moving items from one store to another. For these transactions, the selling store creates an invoice for the items being transferred. Then, during the replication process, a receiving document is created for the store that’s buying the items. Once the items are delivered, the buying store can receive and price the items.
When you set up the Data Exchange program, you can define whether stores are allowed to send and receive each of the data types.
To use Data Exchange, you need to meet TireMaster version and inventory requirements.
The Data Exchange program is compatible with TireMaster Plus and TireMaster Point of Sale Point of Sale versions 9.2.5 and newer.
To view quantities for existing items, the same product codes must be used by all participating stores. To successfully add and update inventory, the following settings must be the same for all stores:
GL codes
Categories
Manufacturer codes
Reconciliation codes
Add-On Codes
Color/Spiff Codes
Commission Codes
Before you can use the Data Exchange program, you need to make various decisions about the data exchange process. Then ASA Support installs the application, and each participating store completes various settings.
Before setups of any kind begin, do the following:
Choose the store from which replication will originate. This store is referred to as the hub, and the remaining stores are called sites.
Provide ASA Support with a name for identifying each participating store. This name code will be assigned during the installation and can be used by ASA Support for troubleshooting.
Determine which types of data will be sent and received for each store. Data that can be received includes prices, price levels, new inventory, and receiving documents for transfers. Data that can be sent includes new inventory items and prices and A–E price levels.
Verify that the same inventory codes are used at all participating stores. For more information, see Inventory Requirements.
The Data Exchange History Report has been replaced by the Inventory Activity Report. For more information, see Data Exchange Inventory Activity Report
Stores can now send new discount inventory items (items assigned type D) and gasoline items (items assigned type G) to other stores.
When duplicate product codes exist at a store receiving a transfer, the program no longer assigns the transfer to the first product code it finds. Now an error appears in the Data Exchange Activity screen, giving you the opportunity to match the transferred item and the correct item at the receiving store.
Once you’ve chosen a hub and identified the names for each of the stores, ASA Support installs the following:
The Regional Replication program, which allows stores to share data
The Data Exchange Program, which allows stores to view and update information from other stores
When ASA Support is finished with the installation, each store needs to do the following:
Assign the Data Exchange permission
Complete the data transmission settings
Add the general ledger accounts, customer type, and customer records needed for interstore transfers.
Define the site settings for each of the participating stores
With the Data Exchange Setup permission, you define whether the members of your security groups are allowed to access the setup screen for the Data Exchange Program.
To assign the Data Exchange permission
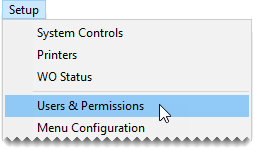
| 1. | From the Setup menu, select Users & Permissions. The User List opens. |
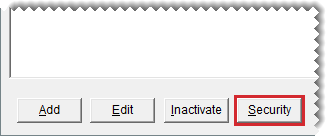
| 2. | Click Security. The Security Assignments screen opens. |
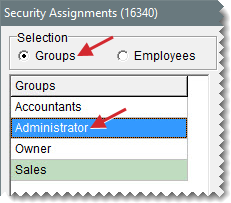
| 3. | Under Selection, make sure Groups is selected. Then select the name of the group to which you want to assign the permission. |
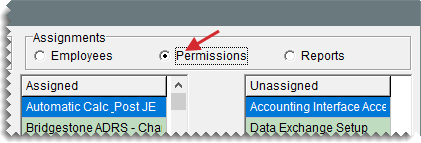
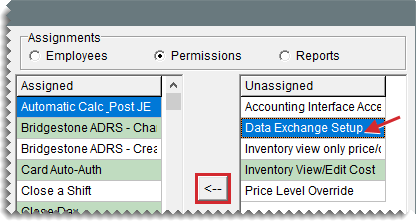
| 4. | Under Assignments, select Permissions. |
| 5. | Select Data Exchange Setup from the list of unassigned permissions, and click  . . |
| 6. | To assign the Data Exchange permission to another group, repeat steps 3 through 5. |
| 7. | Close the open screens. |
With the data transmission settings, you define the following:
Which types of data a store will receive
Whether a store is allowed to set prices
Whether a store is allowed to add new items
To complete the data transmission settings
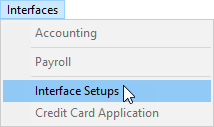
| 1. | From the Interfaces menu, select Interface Setups. The Interface Setup screen opens. |
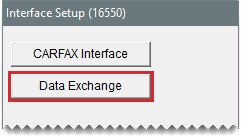
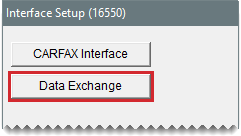
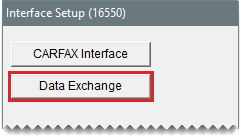
| 2. | Click Data Exchange. The Data Exchange screen opens. |
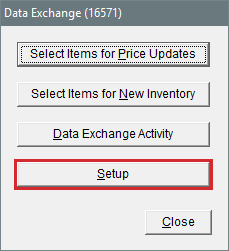
| 3. | Click Setup. |
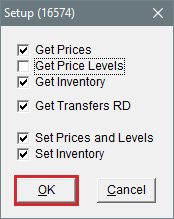
| 4. | Select or clear the check boxes as needed. |
| 5. | Click OK. |
| 6. | Close the open screens. |
Stores participating in the Data Exchange Program can transfer items to each other through an interstore transfer process. For these transfers to occur, you need a customer record for each of the stores to whom you will sell items. To classify the stores as interstore transfer customers, assign a customer type for interstore transfer customers. If this customer type does not exist, add it to Data Exchange.
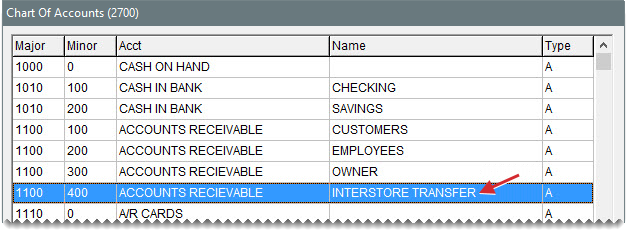
Depending on how interstore transfer activity should post to the general ledger, you might also need to set up additional general ledger accounts.
Add accounts for tracking interstore activity to the chart of accounts as needed. Accounts you might want to add include the following:
An interstore transfer AR account
An interstore transfer AP account
An interstore transfer AR discount account.
For information about adding accounts to your general ledger, see Chart of Accounts.
Before you can transfer items to another store, you need to create a customer record for the store that will be buying items from you. This type of customer is referred to as an interstore transfer customer.
When you create interstore transfer customers, ASA recommends including a pair of hyphens (or a symbol) at the beginning of each store name so they are grouped on the Customer List.
To create an interstore transfer customer
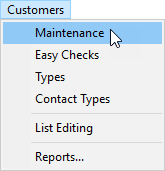
| 1. | Select Customers > Maintenance. |
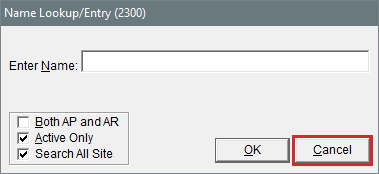
| 2. | Click Cancel. |
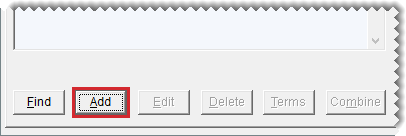
| 3. | Click Add to re-open the Name Lookup/Entry screen in add mode. |
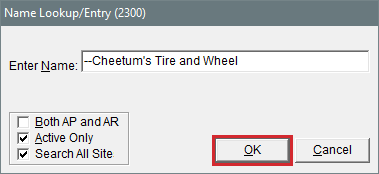
| 4. | Type the name of the interstore transfer customer you want to add preceded by a pair of hyphens or a symbol. Then click OK. |
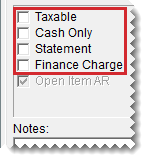
| 5. | Clear the Taxable, Cash Only, Statement, and Finance Charge check boxes. |
| 6. | To save the new interstore transfer customer, click OK. |
Defining site settings allows you to do the following:
Identify the customer record for another store. This customer record is used when selling items to that store via an interstore transfer.
Indicate how quantity information for another store is shown on the Inventory List. You can define a name and the position for that store.
To define site settings
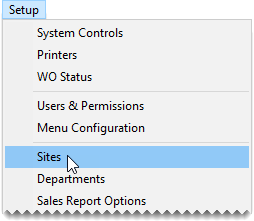
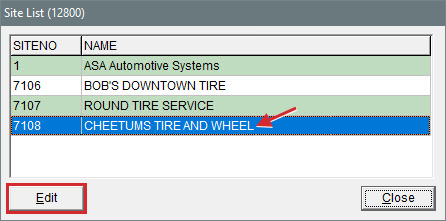
| 1. | From the Setup menu, select Sites. The Site List opens. |
| 2. | For each store on the list, do the following. |
| a. | Select the store name and click Edit. The Site Identification Maintenance screen opens. |
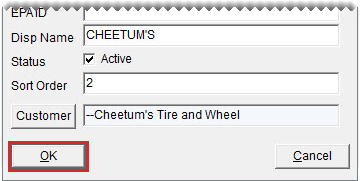
| b. | Type a name for identifying the store in the DispName field. |
| c. | Select the Active check box. |
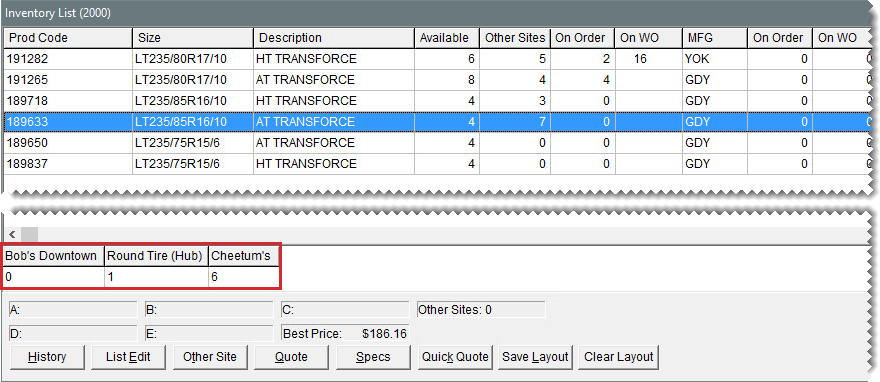
| d. | In the Sort Order field, type the number that corresponds with the position in which you want to show the selected store’s quantities. Other store quantities are listed toward the lower-left corner of the Inventory List. |
| e. | Click Customer, and look up the customer record that was created for the store. |
| f. | Click OK. |
| 3. | When you’ve defined inventory display settings for all of the stores, close the Site List. |
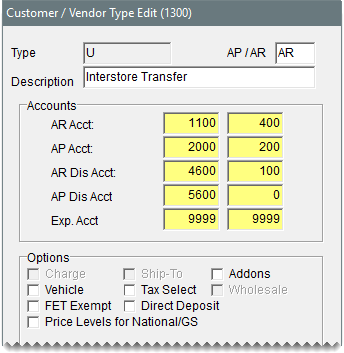
The interstore transfer customer type ensures that the sales to another store are handled properly. Typically, the letter U is used to identify the interstore transfer customer type. Once you’ve created the type, indicate that it is the default customer type for interstore transfers by assigning it in System Controls.
To create the interstore transfer customer type
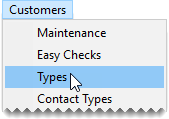
| 1. | From the Customers menu, select Types. The Customer/Vendor Type List opens. |
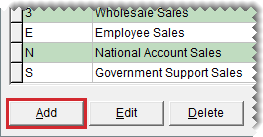
| 2. | Click Add. The Customer/Vendor Type Edit screen opens. |
| 3. | For the type code, type the letter U (or another letter of your choice). |
| 4. | Type a description for the new customer type. |
| 5. | Assign general ledger accounts to the customer type. |
| 6. | Make sure that none of the check boxes near the bottom of the screen are selected. |
| 7. | To save the new customer type, click OK. |
| 8. | Close the Customer/Vendor Type List. |
| 9. | Assign the new interstore transfer customer type in System Controls. |
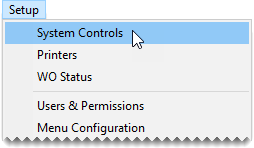
| a. | Select Setup > System Controls. |
| b. | Do one of the following: |
If you’re running TireMaster Plus, click the Enterprise tab.
If you’re running TireMaster Point of Sale, click the Customer tab.
| c. | Select Interstore Transfers - Customer Type and press Enter. |
| d. | Choose the customer type you created for interstore transfers from the list that appears, and click OK. |
| 10. | Close the System Controls screen. |
Once the interstore transfer customer type has been created and assigned in System Controls, you need to assign it to each store to which you’ll sell items. Although you can assign the type to individual customers, it’s more efficient to use Customer List Editing.
To assign the interstore transfer customer type
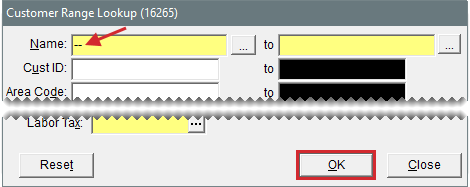
| 1. | Select Customers > List Editing. The Customer Range Lookup screen opens. |
| 2. | In the Name field, type the pair of hyphens (or the symbol used for grouping interstore transfer customers). Then click OK. The Customer List Editing screen opens. |
| 3. | For each customer, click  and select the interstore transfer customer type (typically U) from the list that appears. and select the interstore transfer customer type (typically U) from the list that appears. |
| 4. | Close the open screens. |
You can perform a variety of tasks with the Data Exchange Program.
Quantity information for other stores is available on the Inventory List, in the lower-left section of the screen, above the A–E price level fields [insert figure #]. An item’s quantity information from another store is available when the product code for your store matches the product code used by another store.
With Data Exchange, items from one store can be added to the inventory at other participating stores. To add items in this manner, Set Inventory must be enabled for the store sending the inventory information and Get Inventory must be enabled at the other stores for them to receive the items.
To add items with Data Exchange
| 1. | At the store sending item information, add new items. Existing item information can be sent as well. |
| 2. | At the store sending item information, choose and send the items. |
| a. | Select Interfaces > Interface Setups. |
| b. | Click Data Exchange. |
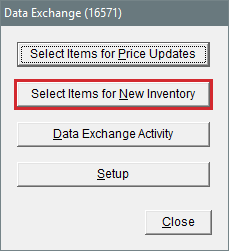
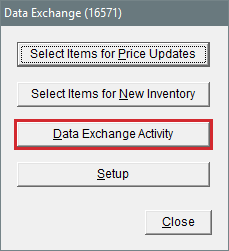
| c. | Click Select Items for New Inventory. The Custom Inventory Lookup screen opens. |
| d. | Look up the items you want to send. The Selected Items screen opens. |
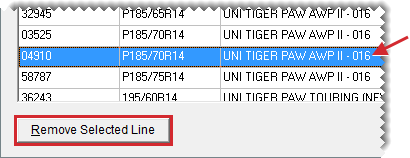
| e. | If there is an item on the list you don’t want to send, select it and click Remove Selected Line. For additional items, repeat as needed. |
| f. | Click OK. The Selected Items screen closes. |
| g. | Close the remaining open screens. |
| 3. | Allow a replication cycle to occur and the inventory-update process to run. For more information, see Replication Process. |
| 4. | At each store receiving the new item information, verify the transmission was successful. |
| a. | Select Interfaces > Interface Setups. |
| b. | Click Data Exchange. |
| c. | Select Data Exchange Activity. The Data Exchange Activity screen opens. |
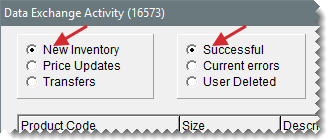
| d. | Make sure New Inventory and Successful are selected. If the sent items are listed, they’ve been added to your inventory. If the items are not listed, select Current Errors and refer to the information in Troubleshooting. |
| 5. | Close the open screens. |
When one store updates prices for items, that information can be sent to the other stores. Depending on a store’s settings, both prices (base price, last cost, parts and labor) and price levels can be shared.
To update prices with Data Exchange
| 1. | At the store sending price information, make sure the prices have been set for the items whose information you’re going to share. |
| 2. | At the store sending the price information, choose the items and send the prices. |
| a. | Select Interfaces > Interface Setups. |
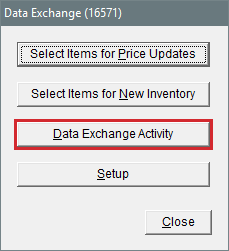
| b. | Click Data Exchange. |
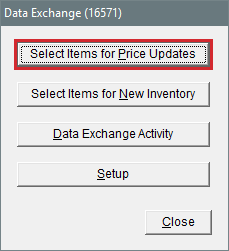
| c. | Click Select Items for Price Updates. The Custom Inventory Lookup screen opens. |
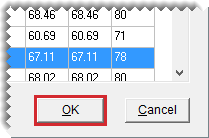
| d. | Look up the items for which you want to send price information. The Selected Items screen opens. |
| e. | If there is an item on the list whose information you don’t want to send, select it and click Remove Selected Line. Repeat as needed. |
| f. | Click OK. The Inventory List closes. |
| 3. | Allow a replication cycle to occur, and allow the inventory-update process to run. For more information, see Replication Process. |
| 4. | At each store receiving the updated prices, verify the transmission was successful. |
| a. | Select Interfaces > Interface Setups. |
| b. | Click Data Exchange. |
| c. | Select Data Exchange Activity. The Data Exchange Activity screen opens. |
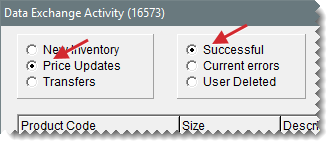
| d. | Make sure Price Updates and Successful are selected. If the sent items are listed, they’ve been added to your inventory. If the items are not listed, select Current Errors and refer to the information in Troubleshooting. |
| 5. | Close the open screens. |
With Data Exchange, you can view vehicle history from the other stores. Vehicle history is available when the license plate entered at your store matches the license plate entries at the other locations.
To view vehicle history from other stores
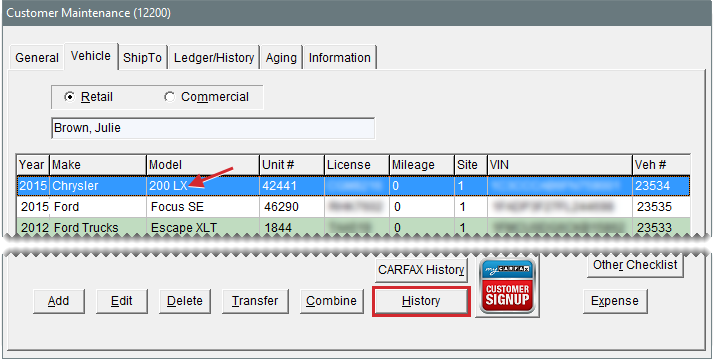
| 1. | Look up or add the customer as a standalone operation or when you start a work order. A list of the customer’s vehicles appears. |
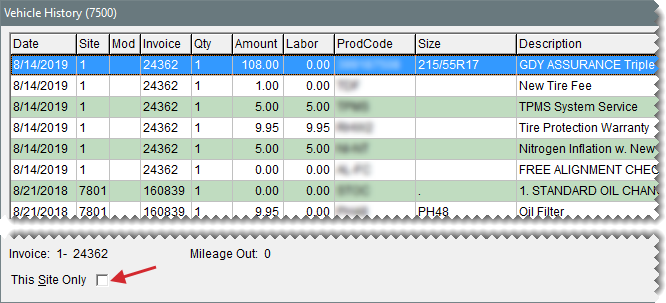
| 2. | Select the vehicle, and click History. The Vehicle History screen opens and displays invoice detail from all stores that have previously worked on the vehicle. |
| 3. | To see history for all stores, clear the This Site Only check box. To limit the history to your store, select the check box instead. |
| 4. | Do one of the following as needed: |
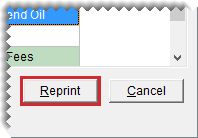
For a hard copy of a historical invoice created at your store, select one of the items that was on that invoice and click Reprint.
For a list of items sold on an invoice from another store, select one of those items and click Reprint.
| 5. | Close the open screens. |
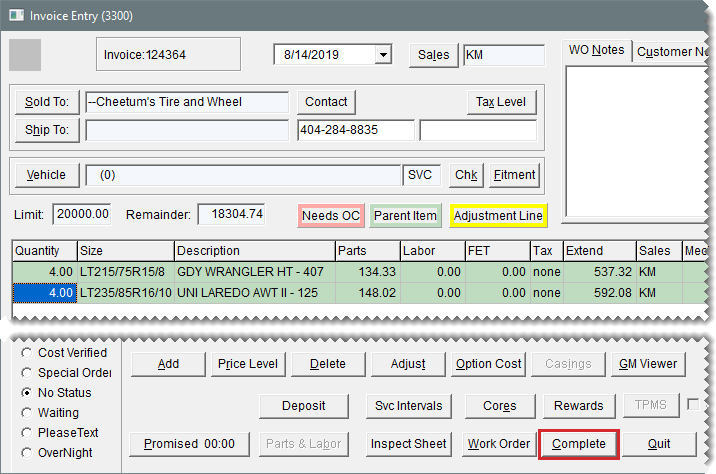
The interstore transfer process allows one store to sell items to another store. For interstore transfers, the selling store creates a work order for the store that’s buying the items. Once the invoice is completed and the data has replicated, a receiving document is available at the purchasing store. To successfully sell items from one store to another, the item’s product code must exist at both stores.
To sell items to another store
| 1. | At the selling store, do the following: |
| a. | Start a work order, and look up the customer record for the store that has requested the transfer. |
| b. | Add items to the work order. |
| c. | Complete the invoice. It will be handled as a charge. |
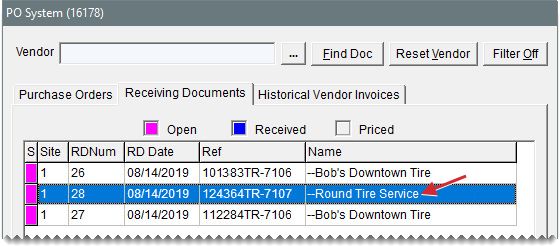
| 2. | At the purchasing store, do the following: |
| a. | Open the PO System and locate the receiving document. The vendor is the store that transferred the items. |
| b. | Open the receiving document. Then receive and price the items. |
If you don’t see new inventory, updated prices, or an interstore transfer receiving document that you’re expecting, refer to the following information to research the issue.
If items sent from another store were not added to your inventory, refer to the following information to determine why.
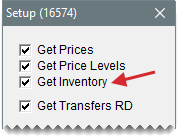
Make sure the Data Exchange settings for your store allow you to add items that were created at another location. For this to happen, the Get Inventory check box needs to be selected on the Data Exchange setup screen.
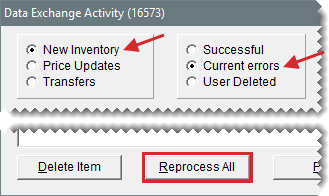
Sometimes a lag in the replication process occurs. Make sure New Inventory and Current Errors are selected and click Reprocess All. Then select Successful and see if the items were added during this attempt.
Make sure New Inventory and Current Errors are selected. Then verify that the manufacturer code, GL code, category, add-on code, reconciliation code, color/spiff code, and commission code listed match the codes used by your store. If one or more codes do not match, the items are not added.
In this scenario, you need to decide whether the mismatched codes need to be added at your store or if the sending store is using codes that are not consistent with those used by the other participating stores.
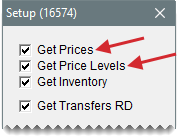
If prices at your store were not updated with price information from another location, make sure the Data Exchange settings for your store allow you to implement prices that were set at another location. Depending on whether parts prices or price levels should be affected, make sure the Get Prices check box, the Get Price Levels check box, or both are selected on the Data Exchange setup screen.
If another store has sent items to your store but there is not a receiving document for the transfer, refer to the following information to determine why.
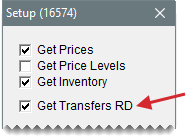
Make sure the Data Exchange settings for your store allow you to receive interstore transfers. For this to happen, the Get Transfers RD check box needs to be selected on the Data Exchange setup screen.
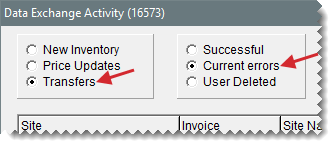
Check the Data Exchange Activity screen for interstore transfer errors. Make sure Transfers is selected and click Current Errors. If any transfers are listed, attempt to process the transfers manually by clicking Reprocess All.
Make sure your inventory has product codes that match the product codes of the transferred items. The same product code must be used for the same it at both stores to successfully perform a transfer. If your store doesn’t have a product code for a transferred item, add an item to your inventory with that product code or update the product code for an existing item.
You can generate a hard copy of the items listed on the Inventory Activity screen by clicking Print. For each item listed, the report includes the product code, size, description, and the date created. Depending on the transaction type, the date created is one of the following:
For new inventory, it’s the date the items were added to inventory.
For updated inventory, it’s the date the items’ prices were updated.
For transferred items, it’s the date when the receiving for the transferred items was completed.
As soon as replication is finished, inventory quantity, site, and history information is available.
For new inventory, pricing, and transfer information to become available, an additional inventory-update process needs to occur. It runs every ten minutes between 4:00 a.m. and 7:00 p.m.
