TMText
This help topic is applicable to the following TireMaster applications:
|
TireMaster Point of Sale |
TireMaster Plus |
TireMaster Corporate |
|---|---|---|

|

|

|
With TMText, you can send text messages to customers and vendors. If you use TireMaster‘s Scheduler, you can also use TMText to send appointment reminders to customers.
This section describes changes made to the TMText application.
Service patch 4 for TireMaster 9.4 includes the following usability improvements for TMText.
Easier Opt-In
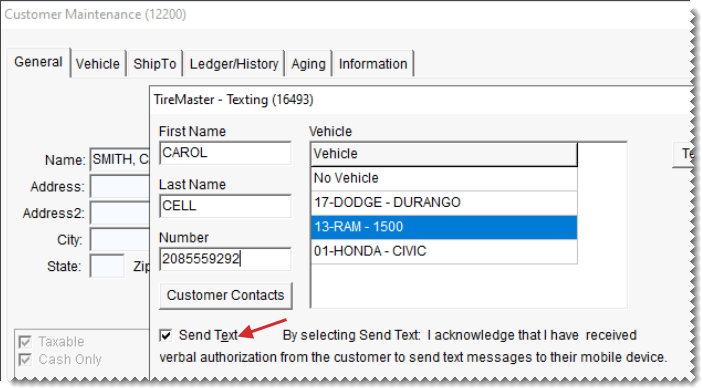
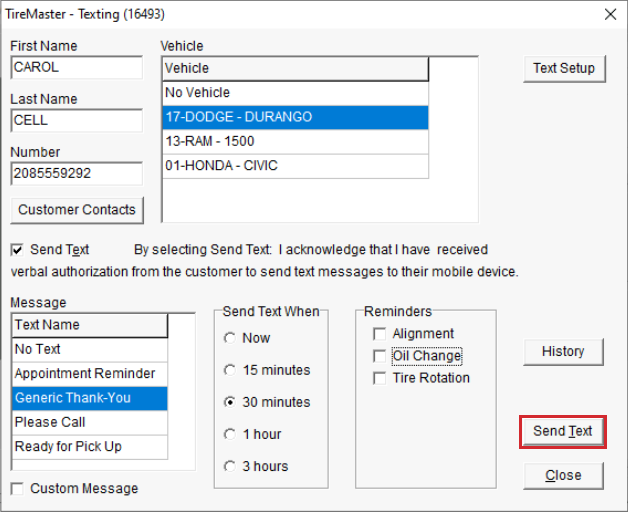
You can record customers’ consent to receiving text messages on the Texting screen now. When a customer opts-in to texting, select the new Send Text check box above the list of predefined messages. Previously, the texting opt-in was available only on the screen for adding and editing individual contact methods.
Work Order Texting Access
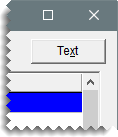
You can send text messages while working on a customer’s order now. A button for opening the Texting screen has been added to the Invoice Entry screen. The new Text button is at the top of the screen next to the Contact button.
Contact List Access
You can open the customer’s contact list from the Texting screen now. The new Customer Contacts button is under the phone number field. When the customer has multiple cell numbers that allow texting, you can choose which number you want to use from the list.
Invoice Completion Toggle
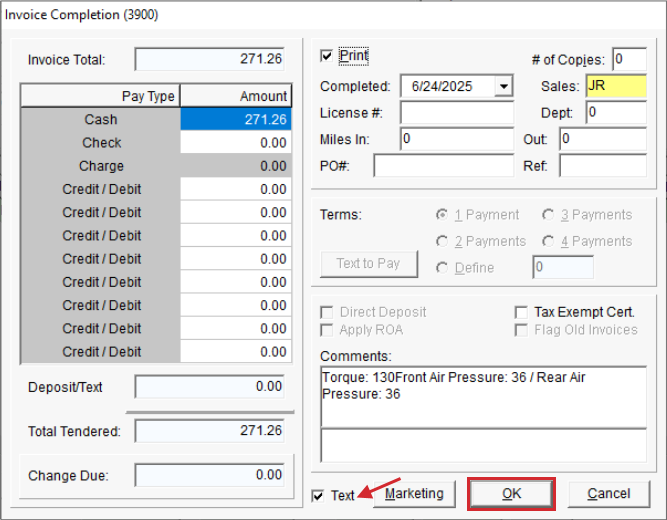
You can bypass the texting screen when TireMaster is configured to send text messages for finalized sales. A Text check box has been added to the Invoice Completion screen, to the left of the Marketing button. When the system control Texting - Send Thank You at Completion is set to Yes, the new check box is selected by default. If you don’t want to text the customer, clear the check box to bypass the texting prompt.
ROA and Deposit Texting
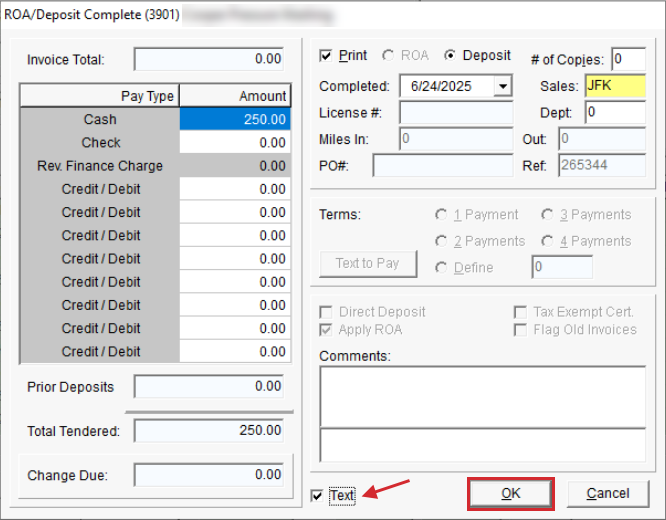
You have the option to send text messages to customers when you finalize their received on account payments and when you take their deposits. A Text check box has been added to the ROA and Deposit completion screen. When the new system control Texting - Send Thank You at ROA is set to Yes, the new Text check box on the ROA completion screen is selected by default. If you leave the check box alone, TireMaster prompts you to send a text message. Clearing the check box bypasses the Texting screen.
Update, September 2020
Enhancement - Functionality for Text Payments
Components that allow a new text-to-pay application to run on TireMaster systems have been added to TMText.
Maintenance - New Text Checking Frequency
This update resolves an issue that prevented TMText from regularly checking for new text messages. The issue typically occurred in environments running multiple TireMaster databases, such as the ASA Data Center.
Update, July 2020
Enhancement - Security Permission Added
The TMText setup module is now protected by the permission Setup. Therefore, users who are allowed to update the source number and add or update predefined text messages and reminders must be belong to security groups that are assigned the Setup permission.
Enhancement - Ability to Define Default Message Selection
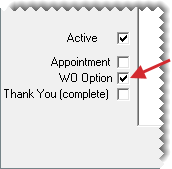
You can identify which predefined message should be selected by default when changing the status of a customer’s work order and when completing a customer’s invoice. The options WO Option and Thank You (complete) have been added to the screen for adding and updating predefined text messages. If you have a predefined message that you always use or typically use when changing a status or completing an invoice, defining the default message for each scenario will help you save time, because you won’t have to select a message from the list at point of sale.
Maintenance - Errors and Limitations
This update also addresses the following:
An issue that prevented text messages from being marked as processed
A limitation on the number of replies that could marked as done, which caused delays and clogs in the system
Issues that occurred when editing text messages
Original Release, 2019
To install and use TMText, you need the following:
TireMaster 9.2.0 or newer installed on your computers
An internet connection
To use TMText, you need to know how to do the following in TireMaster:
Search for customers and vendors
Add and update cell phone numbers for customers and vendors
Change the job status for a work order (if your business uses the Work Order Status Indicator)
Complete sale invoices
Before you can install TMText, do one of the following to locate the installation program:
Access the automatically-deployed installer(s) from the apps directory. For instructions, see Access Automatically-Deployed Installers.
Download the installer(s) from the TireMaster Support site. For instructions, see Download the TMText Installer.
Once you’ve located the installer(s), complete the installation. For instructions, see Complete the TMText Installation.
If your TireMaster system is set up to download automatically-deployed installers as part of the nightly backup process, the installer for TMText is already available to you. Typically, installers are placed in one of the following locations:
|
c:\TireMaster\apps |
c:\TMPOS\apps |
d:\QDSTM\apps |
|
c:\QDSTM\apps |
d:\TireMaster\apps |
d:\TMPOS\apps |
To access automatically-deployed installers
| 1. | Right-click and select File Explorer from the menu that appears. |
| 2. | In the Quick Access navigation pane, scroll to This PC. |
| 3. | Double-click the letter or icon for the drive that TireMaster is installed in. (Usually, it’s the c: or d: drive.) |
| 4. | Double-click the TireMaster, qdstm, or tmpos program folder. |
| 5. | Double-click the apps folder, and locate the file TMText00000000-09000000.exe. Once you have located the installer, complete the installation. For instructions, see Complete the TMText Installation. |
The installer for TMText is available for download from the TireMaster Support site. When you download the installer, save it on your TireMaster server. To log on to the TireMaster Support Site, you need your TireMaster customer number and password. If you no longer have that information, log an online support request via the online portal or by email.
To download the TMText Installer
| 1. | Close all applications. |
| 2. | Log on to support.tiremaster.com. |
| 3. | Type your customer number and password, and click Login. The Support Center home page opens. |
| 4. | Click Download Programs on the menu. The Download Center page opens. |
| 5. | Under Update Files, click the link for TMText. You’ll be prompted to save the file and possibly run the installation, depending on your browser. |
| 6. | Save the installer on your computer. |
| 7. | Exit the TireMaster Support site. |
| 8. | Once you have finished downloading the installer, you can complete the installation. For instructions, see Complete the TMText Installation. |
After you’ve located the installer for TMText, you can complete the installation. Install the application on the TireMaster server and workstations.
To install TMText
| 1. | Right-click TMText00000000-09000000.exe, and select Run as Administrator. A confirmation message appears. |
| 2. | Click Yes. The TireMaster - Installation Program screen opens. |
| 3. | Click OK. The TireMaster - Search Results screen opens. |
| 4. | Select the TireMaster location in which you want to install the interface, and click Install. |
| 5. | At the end of the installation, click Finish. |
You’ll be prompted to register TMText the first time you log in to TireMaster after the installation. When the Interface Registration screen opens, click Register.
Before you can use TMText, you need to complete settings that make texting available at point of sale and define whether to send automated appointment reminders to customers. You can also create predefined messages (such as thank you notes and reminders) that can be reused.
The source number for TMText, is the phone number from which text messages are sent. With the source number setting, you can display a ten digit phone number (such as 111-222-3333) on devices that receive text messages instead of SMS (short message service) short codes (such as 111-00). To define the source number, you must belong to a security group that’s assigned the Setup permission.
To define the source number
| 1. | Access the TireMaster - Texting screen. |
| a. | If the Open Work Order List isn’t already open, click Invoicing. |
| b. | Click Text. The TireMaster - Texting screen opens. |
| 2. | Click Text Setup. The Text Message Setup screen opens. |
| 3. | Click Source Num. |
| 4. | Type the ten digit phone number for sending text messages in the Source Number field, and click OK. |
| 5. | Close the Text Message Setup screen. |
You can send text messages to customers when there are status changes for their work orders (such as when the status is changed from In Progress to Done). You can indicate whether texting is available for each work order status. For more information, see Send Text Messages for Work Order Status Changes.
To enable texting for work order status changes
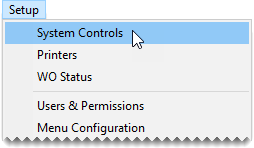
| 1. | Select Setup > WO Status. The Work Order Status Options screen opens. |
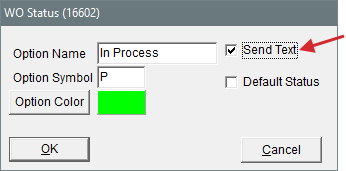
| 2. | Select a status for which you want to enable texting, and click Edit. The WO Status screen opens. |
| 3. | Select the Send Text check box. |
| 4. | To save your changes, click OK. |
| 5. | Repeat steps 2 through 4 to enable texting for another status, or close the Work Order Status Options screen. |
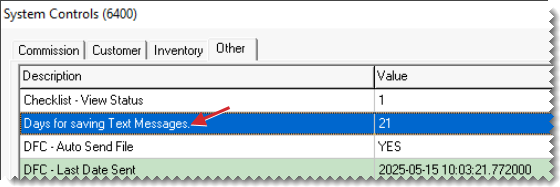
You can set the number of days text messages are visible in text history before being automatically deleted.
To set the text message saved days
| 1. | Select Setup > System Controls. |
| 2. | Click the Other tab. |
| 3. | Select Days for Saving Text Messages and press Enter. |
| 4. | Type the number of days you want to keep the messages and click OK. |
| 5. | Close the System Controls screen. |
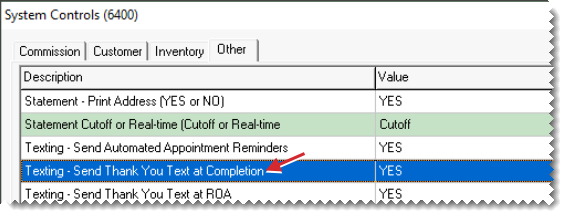
You have the option to send text messages to customers when you complete their sale invoices. By setting a system control, you define whether the Text check box is selected by default on the invoice completion screen. When the check box selected, you're prompted to send a text when you complete an invoice. Clearing the check box bypasses the texting screen.
To enable text messaging for completed invoices
| 1. | Select Setup > System Controls. |
| 2. | Click the Other tab. |
| 3. | Select Texting - Send Thank You Text at Completion and press Enter. |
| 4. | For the option to send text messages, select Yes and click OK. Otherwise, select No and click OK. |
| 5. | Close the System Controls screen. |
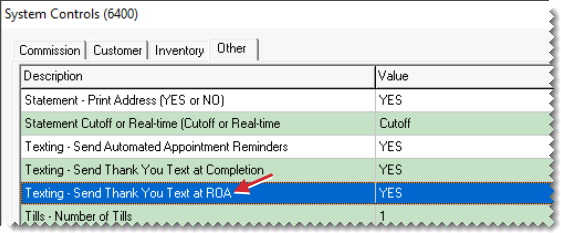
You have the option to send text messages to customers when you finalize received on account payments and work order deposits. By setting a system control, you define whether the Text check box is selected by default on the completion screen for ROAs and deposits. When the check box is selected, you're prompted to send a text when you complete an ROA or a deposit. Clearing the check box bypasses the texting screen.
To enable text messaging for completed ROAs
| 1. | Select Setup > System Controls. |
| 2. | Click the Other tab. |
| 3. | Select Texting - Send Thank You Text at ROA and press Enter. |
| 4. | For the option to send text messages, select Yes and click OK. Otherwise, select No and click OK. |
| 5. | Close the System Controls screen. |
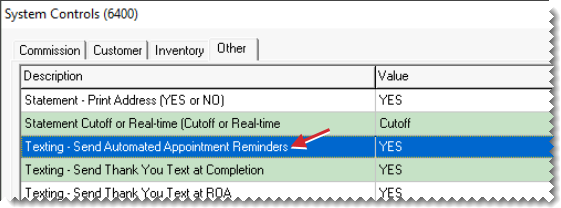
When automated appointment reminders are enabled, TireMaster sends notifications to customers every afternoon. Automated appointment reminders are enabled by setting a system control. For more information, see Send Automated Appointment Reminders.
To enable automated appointment reminders
| 1. | Select Setup > System Controls. |
| 2. | Click the Other tab. |
| 3. | Select Texting - Send Automated Appointment Reminders and press Enter. |
| 4. | Select Yes, and click OK. |
| 5. | Close the System Controls screen. |
Predefined messages simplify texting, because they require you to do little or no typing when sending a text. Examples of predefined messages include thank you notes, oil change reminders, and the appointment notification.
To add and update predefined messages, you must belong to a security group that’s assigned the Setup permission.
You can set up predefined messages that can be used in various scenarios. Predefined messages are classified as Text or Reminder. Text is for messages that are sent immediately, and Reminders is for messages that are sent on a specific date. You can set up a maximum of five reminder messages.
To add a predefined message
| 1. | Access the TireMaster - Texting screen. |
| a. | If the Open Work Order List isn’t already open, click Invoicing. |
| b. | Click Text. The TireMaster - Texting screen opens. |
| 2. | Click Text Setup. The Text Message Setup screen opens. |
| 3. | Click Add. |
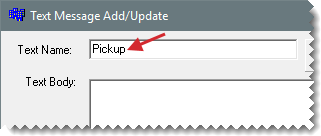
| 4. | Type the name of the message. (If there is an existing name, type over it.) |
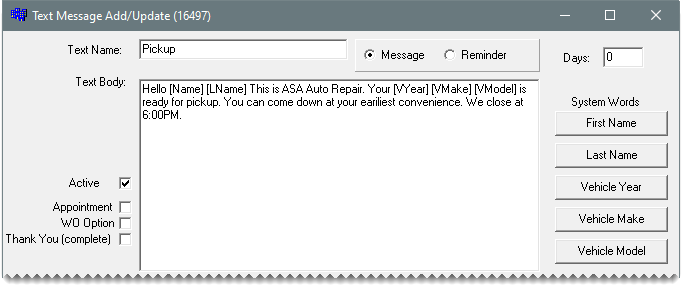
| 5. | Type the message in the Text Body field. To personalize the message, click the applicable button under System Words to insert placeholders for name and vehicle information. |
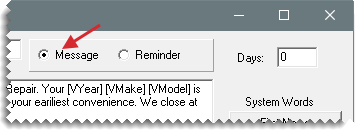
| 6. | Define the message type. |
For unscheduled text messages, select Messages.
For scheduled text messages, select Reminder. Then type the number of days in which the message will be sent.
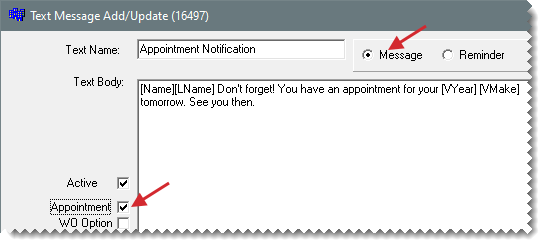
For the appointment notification (you can have only one), select Message and the Appointment check box. If you don’t use the Scheduler, disregard adding this type of text message.
| 7. | Define which work order status change and invoice completion messages will be selected by default. |
For the message that should be selected by default when the status of a work order changes, select WO Option.
For the message that should be selected by default when completing an invoice, select Thank You (complete).
| 8. | Click OK. The name of the new message is added to the list on the left side of the screen. |
| 9. | Repeat steps 3 through 8 to create additional messages if needed. Otherwise, close the open screens. |
Predefined messages are typically updated when you want to vary the text or correct mistakes.
To update predefined messages
| 1. | Access the TireMaster - Texting screen. |
| a. | If the Open Work Order List isn’t already open, click Invoicing. |
| b. | Click Text. The TireMaster - Texting screen opens. |
| 2. | Click Text Setup. The Text Message Setup screen opens. |
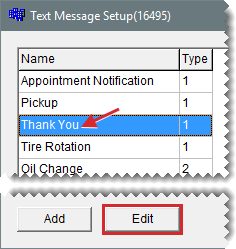
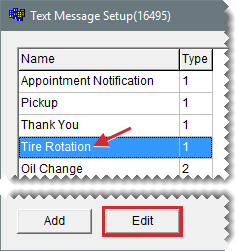
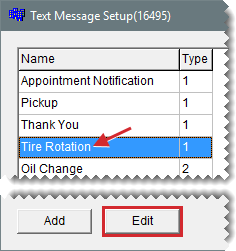
| 3. | Select the name of the message you want to update, and click Edit. |
| 4. | Do the following as needed: |
Change the name (by typing over the existing name).
Add, change, and delete body text and customer name and vehicle placeholders as needed. To remove text and placeholders, select them and press Delete on the keyboard.
Change the number of days (for sending reminders).
If the message should be selected by default when the status of a work order changes, select WO Option.
If the message should be selected by default when completing an invoice, select Thank You (complete).
| 5. | Click OK. |
| 6. | Repeat steps 3 to 5 to update additional messages if needed. Otherwise, close the open screens. |
If you no longer use a predefined message, you can make it inactive. When a message is inactive, it is no longer listed on the screen for texting customers and vendors.
To make a message inactive
| 1. | Access the TireMaster - Texting screen. |
| a. | If the Open Work Order List isn’t already open, click Invoicing. |
| b. | Click Text. The TireMaster - Texting screen opens. |
| 2. | Click Text Setup. The Text Message Setup screen opens. |
| 3. | Select the name of the message you want to make inactive, and click Edit. |
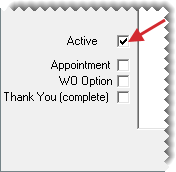
| 4. | Clear the Active check box. |
| 5. | Click OK. |
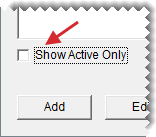
| 6. | To remove the inactive message from list on the Text Message Setup screen, select the Show Active Only check box. |
| 7. | Close the Text Message Setup screen |
You can resume using a predefined message by making it active once again.
To make a predefined message active
| 1. | Access the TireMaster - Texting screen. |
| a. | If the Open Work Order List isn’t already open, click Invoicing. |
| b. | Click Text. The TireMaster - Texting screen opens. |
| 2. | Click Text Setup. The Text Message Setup screen opens. |
| 3. | Clear the Show Active Only check box. |
| 4. | Select the name of the message you want to make active, and click Edit. |
| 5. | Select the Active check box. |
| 6. | Click OK. |
| 7. | Close the open screens. |
Before sending text messages to customers, they need to consent to receiving SMS communication from your business. Verbal opt-in for commercial text messages is a legal requirement of the Telephone Consumer Protection Act (TCPA).
To help your business comply with SMS legislation, employees should follow an SMS opt-in script when they ask customers to consent to receiving text messages. To download an example SMS opt-in script, click here.
TireMaster’s texting functionality is available for individual customer and vendor records, at point of sale, and in the Appointment Scheduler.
You can send text messages to customers from their customer records, the Open Work Order List, and their work orders.
To send a text message to a customer
| 1. | Do one of the following: |
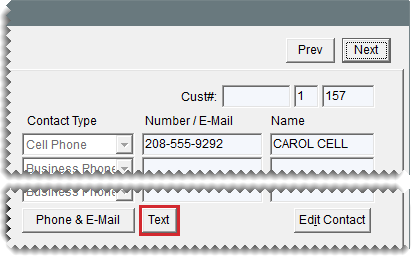
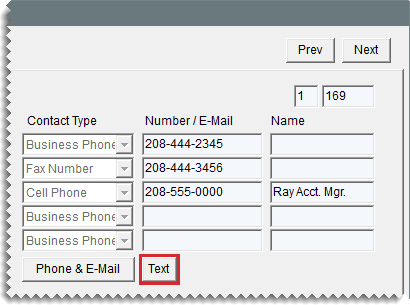
Look up the customer to whom you want to send a text message. When the Customer Maintenance screen (General tab) opens, click Text.
If the Open Work Order List isn’t already open, click Invoicing. Then select the customer’s name and click Text.
If you're working with a customer's order, click Text on the Invoice Entry screen.
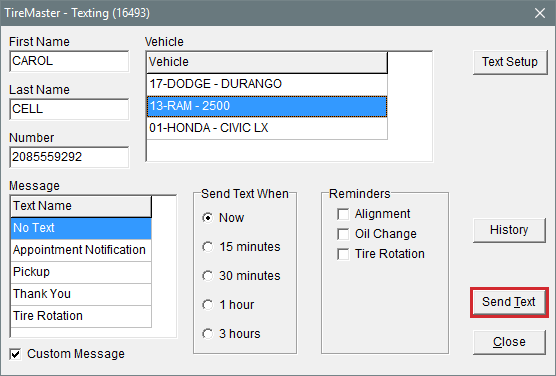
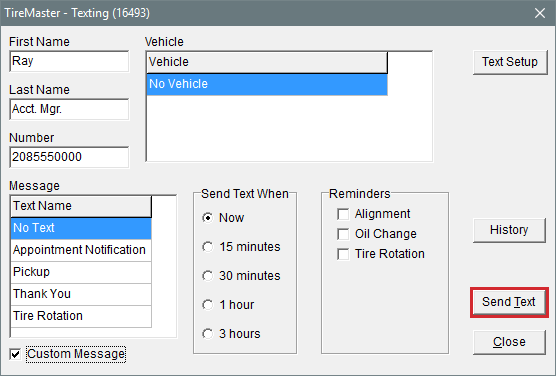
The TireMaster - Texting screen opens.
| 2. | Do one of the following if needed: |
If you want to change the entry in the Number field, type the phone number you want to use or click Customer Contacts and select a message on the list that opens.
If the Number field is empty, type the customer’s cell phone number.
If you change your mind about sending a text, click Close and disregard the remaining steps.
| 3. | Make sure the customer has opted-in to receiving text messages at the selected number. If you need to authorize text messaging, select the Send Text check box. |
| 4. | Do the following as needed: |
If you want to send a predefined message, make sure it’s selected.
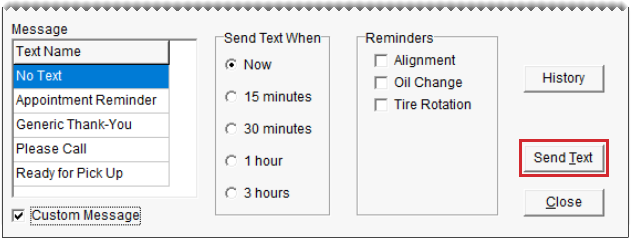
If you want to compose a message instead of using a predefined message, select the Custom Message check box.
If you want to send one or more reminders, select each reminder you want to send.
| 5. | Select the time when the message(s) will be sent. |
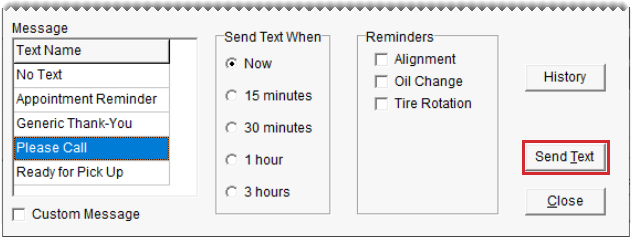
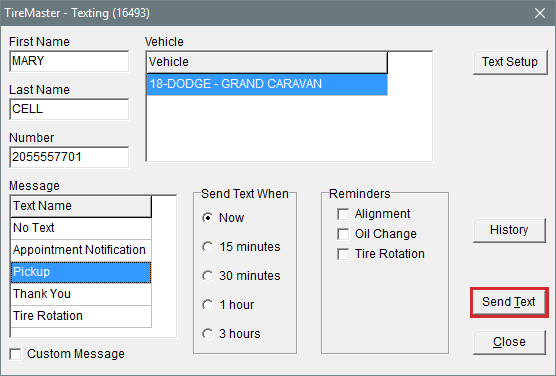
| 6. | Click Send Text. If you selected the custom message type, compose the message and click OK. |
| 7. | Close the open screens. |
When you need to text a vendor, you can send the message directly from that supplier’s vendor record.
To send a text message to a vendor
| 1. | Look up the vendor to whom you want to send a text. |
| 2. | On the Vendor Maintenance screen (General tab), click Text. The TireMaster - Texting screen opens. |
| 3. | Do one of the following if needed: |
If you want to change the entry in the Number field, type the phone number you want to use or click Customer Contacts and select a message on the list that opens.
If the Number field is empty, type the vendor’s cell phone number.
If you change your mind about sending a text, click Close and disregard the remaining steps.
| 4. | Make sure the vendor has opted-in to receiving text messages at the selected number. If you need to authorize text messaging, select the Send Text check box. |
| 5. | Select the Custom Message check box. |
| 6. | Select the time when the message will be sent. |
| 7. | Click Send Text. |
| 8. | Compose the message, and click OK. |
If texting is enabled for a work order status, you can text customers when that status is selected at point of sale. For example, if texting is enabled for the status Done, you can send a text message when the status of a work order changes from In Progress to Done. In this scenario, you’d text customers to let them know that their vehicles are ready for pickup.
To send text messages for work order status changes
| 1. | If the work order isn’t already open, complete the following steps. |
| a. | Click Invoicing. |
| b. | Select the work order whose status you want to change and click Select. The Invoice Entry screen opens. |
| 2. | Select a status on the lower-left corner of the screen. The TireMaster - Texting screen opens. |
| 3. | Do one of the following if needed: |
If you want to change the entry in the Number field, type the phone number you want to use or click Customer Contacts and select a number from the list that opens.
If the Number field is empty, type the customer’s cell phone number.
If you change your mind about sending a text, select the message No Text, click Close, and disregard the remaining steps.
| 4. | Make sure the customer has opted-in to receiving text messages at the selected number. If you need to authorize text messaging, select the Send Text check box. |
| 5. | Do one of the following: |
Make sure the predefined message that corresponds to the status change is selected. For example, if you just changed the work order status to Done, make sure the vehicle-pickup message is selected.
If you want to compose your own message instead, select the Custom Message check box.
| 6. | Define when to send the message. |
| 7. | Click Send Text. If you selected the custom message type, compose the message and click OK. |
| 8. | Close the open screens. |
You can send customers text messages, such as thank yous and service reminders, when you finalize sale invoices. This functionality is available when texting has been enabled for completed invoices and the customer has opted-in to receiving text messages.
To send text messages for completed invoices
| 1. | Begin the invoice completion process as usual. For more information, see Complete an Invoice. |
| 2. | On the Invoice Completion screen, enter the payment information. |
| 3. | Make sure the Text check box is selected and click OK. The TireMaster - Texting screen opens. |
| 4. | Do one of the following if needed: |
If you want to change the entry in the Number field, type the phone number you want to use or click Customer Contacts and select a number from the list that opens.
If the Number field is empty, type the customer’s cell phone number.
If you change your mind about sending a text, select the message No Text, click Close, and disregard the remaining steps.
| 5. | Make sure the customer has opted-in to receiving text messages at the selected number. If you need to authorize text messaging, select the Send Text check box. |
| 6. | Do the following as needed: |
If you want to send a predefined thank you message, make sure it’s selected.
If you want to compose a message instead of using a predefined message, select the Custom Message check box.
If you want to send one or more reminders, select each reminder you want to send.
| 7. | Select the time when the message(s) will be sent. |
| 8. | Click Send Text. If you selected the custom message type, compose the message and click OK. |
| 9. | Complete and print the invoice as usual. |
When you process a received on account (ROA) payment or add a deposit to a customer's work order, you can send a confirmation or thank you message to the customer.
To send an ROA or deposit text message
| 1. | Start the process of taking a customer account payment or deposit For more information, see ROAs or Deposits |
| 2. | Enter the payment or deposit amount, date, and any needed comments on the completion screen for ROAs and deposits. |
| 3. | Select the Text check box and click OK. |
| 4. | Do one of the following if needed: |
If you want to change the entry in the Number field, type the phone number you want to use or click Customer Contacts and select a message on the list that opens.
If the Number field is empty, type the customer’s cell phone number.
If you change your mind about sending a text, click Close and disregard the remaining steps.
| 5. | Make sure the customer has opted-in to receiving text messages at the selected number. If you need to authorize text messaging, select the Send Text check box. |
| 6. | Do the following as needed: |
If you want to send a predefined message, make sure it’s selected.
If you want to compose a message instead of using a predefined message, select the Custom Message check box.
If you want to send one or more reminders, select each reminder you want to send.
| 7. | Select the time when the message will be sent. |
| 8. | Click Send Text. If you selected the custom message type, compose the message and click OK. |
TireMaster can be set up to automatically send appointment reminders to customers at 4:05 p.m. daily. Messages are sent one day before appointments are scheduled.
On the Appointment List, the entries in the Text column indicate the following:
Text messages are ready to be sent for appointments.
Text messages have been sent for appointments.
Texting for appointments has been turned off.
Texting for appointments is not available. (The customer doesn’t have a cell phone.)
Before automated appointment reminders can be sent to customers, texting of this information needs to be enabled. For more information, see Enable Automated Appointment Reminders.
When TMText is installed, the Open Work Order List has an additional column labeled Text. It displays codes that identify the most recent type of activity that occurred in the texting history for customers who have open work orders.
The following status codes are used for text messages:
Sent indicates that a text message has been sent to the customer
Rcvd indicates that a reply has been received from the customer.
Read indicates that a reply from the customer has been read.
The text message status updates every two minutes. For more information, see Text Message History.
Text message history is available on the Text Message Tracking screen.
To view text message history
| 1. | Open the TireMaster - Texting screen using one of the following methods: |
Select the customer’s name on the Open Work Order List, and click Text.
Look up the customer or vendor. When the Customer Maintenance or Vendor Maintenance screen opens (General tab), click Text.
Change the status of a work order. The texting screen opens automatically when texting is enabled for the status you just selected.
Begin the invoice completion process. The texting screen opens automatically when texting is enabled for completed invoices and texting is allowed for the customer’s cell phone number.
| 2. | Click History. The Text Message Tracking screen opens. A list of sent and received messages appears on the left side of the screen. |
| 3. | To see threads for a message, select the message. The threads are displayed on the right side of the screen. |
| 4. | Do the following as needed: |
To list all text messages (instead of those for the selected customer), select the All Messages check box.
For a hard copy of the messages listed, click Print Texts.
To indicate you’ve read a message, select it and click Mark Read. The status of the message will change to Read on the Open Work Order List.
| 5. | Close the open screens. |
