Process Vendor Charges in Batches
This help topic is applicable to the following TireMaster applications:
|
TireMaster Point of Sale |
TireMaster Plus |
TireMaster Corporate |
|---|---|---|

|

|
If you process a high volume of charges for a vendor, you might want to process that vendor’s changes in a batch. The charges in a batch can be completed as soon as they’re entered, or you can save the batch and add new charges to it later. Because TireMaster keeps a running total of all the charges in a batch, you can easily compare that total to the statement issued by the vendor.
You can create a group of charges for a single vendor. The charges can be completed right away or saved for processing at a later time. Batches created at one site can include charges for other sites.
To process a batch of vendor charges
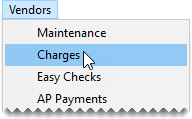
| 1. | Select Vendors > Charges. The Vendor Charges screen opens. |
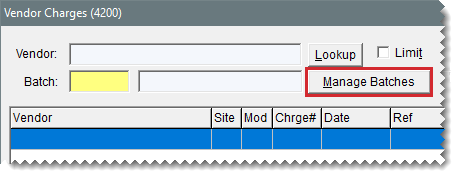
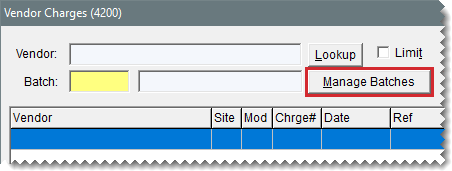
| 2. | Click Manage Batches. The AP Batch Charges screen appears. |
 .
.| 3. | Create a batch for the group of charges you need to process: |
| a. | Click New Batch and select a vendor from the list. The Batch Description screen opens. |
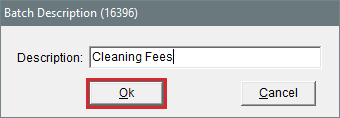
| b. | Type a name for the batch and click OK. |
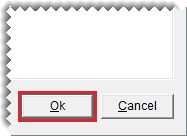
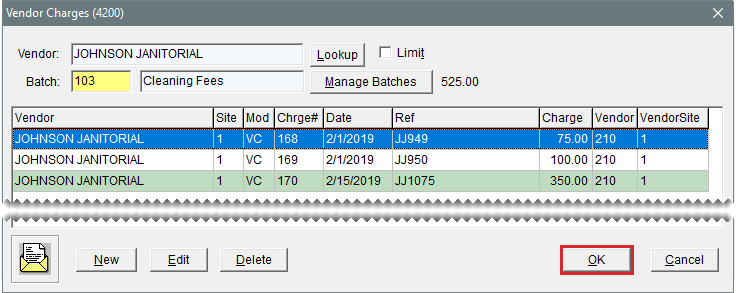
| c. | To close the AP Batch Charges screen, click OK. The Vendor Charges screen opens. |
| 4. | Enter each charge for the new batch: |
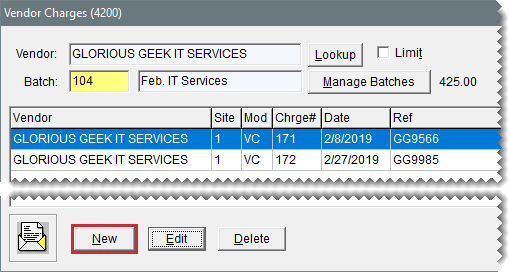
| a. | Click New. TireMaster prompts you to use the selected vendor |
| b. | Click Yes. TireMaster prompts you to use the selected batch. |
| c. | Click Yes. The Vendor Charge screen opens. |
| d. | Create one or more charges for the vendor. For more information, see Enter a Vendor Charge. |
| 5. | When you’re done entering each charge, click OK. TireMaster prompts you to print the Charge Edit Report. |
| 6. | Click Yes. The Report Window opens. |
| 7. | Print the report and close the Report Window. TireMaster prompts you to complete the charges. |
| 8. | To finish processing the batch of charges now, click Yes. To save the batch of charges, click No. Then click Cancel to exit the Vendor Charges screen. |
If you saved a batch of vendor charges, you can easily retrieve it.
To retrieve a batch of vendor charges
| 1. | Select Vendors > Charges. The Vendor Charges screen opens. |
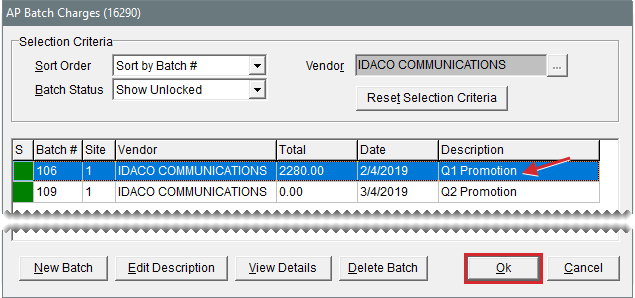
| 2. | Click Manage Batches. The AP Batch Charges screen appears. |
| 3. | Select the batch you want to update. If you can’t find the batch you’re looking for, do the following as needed: |
Select a different sort order from drop-down.
Select a different batch status from the drop-down.
Display batches for a single vendor. Click  next to the Vendor field and select a vendor from the list.
| 4. | Click OK. The Vendor Charges screen opens. You can add more charges to the batch, delete it, view its totals, or finish processing it. |
If you’ve saved a batch of vendor charges, you can update it by adding or removing charges.
To update a batch of vendor charges
| 1. | Look up a batch of vendor charges. For more information, see Retrieve a Batch of Vendor Charges. |
| 2. | To add a new charge to the batch, do the following. |
| a. | Click New. |
| b. | Click Yes when prompted to use the selected vendor. |
| c. | Click Yes when prompted to use the selected batch. |
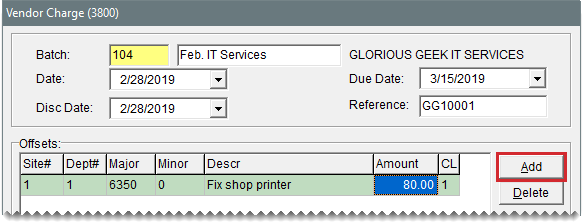
| d. | Select the charge date, discount date, and payment due date from the pop‑up calendars. |
| e. | Type a reference number for the charge if needed. |
| f. | Click Add and make the offsetting entry for the charge. For more information, see Enter a Vendor Charge. |
| 3. | To remove a charge from the batch: |
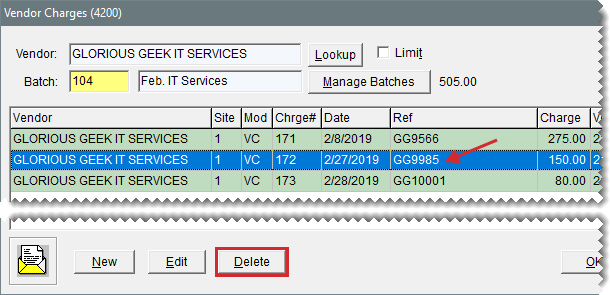
| a. | Select the charge you want to remove and click Delete. |
| b. | Click Yes to confirm that you want to remove the selected document from the batch. |
| c. | Click Yes to confirm that you want to delete the document. |
| 4. | When you’re finished updating the batch of charges, close the Vendor Charges screen or process the charges. For more information, see Create a Batch of Vendor Charges. |
If you have several individual charges for a particular vendor that haven’t been completed, you can add them to an existing batch for that vendor.
To add a charge to a batch
| 1. | Select Vendors > Charges. The Vendor Charges screen opens. |
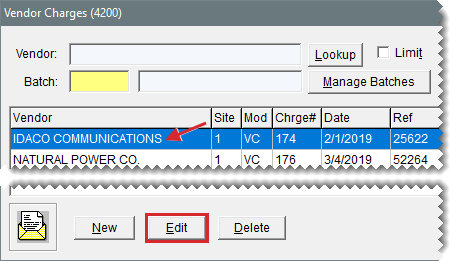
| 2. | Select the charge you want to assign to a batch and click Edit. The Vendor Charge screen opens. |
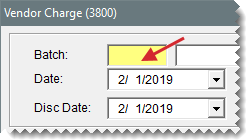
| 3. | Click the Batch field and press  . The AP Batch Charges screen opens. . The AP Batch Charges screen opens. |
| 4. | Select the batch you want to assign the charge to and click OK. A confirmation message appears. |
| 5. | Click Yes to return to the Vendor Charge screen. |
| 6. | Click OK. TireMaster prompts you to save the charge. |
| 7. | Click Yes. |
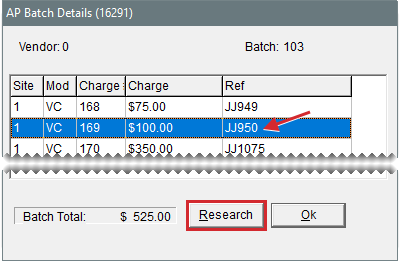
When a vendor sends you a statement, compare it to your records in TireMaster Corporate. You can view the running total for a batch and the individual charges for it on the AP Batch Details screen.
To view a batch of vendor charges
| 1. | Look up a batch of vendor charges. For more information, see Retrieve a Batch of Vendor Charges. |
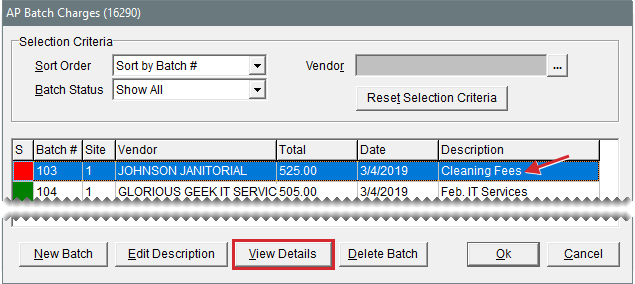
| 2. | Select the batch you want to see, and click View Details. The AP Batch Details screen opens. |
| 3. | To see the entries that posted to the general ledger for a charge, select the charge and click Research. |
| 4. | To close the AP Batch Details screen, click OK. |
If you no longer need a particular batch of vendor charges or if you created a batch in error, you can delete it. Only unlocked batches can be deleted.
To delete a batch of vendor charges
| 1. | Look up a batch of vendor charges. For more information, see Retrieve a Batch of Vendor Charges. |
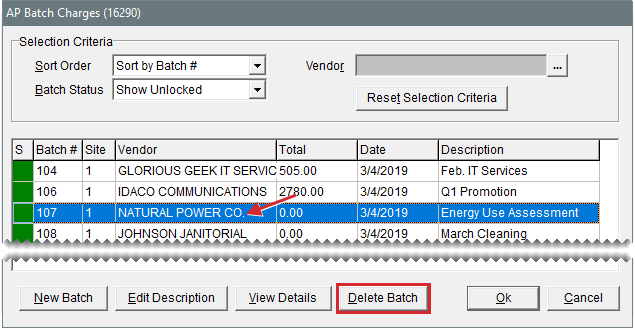
| 2. | Select the batch you want to delete, and click Delete Batch. |
| 3. | To confirm that you want to delete the batch, click Yes. |
| 4. | To confirm that you want to delete the charges included in the batch, click Yes. To delete the batch only, click No.The charges that were once part of the batch are listed individually on the Vendor Charges screen. |
