Departments
This help topic is applicable to the following TireMaster applications:
With departments, you can track the profitability of different segments of your business. The profitability for each department is displayed on the income statement. The department number is also included in GL account numbers to show which departments transactions posted to.
If you use multiple departments, you need to set them up in one of the following ways:
By customer types, such as wholesale and retail (see Customer Method
)
By types of inventory items and services sold (see Inventory Method
)
With multiple departments, you need to assign departments to several program settings and you need to select which department various transactions should post to. For some transactions, such as manual journal entries, you can only change the department when the transaction posts to an income or expense account (the accounts used for the income statement).
 Department Consideration
Although multiple departments can give you additional information about different segments of your business, they take time to set up and maintain. For example, having three departments triples the size of your chart of accounts. If you use multiple departments, you might want to add more accounts to the chart of accounts to generate additional information about your income and expenses. If departments are not properly maintained, you're at risk of having incorrect departmental totals on the income statement.
Note: If you want to use multiple departments, ASA recommends that you set them up them during the going-online process. Although you can add departments after going live, doing so can adversely affect the quality of your historical data.
 Add a Department
Before you set up multiple departments, determine what kind of information departments can help you gather and how many departments you need.
With multiple departments, there is a risk of user error when manually completing transactions. For example, selecting the wrong department for a journal entry can result in inaccurate information on departmental income statements. To prevent user error, give your departments names that make it easy for employees to know which departments they should post entries to.
To add departments
|
1.
|
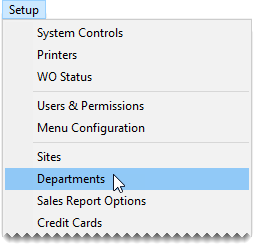
Select Setup > Departments. The Department Listing opens. |
|
2.
|
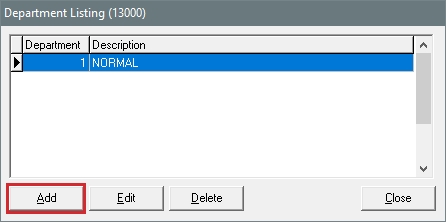
Click Add. The Department Edit screen appears. |
|
3.
|
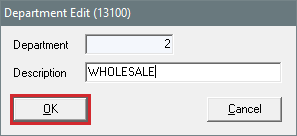
Type a description for the department. |
|
5.
|
Close the Department Listing screen. |
 Set the Default Department
In a multi-department system, you need define which department to use as the default department (that is, which department will automatically appear in various program screens that use department settings). If you don’t set up multiple departments, use the department that comes already set up in TireMaster. If you use only one department, you don’t need to define a default department because it has already been set.
Tip: Your default department should be the one that’s most frequently used.
To change the default department
|
1.
|
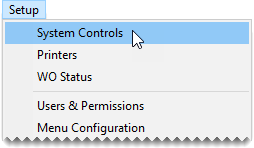
Select Setup > System Controls. The System Controls screen opens. |
|
2.
|
Click the General Ledger tab. |
|
3.
|
Select Default Department, and press Enter. |
|
4.
|
Type the number for the department that will be the default department, and click OK. |
|
5.
|
Close the System Controls screen. |
 Department Methods
When you set up departments, you need to use either the customer method or the inventory method. The method that you choose depends on the kind of information you want your departments to provide.
 Customer Method
With the customer method, you can see which types of customers generate the most profit. A retail department and a wholesale department are examples of customer method departments.
To set up departments by customer, you need to do the following:
Set the customer department method in System Controls.
Assign a department to each customer type.
To set up departments by customer
|
1.
|
To set the customer department method, do the following: |
|
a.
|
Select Setup > System Controls. The System Controls screen opens. |
|
b.
|
Click the General Ledger tab. |
|
c.
|
Scroll to the control Department Method and verify whether Customer is already assigned. If it isn’t, press Enter. Then select Customer and click OK. |
|
d.
|
Close the System Controls screen. |
|
2.
|
To assign a department to each customer type, do the following: |
|
a.
|
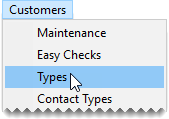
Select Customers > Types. The Customer/Vendor Type List opens. |
|
b.
|
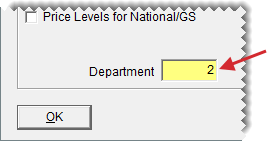
Select the customer type that you want to assign a department to and click Edit. The Customer/Vendor Type Edit screen opens. |
|
c.
|
Click the Department field and press  . Then select a department from list that appears. . Then select a department from list that appears. |
|
d.
|
To save you changes, click OK |
|
e.
|
Repeat steps 2b through 2d to assign departments to the remaining customer types. |
|
f.
|
Close the Customer/Vendor Type List. |
 Inventory Method
With the inventory method, you can see which types of items and services, such as tires and brake jobs, generate the most profit. A tire department and a repair department are examples of inventory method departments.
To set up departments by inventory, you need to do the following:
Set the inventory department method in System Controls.
Assign departments to each inventory GL code.
To set up departments by inventory
|
1.
|
Set the inventory department method. |
|
a.
|
Select Setup > System Controls. The System Controls screen opens. |
|
b.
|
Click the General Ledger tab. |
|
c.
|
Select Department Method and press Enter. |
|
d.
|
Select Inventory and click OK. |
|
e.
|
Close the System Controls screen. |
|
2.
|
Assign a department to each GL Code. |
|
a.
|
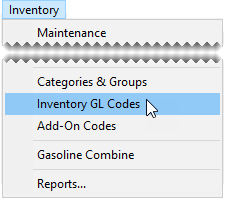
Select Inventory > Inventory GL Codes. The Inventory GL Code List opens. |
|
b.
|
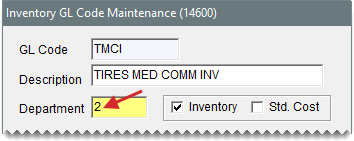
Select the GL code that you want to assign to a department to and click Edit. The Inventory GL Code Maintenance screen appears. |
|
c.
|
Click the Department field and press . Then select the appropriate department from list that appears. |
|
d.
|
To save your changes, click OK. |
|
3.
|
Close the Inventory GL Code List. |
 Change the Department at Point of Sale
If you want an invoice to post to a department that's not the one assigned to a customer type or an inventory GL code, you can override the setting at point of sale.
To change a department at point of sale
|
1.
|
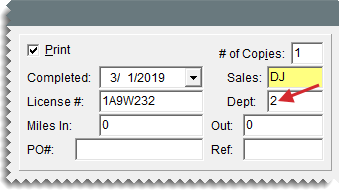
Begin the process of completing an invoice as usual. For more information, see Complete an Invoice. The Invoice Completion screen opens. |
|
2.
|
Type the number of the department that you want the invoice to post to in the Dept field. |
|
3.
|
Fill in the remaining fields as needed, and click OK. |
 Rename a Department
If you dislike the description for a department, you can rename it.
To rename a department
|
1.
|
Select Setup > Departments. The Department Listing opens. |
|
2.
|
Select the department you want to rename and click Edit. |
|
3.
|
Type a new description and click OK. |


 . Then select a department from list that appears.