Work Orders and Invoices
This help topic is applicable to the following TireMaster applications:
|
TireMaster Point of Sale |
TireMaster Plus |
TireMaster Corporate |
|---|---|---|

|

|

|
When a customer needs to purchase items and services, you’ll usually start a work order, which will be turned into an invoice upon completion of the sale.
When a sale requires little or no special handling, create a regular work order. Creating a work order includes gathering customer and vehicle information and defining which items to sell.
To create a regular work order
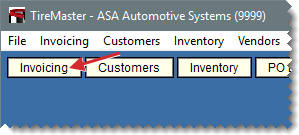
| 1. | Click Invoicing. The Open Work Order List opens. |
| 2. | Click New Work Order. TireMaster prompts you for the customer's name. |
| 3. | Enter the customer information: |
For a returning customer, look up the customer. For more information, see Customer Searches.
For a new customer, click Cancel and add the customer. For more information, see Add a Cash Customer or Add an AR Customer.
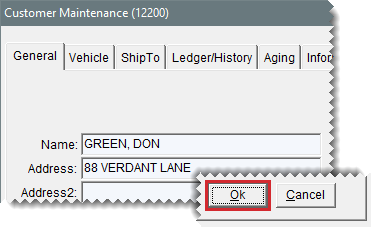
| 4. | Click OK to close the Customer Maintenance screen. If TireMaster prompts you for a vehicle, go to step 5. If the Work Order screen opens instead, go to step 6. |
| 5. | Enter vehicle information if needed: |
For an existing vehicle, select it from the list and click OK.
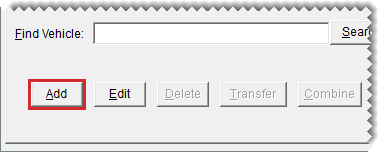
For a new customer, click Add and set up the vehicle. Then click OK to continue. For more information, see .
If there is no vehicle, click OK to continue.
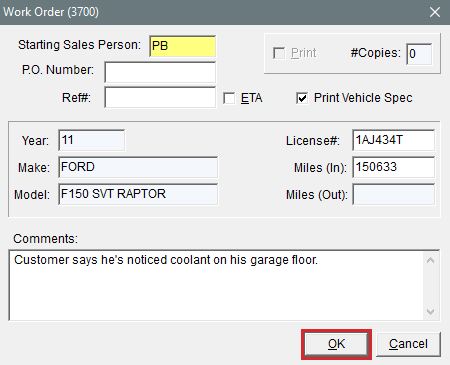
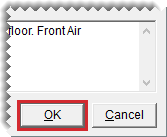
| 6. | Do the following on the Work Order screen as needed. Then click OK. |
Enter your user ID (in the Starting Salesperson) field. To enter this information, press  and select a name from the list.
Type the customer’s PO number, reference number, the vehicle’s mileage, and comments or notes about the job. (Up to four thousand characters are allowed.)
Select the Print Vehicle Spec check box if you want a hard copy of Epicor‘s specifications for the vehicle. The specs will print on a separate sheet of paper.
| 7. | If you need to change the contact information, type the customer’s phone number in the Contact field or click Contact and make a selection from the list that appears. |
| 8. | Add one or more items to the work order, using the following methods as needed: |
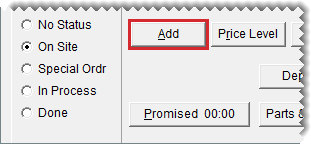
Click Add and look up an item or scan its bar code. For more information, see Inventory Searches, or Enter Bar Codes on Work Orders .
Click the Size field and type the item’s quick look (or another) code or scan its bar code.
 to add a new line. For more information, see Down Arrow Lookup Method.
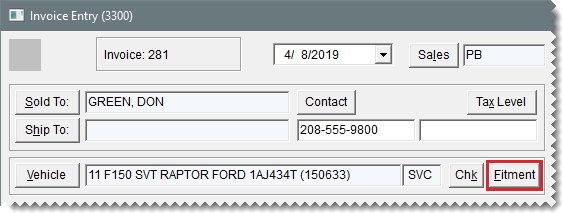
Click Fitment to look up tires for the vehicle (if you have a subscription to Tire Guide Pro Plus). For more information, see Look Up Tire Sizes at Point of Sale.
| 9. | For each item, type the quantity and press Enter. If add-ons are assigned to an item, they appear below the parent item. For more information, see Add-On Packages. |
| 10. | Change the parts price, labor price, and FET for the items if needed. |
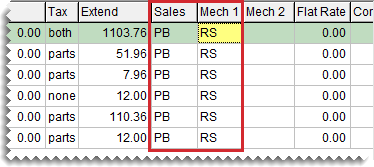
| 11. | Assign salespeople and mechanics to the items if needed, using one or both of the following methods. |
Type the employee’s user ID in the top row for the Sales, Mech 1, or Mech 2 column and press Enter or press  and make a selection from the list that appears. Depending on how a system control setting, the user ID will be entered for additional rows. For more information, see Work Orders - Mechanic Autofill.
Type the employee’s user ID in the Sales, Mech 1, or Mech 2 field for the applicable row or press  and make a selection from the list that appears.
| 12. | Set the promised time and job status if needed. For more information, see Set the Promised Time and Change a Vehicle’s Job Status. |
| 13. | Follow the steps below to print a copy of the work order, or click Quit: |
| a. | Click Work Order. The Work Order screen opens. |
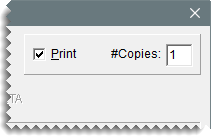
| b. | Make sure the Print check box is selected and type the number of copies you need. |
| c. | Update the remaining information on the screen if needed. |
| d. | Click OK. |
When you need to add an oil change to a customer’s work order, you can copy oil change items from one of the customer’s historical invoices to the new work order. Reusing oil change information from a previously-completed invoice helps to ensure that you consistently use the same oil filter, the same type of oil, and the correct amount of oil every time a customer comes in for oil changes.
To reuse oil change work order information
| 1. | Start a work order. For more information, see Create a Regular Work Order. |
| 2. | On the Invoice Entry screen, click Oil History. The Oil History Invoices screen opens. It lists oil change items that were sold during the past two years. |
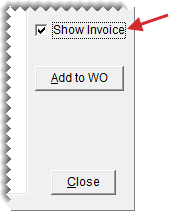
| 3. | To see additional items sold on an invoice with an oil change, select the Show Invoice check box. |
| 4. | Make sure the Add check boxes for the oil change items you want to copy to the work order are selected, and the check boxes for the items you want to exclude are clear. By default, the check boxes for only a single invoice are selected. |
| 5. | Click Add to WO. TireMaster adds the selected items to the work order. |
| 6. | Update quantities, descriptions, and prices for the items you just added, if needed. |
| 7. | Do the following as needed: |
Add other items to the work order.
Click Quit to close the work order.
Complete the invoice. For more information, see Complete an Invoice.
Creating work orders for service calls differs from creating work orders in a store, because you need to record the address where the service call occurred. Including that address on the final invoice creates a paper trail that you can use for a tax audit. Depending on the service call location, you might also need to change the tax level to ensure the proper amount of sales tax is collected.
To create a service call work order
| 1. | Start a work order and add items to it. For more information, see Create a Regular Work Order. |
| 2. | Record the address of the service call location: |
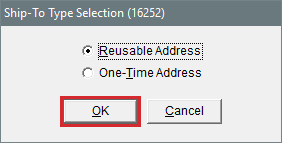
| a. | Click Ship To. The Ship-To Type Selection screen opens. |
| b. | Select one of the following: |
If the service call occurred at a location that’s on the customer’s Ship‑To List, such as a fleet warehouse or branch office, select Reusable Address and click OK. Then select the appropriate address from the list.
If the service call occurred at a location that’s not on the customer’s Ship-To List, select One-Time Address and click OK. Then type the temporary address on the Ship-To Maintenance screen, and click OK.
| 3. | Change the tax level if needed: |
| a. | Click Tax Level. The Invoice Tax Level Selection screen opens. |
| b. | For both the parts and labor levels, click Lookup and make a selection from the list. |
| c. | Click OK. TireMaster recalculates the sales tax. |
| 4. | Make additional changes to the work order if needed, print it, or complete the invoice. For more information, see Complete an Invoice. |
If you want to know the profit a sale will generate, you can view the gross profit margin for the corresponding work order.
To view a work order’s gross profit margin
| 1. | If the Invoice Entry screen isn’t already open, click Invoices. Then select the work order whose gross profit margin you want to view and click Select. |
| 2. | On the Invoice Entry screen, click GM. The GM Viewer opens and provides the following information: |
The GM$ and GM% columns display the gross margin for each item.
The GM$ and GM% fields at the bottom of the screen display the total gross margin amount and percentage.
| 3. | To close the viewer, click Cancel. |
Once a work order is started, you will likely to need to make changes to it before turning it into a sale invoice or you might find that it's not longer needed.
When you need to sell additional products or services, you can add those items to a work order. Likewise, when items aren't needed, you can delete them. You can also update a work order by making additional changes, such as changing the customer's tax level or changing the job status.
To update the work order
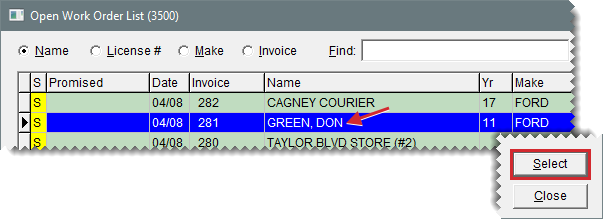
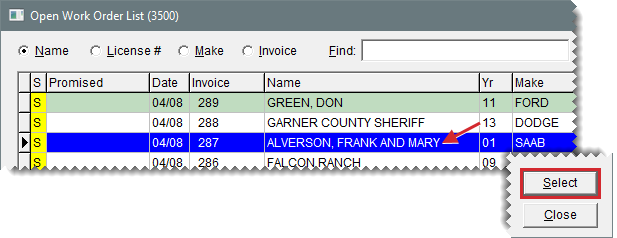
| 1. | If the Open Work Order List isn't open, click Invoicing. |
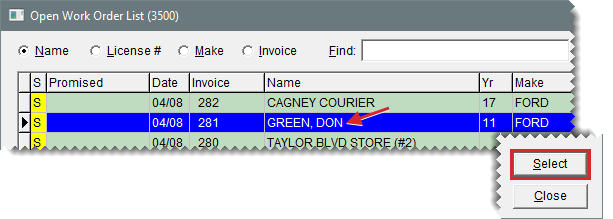
| 2. | Select the work order, and click Select. |
| 3. | Add an item to the work order, if needed, using one of the following methods. Then enter the quantity. |
Click Add and look up an item or scan its bar code. For more information, see Inventory Searches, or Enter Bar Codes on Work Orders .
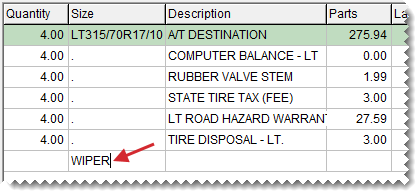
Press  , and type an item’s quick look (or another) code in the Size field or scan its bar code. For more information, see Down Arrow Lookup Method.
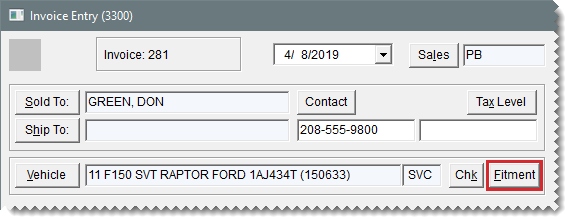
Click Fitment to look up tires for the vehicle (if you have a subscription to Tire Guide Pro Plus). For more information, see Look Up Tire Sizes at Point of Sale.
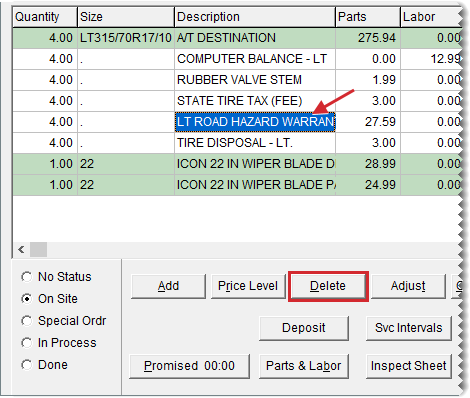
| 4. | To delete an item select it and click Delete. Then click Yes when confirmation message appears. |
| 5. | Make additional changes to the work order if needed. For information about the options available, see Invoice Entry Screen. |
| 6. | To close the Invoice Entry screen, click Quit. |
If your state’s Bureau of Automotive Repair requires you to notify customers of changes to their work orders, you can remind your employees to gather the information at point of sale.
To complete a BAR change entry
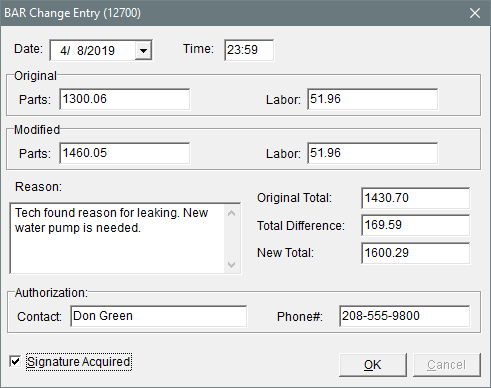
| 1. | After making a change to a work order, click Quit or Complete. The BAR Change Entry screen opens and displays the work order’s original and updated prices. |
| 2. | Type an explanation for the change in the Reason field. |
| 3. | Type the name and phone number for the person who authorized the change. |
| 4. | To verify that the customer approved the change, select the Signature Acquired check box. |
| 5. | To save the BAR change entry, click OK. |
If you have a work order for a sale that will not be completed, you can delete the work order.
To delete a work order
| 1. | If the Open Work Order List isn’t already open, click Invoicing |
| 2. | Select the work order you want to delete and click Delete. |
| 3. | If the Deleted Work Order Comment screen opens, type the reason for deleting the work order and click OK. If the confirmation message appears instead, click Yes. The deleted work order prints automatically or is displayed in the Report Window. |
| 4. | If the Report Window is open, close it. |
By pressing a single key, you view a customer’s sales history at point of sale. Having quick access to this information makes it easy to track down the date of the customer’s last visit, along with a list of items the customer has already bought, returned, or traded-in.
To view at-a-glance sales history
| 1. | If the customer's work order isn't open, click Invoicing. Then select the work order and click Select. The Invoice Entry screen opens. |
| 2. | Press F8. The Customer Sales History screen opens. |
| 3. | To define which items are displayed, select the following as needed: |
Match Inventory to display only the item selected on the Invoice Entry screen (if the customer previously bought, returned, or traded-in that item)
Match Vehicle to display only the vehicle selected for the current work order
Under 90 Days to display only invoices that are less than 90 days old
Under 180 Days to display only invoices that are less than 180 days old
All to displays all invoices
| 4. | To exit the customer’s history, click Cancel. |
In most cases, you create a work order when a customer arrives and leave it open while the work is performed. When the work is finished, you need to complete the work order to create the final invoice.
To complete an invoice
| 1. | Select the work order that you want to complete: |
| a. | If the Open Work Order List is not already open, click Invoicing. |
| b. | Select the work order and click Select. The Invoice Entry screen opens. |
| 2. | Update the work order if needed. This can include adding or removing items, making sure that quantities have been entered, assigning mechanics and salespeople for each item, updating the comments in the WO Notes tab, or updating the amount in the Flat Rate column. For more information, see Calculate Mechanic Productivity. |
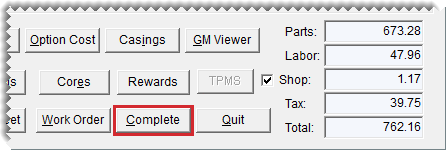
| 3. | Click Complete. The Invoice Completion screen opens. |
| 4. | Enter the payment information: |
| a. | Click the field for the type of payment the customer is using. |
| b. | Type the payment amount or press to enter the invoice total. |
| 5. | Make sure the Print check box is selected and the number of copies is set. |
| 6. | Enter the following information as needed: |
The vehicle’s license plate number
The ending salesperson’s user ID (type it or press and select it from a list)
The vehicle’s beginning and ending mileage
A PO or reference number
A message for the customer
| 7. | If you need to include a tax exemption certificate on the invoice, select the Tax Exempt Cert check box. Otherwise, leave it blank. |
| 8. | If you want to associate the invoice with up to three postcards, click Marketing. For more information, see Associate an Invoice with a Postcard. |
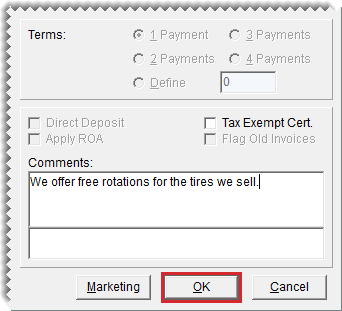
| 9. | Click OK. TireMaster prompts you to complete and print the invoice. |
| 10. | Click Yes. |
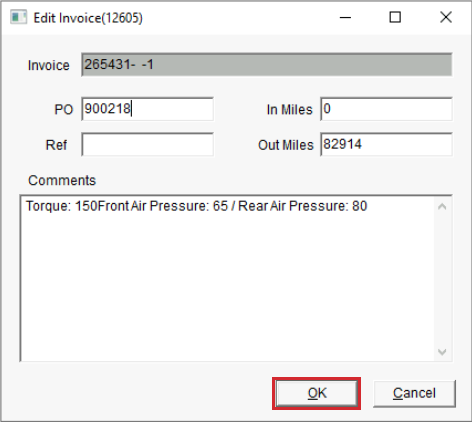
If you need to add details to a completed invoice or update existing invoice information, you can retrieve the document and make the changes. Editing the following invoice fields is allowed:
PO number
Reference Number
Mileage In
Mileage Out
Comments
The changes made to an edited invoice are included on reprinted invoice copies
To edit an invoice
| 1. | Look up the completed invoice using Invoice and Document Search. For more information, see Search for Invoices and Other Documents |
| 2. | Make sure the invoice you want to update is selected, and click Edit. The Edit Invoice screen opens. |
| 3. | Add missing information or change the existing entries as needed. |
| 4. | Click OK. |
| 5. | Close the Invoice/Document Search screen. |
If you make an mistake on a customer’s invoice, you can reverse it. Then you can automatically create a new work order with the same items and quantities if needed. You can begin invoice reversals in two places:
The Open Work Order List
The Invoice/Document Search screen
| 1. | Click Invoicing. The Open Work Order List opens. |
| 2. | Click Rev. Invoice. TireMaster prompts you to look up an invoice to reverse. |
| 3. | Click Yes. The Name Lookup/Entry screen opens. |
| 4. | Search for the customer whose invoice you want to reverse. The Customer Maintenance screen opens. For more information, see Customer Searches. |
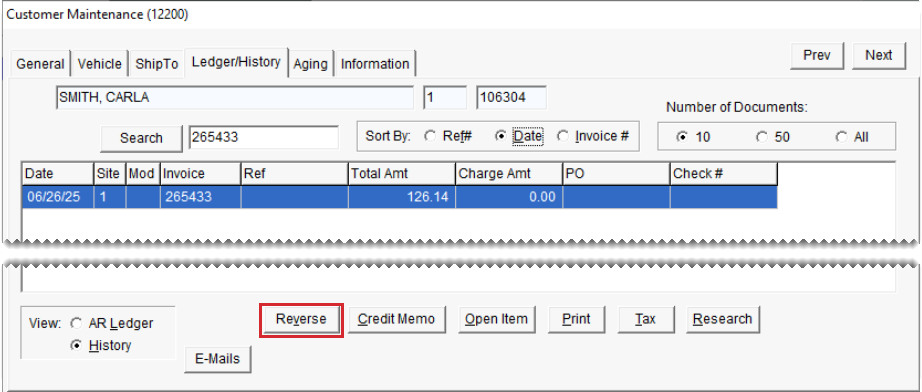
| 5. | Click the Ledger/History tab. |
| 6. | Select the invoice you want to reverse and click Reverse. A confirmation message appears. |
| 7. | Click Yes. TireMaster prompts you to create a new work order that is a duplicate of the reversed invoice. |
| 8. | If you want to create a duplicate work order, click Yes. TireMaster reverses the current invoice and creates a work order with the same items and quantities. If you don’t want to duplicate the work order, click No instead. Regardless of whether you click Yes or No, all previous charges are reversed. |
| 1. | Look up the invoice you want to reverse with Invoice and Document Search. For more information, see Search for Invoices and Other Documents |
| 2. | Make sure the invoice you want to reverse is selected, and click Reverse. |
The Customer Maintenance screen opens.
| 3. | Make sure the invoice is selected, and click Reverse. A confirmation message appears. |
| 4. | Click Yes. TireMaster prompts you to create a new work order that is a duplicate of the reversed invoice. |
| 5. | If you want to create a duplicate work order, click Yes. TireMaster reverses the current invoice and creates a work order with the same items and quantities. If you don’t want to duplicate the work order, click No instead. Regardless of whether you click Yes or No, all previous charges are reversed. |
| 6. | Close the Invoice/Document Search screen. |
You can reuse the contents of previously-completed sale invoices to create new quotes and work orders. Reusing invoices saves time and helps to ensure consistency when a current job needs to be handled in the same manner as a prior job.
To reuse an invoice
| 1. | Click Invoicing. The Open Work Order List opens. |
| 2. | Click Reuse Invoice. |
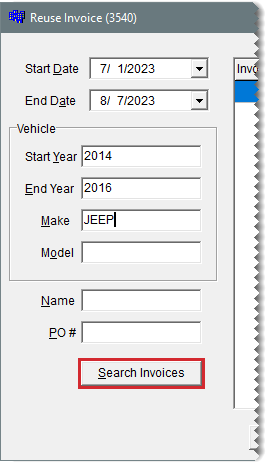
| 3. | Search for the invoice using one or more of the following criteria: |
Invoice date or date range. For a single day, use the same date in both the starting and ending date fields.
Vehicle year or a range of vehicle years. For a single year, use the same year in both the starting and ending year fields.
Vehicle make
Vehicle model
Customer name
Customer purchase order number
| 4. | Click Search Invoices. TireMaster retrieves invoices that match the search criteria. |
| 5. | Select the invoice you want to reuse. |
| 6. | To use prices from the original invoice on the new work order or quote, select the Use Original Pricing checkbox. |
| 7. | Click one of the following: |
Create WO
Create Quote
TireMaster prompts you to search for the customer and choose a vehicle. For more information, see Customer Searches.
| 8. | When the confirmation message appears, click OK. |
| 9. | Close the Reuse Invoice screen. New work orders are added to the Open Work Order List. New quotes can are available on the Quote and Estimate List. |
 . The duplicated invoice items are listed under the Import line on the lower half of the screen.