Fiscal Calendar
This help topic is applicable to the following TireMaster applications:
|
TireMaster Point of Sale |
TireMaster Plus |
TireMaster Corporate |
|---|---|---|

|
|
|
In TireMaster, a fiscal calendar is used to implement your fiscal year. A fiscal year is the 12 month period businesses and government agencies use for accounting, budgeting, and reporting earnings. Access to the fiscal calendar module varies, depending on your TireMaster system.
If you're running TireMaster Point of Sale, ![]() click here.
click here.
If you're running TireMaster Plus, ![]() click here.
click here.
If you're running TireMaster Corporate, ![]() click here
click here
When you go online, you need to set up the fiscal calendar for the current year and any previous years for which you need to make journal entries. For some companies, fiscal periods start on the first day of the month and end on the last day of the month. After going live, you need to update the calendar for each new fiscal year.
To set the fiscal calendar
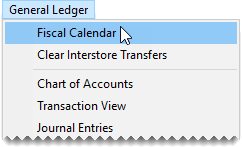
| 1. | Select General Ledger > Fiscal Calendar. The Fiscal Calendar opens. |
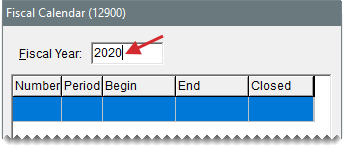
| 2. | In the Fiscal Year field, type the earliest fiscal year for which you’ll make journal entries. |

| 3. | Click Add Period. The Date Range screen opens. |

| 4. | Do one of the following: |
To use the default date range, click OK.
To change the date range, select an ending date from the pop‑up calendar and click OK.
A new period is added to the fiscal calendar.
| 5. | Repeat steps 3 and 4 for each of the remaining periods you need to add. |
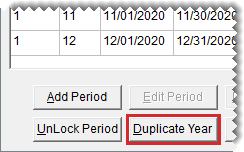
| 6. | To add more years to the fiscal calendar, click Duplicate Year for each additional year. |
| 7. | Close the Fiscal Calendar screen. |
Although it’s rare, some businesses decide to change their fiscal calendar. A business might change its fiscal year under the following circumstances:
A new owner buys the company
The company gets a new accountant who wants to change the bookkeeping system
The company hasn’t been in existence for an entire fiscal year
To change the fiscal calendar, you need to receive permission from the Internal Revenue Service.
To implement changes to the fiscal calendar, you need to create a short tax year. A short tax year is a fiscal year that’s less than 12 months.
When you change the fiscal calendar, TireMaster uses a fiscal number to distinguish the short fiscal year from the new fiscal year. Typically, the number 1 identifies the short year and number 2 identifies the new fiscal year. TireMaster resets the number to 1, once both the short year and the new fiscal year of 12 periods are completed.
To change the fiscal year
| 1. | Select General Ledger > Fiscal Calendar. The Fiscal Calendar opens. |
| 2. | In the Fiscal Year field, type the year that you want to turn into a short year. |
 to select the year.
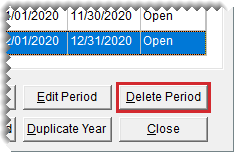
| 3. | Select the last period for the year, and click Delete Period. The period is removed from the Fiscal Calendar screen. |
| 4. | Repeat step 3 to delete remaining periods that are not part of the short year. |
| 5. | Create the first period of the new fiscal year. |
| a. | Click Add Period. The Date Range screen opens. |

| b. | If you need to change the ending date, select a date from the pop-up calendar. |
| c. | To change the fiscal number for the new fiscal year, click  . The Security Pass Code screen appears. . The Security Pass Code screen appears. |
| d. | Type the security code provided by TireMaster Support and click OK. |
| e. | To save your changes and exit the Date Range screen, click OK. |
| 6. | Add the remaining periods of the new fiscal year. |
| a. | Click Add Period. The Date Range screen opens. |
| b. | Verify the ending date is correct, and click OK. |
| c. | Repeat steps a and b until the new fiscal year has 12 periods. |
| 7. | Close the Fiscal Calendar screen. |
Before you can post an entry to a fiscal period that has been closed, you need to unlock the period on the Fiscal Calendar screen. Once the entry has posted, you can relock the period. Fiscal periods are locked during the month end closing process. For more information, see Lock a Fiscal Period (TireMaster Plus and TireMaster Corporate).
If a fiscal period is part of a fiscal year that has been closed, it cannot be unlocked.
To unlock a fiscal period
| 1. | Select General Ledger > Fiscal Calendar. The Fiscal Calendar opens. |
| 2. | Select the period that you want to unlock, and click Unlock Period. The status changes from closed to open. |
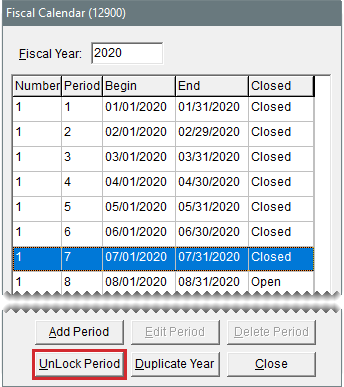
| 3. | Close the Fiscal Calendar screen. |
Now you can post entries to the period that you just unlocked. When you’re done, relock the period. For instructions, see Lock a Fiscal Period (TireMaster Plus and TireMaster Corporate).