GL Classes
This help topic is applicable to the following TireMaster applications:
|
TireMaster Point of Sale |
TireMaster Plus |
TireMaster Corporate |
|---|---|---|

|

|
With GL classes, you can display information for each type of sale in its own section on the income statement. Therefore, you can report the profit (or loss) for items that bring in little or no money separately from items sold under normal circumstances.
Low-profit or no-profit items include tires that are sold in national account, government support, adjustment, and transfer sales. When sales figures for these items are combined with the sales figures for items sold at their regular prices, the overall gross profit margin is lowered.
In TireMaster, sales are typically divided into the following GL classes:
Class 1: Normal Sales
Class 2: Transfer Sales
Class 3: NA/GS/ADJ Sales (for national account, government support, and adjustment sales)
When you print an income statement, you can do one of the following:
Display a summary of the net gain or loss for a particular type of sale. For this summary, roll up a GL class.
Display the sales and cost totals for a particular type of sale. To include these totals, don’t roll up a GL class.
GL classes are also part of general ledger account numbers. For more information, see General Ledger Account Numbers.
The amount of detail on your income statements depends on the number of GL classes. The startup database in new TireMaster systems includes the following GL classes:
Class 1: Normal Sales
Class 2: Transfer Sales
Class 3: NA/GS/ADJ Sales
With these settings, national account, government support, and adjustment sales are lumped into one GL class. If you want a separate profit (loss) report for each type of sale, you could set up your GL classes in the following manner:
Class 1: Normal Sales
Class 2: Transfer Sales
Class 3: National Account Sales
Class 4: Government Support Sales
Class 5: Adjustments
You can also add detail to the income statement by setting up GL classes based on your vendors:
Class 1: Normal sales
Class 2: Transfer Sales
Class 3: Goodyear Sales
Class 4: Tires Express Sales
Class 5: Napa Sales
Class 6: O'Reilly Sales
Class 7: Other Vendors
You can use GL classes to affect the appearance of information on the income statement. Each GL class that you add increases the amount of detail on the income statement.
To add a GL class
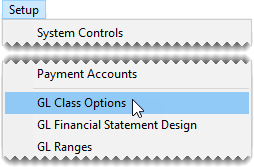
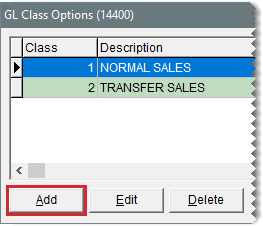
| 1. | Select Setup > GL Class Options. The GL Class Options screen opens. |
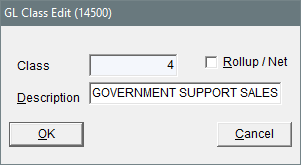
| 2. | Click Add. The GL Class Edit screen opens. |
| 3. | Type a description for the GL class. |
| 4. | To save the new GL class, click OK. |
| 5. | Close the GL Class Options screen. |
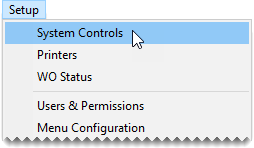
Typically, the GL class for normal sales is the default GL class. If needed, you can change this setting in System Controls.
To set the default GL class
| 1. | Select Setup > System Controls. The System Controls screen opens. |
| 2. | Click the General Ledger tab. |
| 3. | Select Default GL class, and press Enter. |
| 4. | Type the number for the GL class that you want to use as the default. |
| 5. | Click OK. |
If you dislike the description for a GL class, you can rename it.
To rename a GL class
| 1. | Select Setup > GL Class Options. The GL Class Options screen opens. |
| 2. | Select the GL class you want to rename and click Edit. |
| 3. | Type a new description for the GL class and click OK. |
If you have never used a particular GL class, you can delete it.
To delete a GL class
| 1. | Select Setup > GL Class Options. The GL Class Options screen opens. |
| 2. | Then select the GL class you want to delete and click Delete. A confirmation message appears. |
| 3. | Click Yes. The GL class is removed. |


