Year End Procedures
This help topic is applicable to the following TireMaster applications:
|
TireMaster Point of Sale |
TireMaster Plus |
TireMaster Corporate |
|---|---|---|

|
|
|
Closing a fiscal year provides a fresh start for accumulating information for a new fiscal year.
Closing a fiscal year shows the increase or decrease in the owner’s equity, and it provides a fresh start for accumulating information for a new fiscal year. Closing the year includes closing fiscal period 12 and making adjusting entries recommended by your accountant. Once you perform those tasks, you can formally close the year in TireMaster, which results in the following:
Income and expense accounts are closed, and any profit or loss is posted to the owner’s retained earnings account.
No additional transactions (manual or system‑generated) can post to the year that was just closed.
To close a year
| 1. | At the end of the year, close and lock period 12. For more information, see (TireMaster Plus and TireMaster Corporate) and Lock a Fiscal Period (TireMaster Plus and TireMaster Corporate). |
| 2. | Generate the reports requested by your accountant. |
| 3. | Unlock period 12, and make any adjusting entries recommended by your accountant. When you’re done, lock period 12 again. For more information, see Unlock a Fiscal Period. |
| 4. | Have your accountant review the adjusting entries. |
| 5. | Back up your data to removable media. For more information, see Year End Backups. |
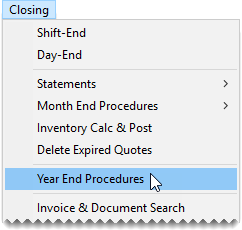
| 6. | Select Closing > Year End Procedures. A confirmation message appears. |
| 7. | Click Yes. The Report Window opens and displays the JE Edit Report. |
| 8. | Print the report and close the Report Window. A second confirmation message appears. |
| 9. | Click OK. |
Because TireMaster Point of Sale doesn’t have a general ledger or accounts payable, you don’t actually perform a year end closing process with the application. However, you need to complete additional steps when closing Period 12.
To close period 12
| 1. | Apply any outstanding payments and credits in the customer open item ledger. |
| 2. | Take a physical inventory count (optional). |
| 3. | Delete expired quotes (optional). For more information, see Delete Expired Quotes. |
| 4. | Reset the quantities of noninventoriable items (optional). For more information, see Reset Quantities of Noninventoriable Items. |
| 5. | Generate any reports requested by your accountant. |
| 6. | Back up your data to a removable storage device. For more information, see Backups. |