Vendor Tab Reports
This help topic is applicable to the following TireMaster applications:
|
TireMaster Point of Sale |
TireMaster Plus |
TireMaster Corporate |
|---|---|---|

|

|
These reports provide information about your vendor accounts.
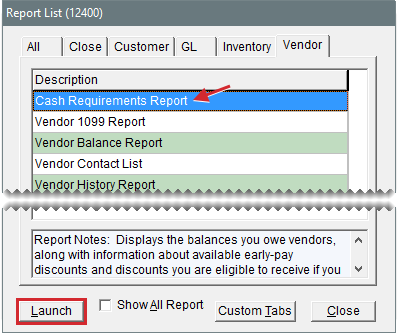
This report can help you make decisions about paying your vendors. It displays the balances you owe vendors, along with information about available early pay discounts and discounts you are eligible to receive if you pay by the discount due date.
To generate a Cash Requirements Report
| 1. | Select Vendors > Reports. The Report List opens with the Vendor tab selected. |
| 2. | Select Cash Requirements and click Launch. The Cash Requirements Report screen opens. |
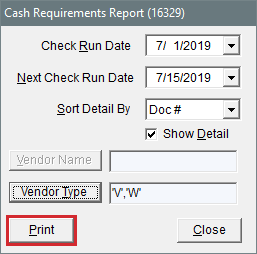
| 3. | Change the check run and next check run dates if needed. |
| 4. | Select one of the following methods for organizing purchase orders and vendor charges from the Sort Detail By drop-down: |
Doc #
Doc Date
Due Date
Reference
To generate the report in summary view instead, clear the Show Detail check box.
| 5. | Look up the balances for one or more vendors: |
For all vendor balances, leave the Vendor Name and Vendor Type fields blank.
For one vendor’s balance, click Vendor Name. Then look up the vendor.
To retrieve balances for specific vendor types, click Vendor Type. Then select one or more types from the list.
| 6. | Click Print. The Report Window opens. |
| 7. | Print the report and close the Report Window. |
| 8. | Close the Cash Requirements Report screen. |
With this report, you can see how much you paid your 1099 vendors and generate information needed to complete IRS form 1099-Misc. You can also use it throughout the year to see how much you paid your 1099 vendors during a specific date range. You can refer to this report when completing IRS form 1099 Misc or convert it into a .CSV file., which can be imported into tax preparation software.
To generate a vendor 1099 report
| 1. | Select Vendors > Reports. The Report List opens with the Vendor tab selected. |
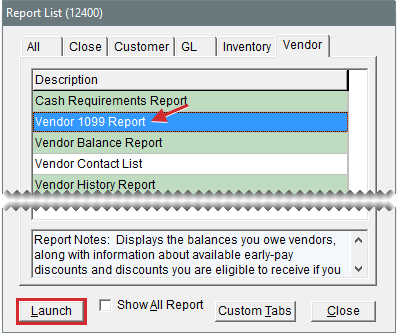
| 2. | Select Vendor 1099 Report and click Launch. The Vendor 1099 Reporting screen opens. |
| 3. | Define the beginning and ending dates for the report’s date range. To generate a report for a single day, enter the same date for both the beginning and ending dates. |
| 4. | Define whether to generate the report for one vendor or all vendors: |
To generate the report for a specific vendor, click the Vendor field and press  . Then look up the vendor.
To generate the report for all vendors, leave the Vendor field alone.
To generate the report for a specific vendor type, make a selection from the Vendor Type drop-down.
| 5. | To limit the report to those vendors who earned more than a specific dollar amount, type that value in the Minimum Amount field. Only whole numbers are accepted. |
| 6. | Select or clear the following check boxes as needed: |
If you’re generating the report based on vendor type, make sure All Vendors is selected. If you’re generating the report for a single vendor, make sure the check box is clear.
To organize the report information by vendor type assignments, make sure the Group by Vendor Type check box is selected. Otherwise, make sure the check box is clear.
To include invoice information on the report, make sure the Show Details check box is selected. For totals only, make sure the check box is clear. To limit the report to 1099 vendors, select the 1099s Only check box.
| 7. | Generate the output. |
For a hard copy, click Print. If you’re prompted to include $0.00 payment amounts, answer the question. The Report Window opens, and you can print the report.
For a .CSV file that can be imported into tax preparation software, click Create CSV File. Then answer one or more questions when prompted. The .CSV file is saved in the apps folder in your TireMaster program directory.
This report lists one or more vendors with whom you have outstanding charges. It also shows the past due balance, the aged future due balances, and the total balance for each vendor.
To generate a Vendor Balance Report
| 1. | Select Vendors > Reports. The Report List opens with the Vendor tab selected. |
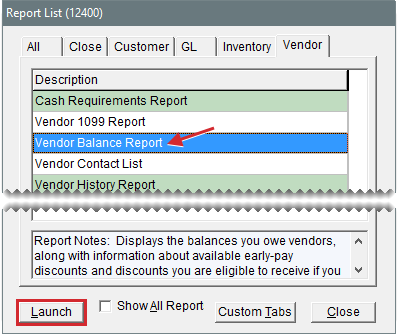
| 2. | Select Vendor Balance Report and click Launch. The Vendor Balance Report screen opens. |
| 3. | Select one or more vendors: |
For all vendors, leave the Beginning Vendor and Ending Vendor fields blank.
For one vendor, click Beginning Vendor and look up the vendor. The vendor’s name opens in both the Beginning Vendor and Ending Vendor fields. For more information, see Vendor Searches.
For a range of vendors, click Beginning Vendor and look up the first vendor in the range. Then click Ending Vendor and look up the last vendor in the range.
| 4. | Click Print. The Report Window opens. |
| 5. | Print the report and close the Report Window. |
| 6. | Close the Vendor Balance Report screen. |
This report lists the addresses, phone numbers, and email addresses for all vendors or one or more vendor types. Information generated with this report can be printed or exported to a spreadsheet.
To generate a Vendor Contact List
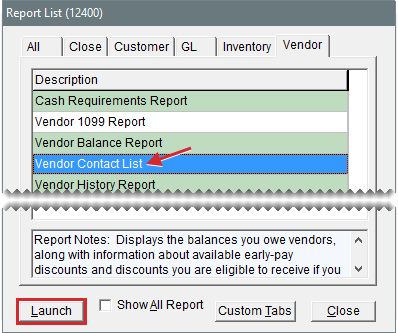
| 1. | Select Vendors > Reports. The Report List opens with the Vendor tab selected. |
| 2. | Select Vendor Contact List and click Launch. The Vendor Contact List screen opens. |
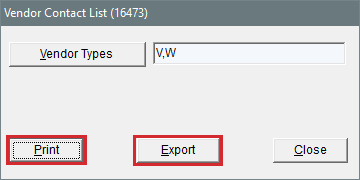
| 3. | Define which vendors you want to include: |
For all vendors, leave the entries in the Vendor Types field alone.
For specific vendor types, click Vendor Types. Then select one or more types from the list that appears, and click OK. For multiple types, press the Ctrl key while you make your selections.
| 4. | To generate the report, do one of the following: |
For a printed copy, click Print. When the Report Window opens, click Print again. When you’re done printing the report, close the Vendor Contact List screen.
For a spreadsheet, click Export. Then click OK to close the message. The spreadsheet is saved in the Apps folder inside your TireMaster program directory.
With this report, you can generate the following:
For one vendor, the running balance and a list of all transactions that occurred during a specified date range
For all vendors, the running balances and a list of all transactions that have occurred since you started using TireMaster.
In addition to generating detailed history, you also can print a summary that lists only the balance and cash, charge, payment, and discount totals for one or all vendors.
To generate a Vendor History Report
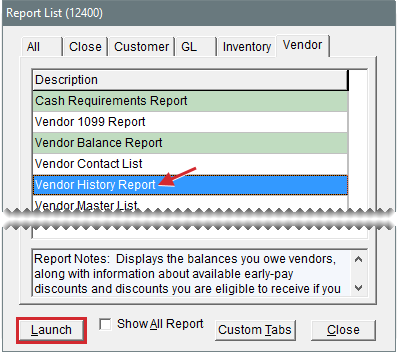
| 1. | Select Vendors > Reports. The Report List opens with the Vendor tab selected. |
| 2. | Select Vendor History Report and click Launch. The Vendor History Report screen opens. |
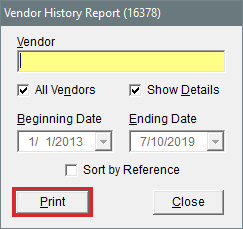
| 3. | Select one or more vendors: |
For one vendor, click the Vendor field and press  . Then look up the vendor’s name. For more information, see Vendor Searches.
For all vendors, leave the Vendor field blank and make sure the All Vendors check box is selected.
| 4. | To include individual purchases, charges, and payments on the report, leave the Show Details check box selected. For balances and cash, charge, payment, and discount totals only, clear the check box. |
| 5. | If you’re generating the report for one vendor, select a date range. |
| 6. | To sort the report by reference number, select the Sort by Reference check box. Otherwise the default sort is document date. |
| 7. | Click Print. The Report Window opens. |
| 8. | Print the report and close the Report Window. |
This report lists each of your active vendors along with their addresses and phone numbers.
To generate a Vendor Master List
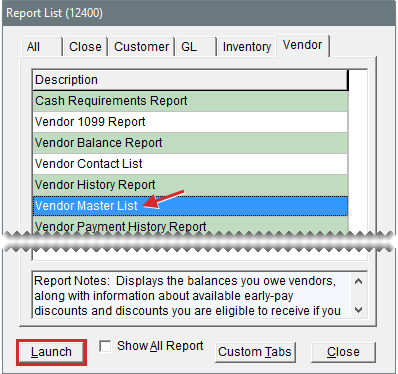
| 1. | Select Vendors > Reports. The Report List opens with the Vendor tab selected. |
| 2. | Select Vendor Master List and click Launch. The Report Window opens. |
| 3. | Print the report and close the Report Window. |
This report lists the payments made during a date range for all payment accounts or a single payment account, or you can generate information for a specific payment or document.
To generate a Vendor Payment History Report
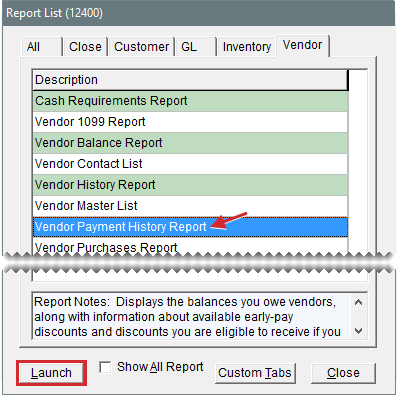
| 1. | Select Vendors > Reports. The Report List opens with the Vendor tab selected. |
| 2. | Select Vendor Payment History and click Launch. The Payment History Report Options screen opens. |
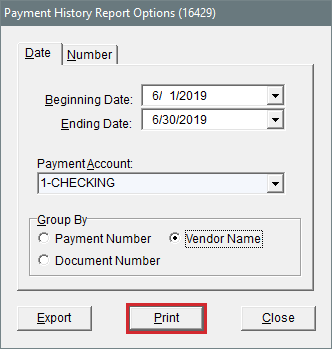
| 3. | For a list of payments generated during a date range, complete the following steps. For information about a specific payment or document, go to step 4. |
| a. | Make sure the Date tab is selected. |
| b. | Define the beginning and ending dates for the date range. For a single day, enter the same date for both the beginning and ending dates. |
| c. | Select the account whose payment history you want to generate from the Payment Account drop-down. For information about all accounts, leave the entry alone. |
| d. | Define how to organize the payments by selecting Payment Number, Document Number, or Vendor Number. |
| e. | Click Print. The Report Window opens. |
| f. | Print the report and close the Report Window. |
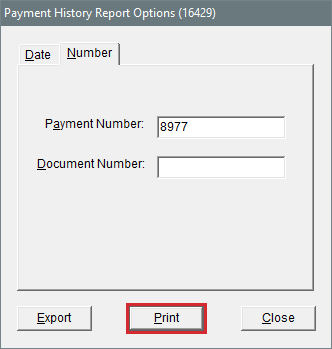
| 4. | For information about a specific payment or document, complete the following steps. If you want a list of payments for a date range, complete step 3 instead. |
| a. | Click the Number tab. |
| b. | For information about a specific payment, type the payment number. |
| c. | For information about a specific document, type the document number. |
| d. | Click Print. The Report Window opens. |
| e. | Print the report and close the Report Window. |
| 5. | Close the Payment History Report Options screen and the Report List. |
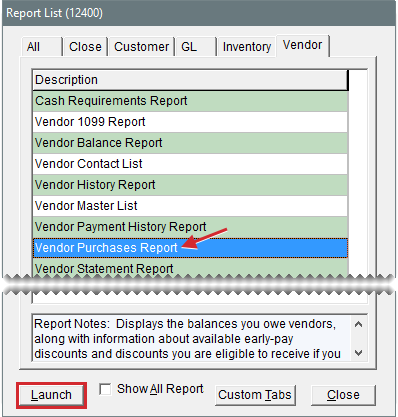
This report lists the purchases and vendor charges that occurred during a selected date range for one vendor or all vendors.
To generate a Vendor Purchases Report
| 1. | Select Vendors > Reports. The Report List opens with the Vendor tab selected. |
| 2. | Select Vendor Purchases Report and click Launch. |
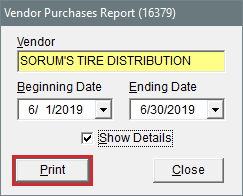
| 3. | Look up one or more vendors: |
For one vendor, click the Vendor field and press  . Then look up the name of the vendor. For more information, see Vendor Searches.
To generate a report for all vendors, leave the Vendor field blank.
| 4. | If you’re generating the report for one vendor, select a date range. |
| 5. | To include information for PO line items, select the Show Details check box. For totals only, leave the check box clear. |
| 6. | Click Print. The Report Window opens. |
| 7. | Print the report and close the Report Window. |
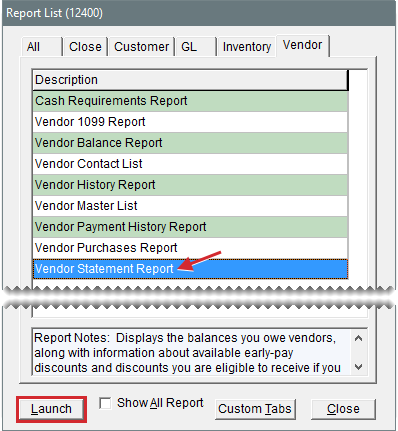
This report provides detailed information about vendors with whom you have outstanding charges. It lists each charge, the date, discount date, due date, charge amount, discount amount, remaining available discount, amount owed, and reference number. This report also provides aging information for the outstanding charges.
To generate a Vendor Statement Report
| 1. | Select Vendors > Reports. The Report List opens with the Vendor tab selected. |
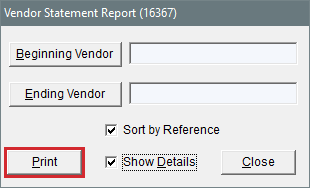
| 2. | Select Vendor Statement Report and click Launch. The Vendor Statement Report screen opens. |
| 3. | Do one of the following: |
For all vendors, leave the Beginning Vendor and Ending Vendor fields blank.
For one vendor, click Beginning Vendor and look up the vendor. The vendor’s name appears in both the Beginning Vendor and Ending Vendor fields. For more information, see Vendor Searches.
For a range of vendors, click Beginning Vendor and look up the first vendor in the range. Then click Ending Vendor and look up the last vendor in the range.
| 4. | To sort the list by reference number, select the Sort by Reference check box. Otherwise the default sort is document number. |
| 5. | To include aging information for each invoice, select the Detail check box. For an aging summary, leave the check box blank. |
| 6. | Select the site or sites whose information you want to retrieve |
| 7. | Click Print. The Report Window opens. |
| 8. | Print the report and close the Report Window. |

