Sales Tax Rates and Levels
This help topic is applicable to the following TireMaster applications:
|
TireMaster Point of Sale |
TireMaster Plus |
TireMaster Corporate |
|---|---|---|

|

|

|
To calculate sales tax in TireMaster, you need to set up tax rates and tax levels.
Tax rate: The percentage of the sale total collected by a tax authority.
Tax level: A combination of sales tax rates. Tax levels are assigned to customers, so TireMaster can compute the amount of sales tax they owe.
The number of tax rates and levels that you need depends on the complexity of your state’s tax laws and how many sales tax totals you need on your reports. If your state requires information for nontaxable sales, create exempt tax rates and levels.
If your state requires one sales tax total, you need only one or two rates and levels.
|
Rates |
Levels |
|
Rate 1: Idaho Rate |
Level 1: Idaho Level |
|
Rate 2: Exempt Rate |
Level 2: Exempt Level |
If your state requires a variety of sales tax totals, you need one level for each total. You can assign one or more rates to a level.
|
Rates |
Levels |
|
Rate 1: Idaho Rate Rate 2: Ada County Rate Rate 3: Boise City Rate |
Level 1: Idaho, Ada County, Boise Level (includes Rates 1–3)
|
|
Rate 4: Oregon Rate Rate 5: Farm Rate |
Level 2: Oregon Farm Level (includes Rates 4 and 5) |
|
Rate 6: Government Rate |
Level 5: Government Level (includes Rate 6) |
|
Rate 7: Exempt Rate |
Level 6: Exempt Level (includes Rate 7) |
Because tax levels are created by combining various tax rates, you can customize tax collections based on the requirements of different customers.
A tax rate is the rate of tax assessed by a tax jurisdiction such as a city, county, or state. Having separate tax rates let you group different types of tax totals on the tax reports.
The first component needed to calculate sales tax in TireMaster is the tax rate. The number and kind of rates that you need depend on the following:
Whether the city, county, or state where your store is located collects sales tax
Whether you perform service calls in cities, counties, or states other than those where your store is located
Whether some customers are exempt from paying taxes
To create a tax rate
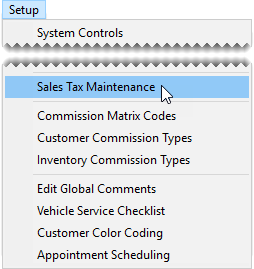
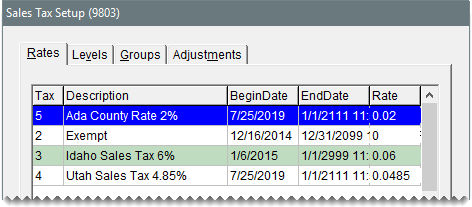
| 1. | Select Setup > Sales Tax Maintenance. The Sales Tax Setup screen opens. |
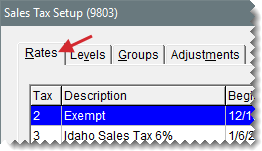
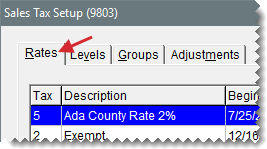
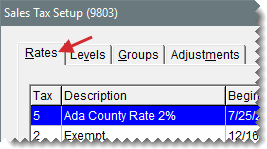
| 2. | Make sure the Rates tab is selected. |
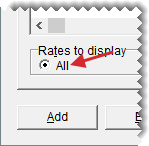
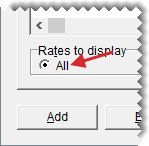
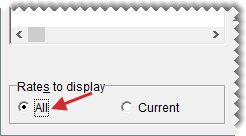
| 3. | To display both current and future tax rates, select All under Rates to display. |
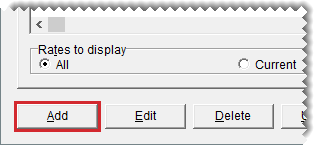
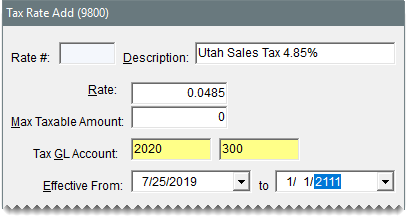
| 4. | Click Add. The Tax Rate Add screen opens. |
| 5. | Enter the following information for the new rate: |
| a. | Type a description. |
| b. | Type the tax rate amount as a decimal. For example, if the tax rate is 5%, type .05. |
| c. | If required by your state, enter the maximum taxable amount. Otherwise, leave the amount as 0.00. |
| d. | Assign a GL account to the rate. Click the Tax GL Account field, press  and select an account from the list. and select an account from the list. |
f you're running TireMaster Plus or TireMaster Corporate, use the account of your choice.
If you're running TireMaster Point of Sale, use preset account 2020-0.
| e. | To define when the rate goes into effect and ends, select dates from the Effective From and to pop-up calendars. |
| 6. | To save the new rate, click OK. |
When you set up your tax rates, name them in a consistent manner. Using a consistent naming pattern helps to ensure that you will assign the proper rates to tax levels, and it helps you identify the tax rates on the sales tax reports. Tax rates are organized alphabetically on the Sales Tax Setup screen.
The extent to which you can change the settings for a tax rate depends on whether the rate has been assigned to a tax level.
If the rate has never been assigned to a tax level, all of its settings can be edited.
If the rate has been assigned to a tax level, only the description and its ending date can be edited.
To edit a tax rate
| 1. | Select Setup > Sales Tax Maintenance. The Sales Tax Setup screen opens. |
| 2. | Make sure the Rates tab is selected. |
| 3. | To display both current and future rates, select All in under Rates to display. |
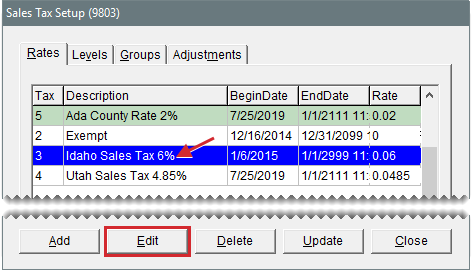
| 4. | Select the rate that needs to be changed, and click Edit. |
| 5. | Change the description, rate, maximum taxable amount, GL account, or effective dates as needed. |
| 6. | To save the changes, click OK. |
| 7. | Close the Sales Tax Setup screen. |
If your city, county, or state announces an increase or decrease for its sales tax rate, you can prepare for the change in advance by updating the tax rate. To update a tax rate, edit the ending date of the original rate. Then create a replacement rate.
To prepare for tax rate changes
| 1. | Select Setup > Sales Tax Maintenance. The Sales Tax Setup screen opens. |
| 2. | Make sure the Rates tab is selected. |
| 3. | To display both current and future rates, select All in the Rates to display area. |
| 4. | Edit the ending date of the original rate. |
| a. | Select the rate that needs to be changed, and click Edit. The Tax Rate Edit screen appears. |
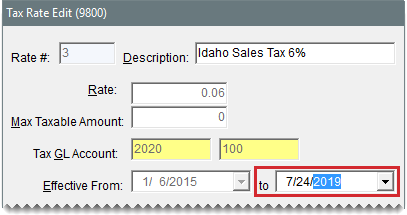
| b. | In the to field, change the ending date of the original tax rate to the day before the replacement rate takes effect. You can select the date from the pop-up calendar. |
| c. | Click OK. |
| 5. | To create the replacement rate, do the following: |
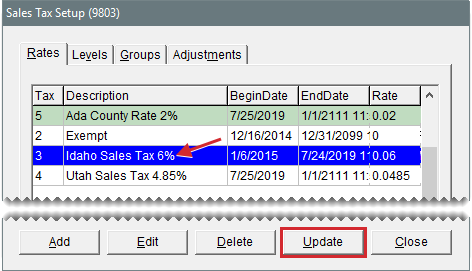
| a. | Reselect the rate that needs to be changed, and click Update. |
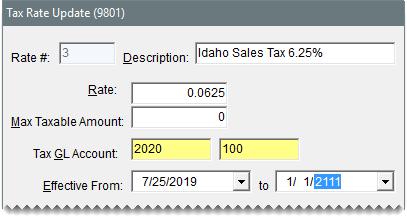
| b. | Change the description and the rate. |
| c. | Change the maximum taxable amount if needed. |
| d. | Change the GL account if needed. |
| e. | Enter the date when the replacement rate goes into effect and the date when the replacement date ends. You can select these dates from the Effective From pop-up calendar. |
| 6. | To save the replacement rate, click OK. |
Tax rates that have never been assigned to any tax levels can be deleted.
To delete a tax rate
| 1. | Select Setup > Sales Tax Maintenance. The Sales Tax Setup screen opens. |
| 2. | Make sure the Rates tab is selected. |
| 3. | To view both current and future rates, select All under Rates to display. |
| 4. | Select the rate you want to remove, and click Delete. A confirmation message appears. |
| 5. | Click Yes. |
A tax level is a group of tax rates. Tax levels are assigned to customers, so TireMaster can calculate the proper amount of sales tax to collect from them.
The second component needed to calculate sales tax in TireMaster is the tax level. A tax level, which is a combination of tax rates, can be assigned to customers to ensure that you collect the proper amount of sales tax from them.
To create a tax level
| 1. | Select Setup > Sales Tax Maintenance. The Sales Tax Setup screen opens. |
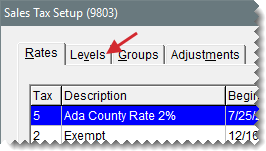
| 2. | Click the Levels tab. |
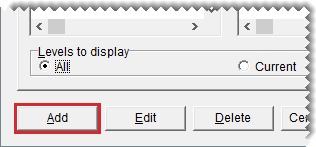
| 3. | To display both current and future tax levels, select All under Levels to display. |
| 4. | Click Add. The Level Add screen appears. |
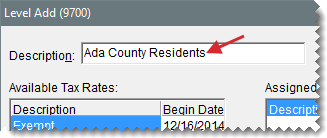
| 5. | Type a description for the new tax level. |
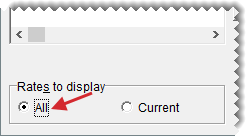
| 6. | If you don’t see a rate that you want to assign, select All under Rates to Display. |
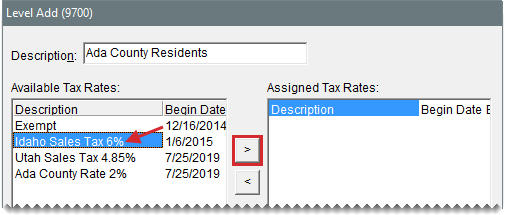
| 7. | Assign one or more rates to the tax level: |
To assign a single rate, select the rate in the Available Tax Rates panel and click  .
.
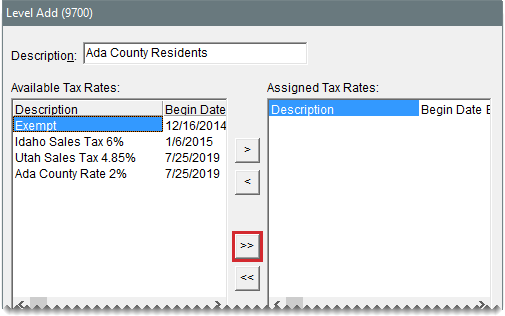
To assign all rates, click  .
.
 for a single rate or click
  for all rates.
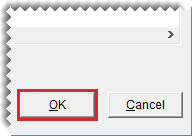
| 8. | To save the new level, click OK. |
Because of changes in tax laws, you might need to update your tax levels by adding new rates or removing existing rates.
To update a tax level
| 1. | From the Setup menu, select Sales Tax Maintenance. The Sales Tax Setup screen appears. |
| 2. | Click the Levels tab. |
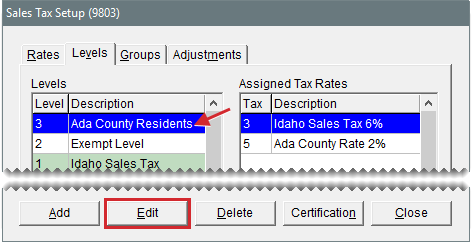
| 3. | Select the level you want to update, and click Edit. The Level Edit screen appears. |
| 4. | To display both current and future tax rates that can be assigned to the tax level, select Allunder Rates to display. |
| 5. | Assign or remove rates from the level: |
To assign a single rate to the tax level, select the rate in the Available Tax Rates area and click  . To assign all rates, click
  .
.
To remove a single rate from the tax level, select the rate in the Assigned Tax Rates area and click  . To remove all rates, click
  .
.
| 6. | To save the updated level, click OK. |
TireMaster calculates how much sales tax customers need to pay based on the tax levels assigned to them. For each customer, you need to assign two tax levels. One is for an item’s parts price, and the other is for an item’s labor price.
When new customers are added to TireMaster, they’re automatically assigned the default tax levels set in System Controls. If the default levels don’t meet a new customer’s tax requirements, assign different tax levels. For more information, see Update Customer Records.
When new customers are added to TireMaster, they’re automatically assigned the default tax level. To define your default tax level, you need to complete a pair of control settings. There are two approaches for setting the default tax level:
Use the level that calculates the highest amount of tax. This method ensures you’ll collect enough sales tax.
Use the tax level that’s required for the majority of your customers. With this method, you’ll rarely need to change the tax level when adding new customers.
To set the default tax levels
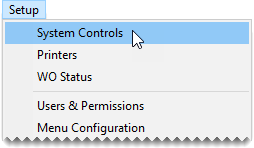
| 1. | Select Setup > System Controls. The System Controls screen opens. |
| 2. | Click the Customer tab. |
| 3. | Set the default labor level. |
| a. | Select Customer/Site Default Tax Level - Labor and press Enter. The Tax Level Lookup screen opens. |
| b. | Select the tax level you want to use as the default for labor, and click OK. |
| 4. | Set the parts level. |
| a. | Select Customer/Site Default Tax Level - Parts and press Enter. The Tax Level Lookup screen opens. |
| b. | Select the tax level you want to use as the default for parts, and click OK. |
| 5. | Close the System Controls screen. |
Expired sales tax rates and levels are tax settings that are no longer in effect. A tax rate expires when the ending date passes. Once a rate expires, you cannot view, reinstate, edit, or update it.
A tax level expires when all of the tax rates assigned to it expire. When a tax level expires, you won’t be able to complete invoices for customers who have been assigned that level. Although you can set up new rates for a tax level, those rates won’t take effect until the next day.
To prevent your tax rates and levels from expiring, follow these guidelines:
Before changing tax rates, make sure you know which tax levels use those rates. Depending on how often you use various tax levels, you might decide to delay rate changes.
When editing a tax rate, verify that you’ve entered the correct ending date before clicking OK. Once you click OK, you can’t reset the ending date.
When you create new rates or update existing rates, set the ending date far into the future. Consider using the same date (such as 1-1-2111) for all of your rates.
When preparing for a rate change, create the replacement rate on the same day that you change the ending date of the original rate. This will prevent the original rate from expiring before you’ve created the replacement rate.
