Add Casings to the Casing Manager
This help topic is applicable to the following TireMaster applications:
|
TireMaster Point of Sale |
TireMaster Plus |
TireMaster Corporate |
|---|---|---|

|

|

|
When a customer brings you casings that need to be sent to a retreader, add them to the Casing Manager. You can add casings to the Casing Manager from a work order or the Casing Manger itself.
To add casings to the Casing Manager
| 1. | Use one of the following methods to open the Add/Edit Casings screen: |
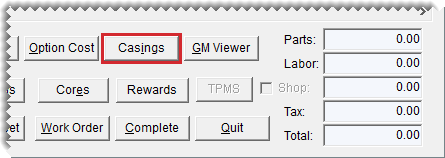
Start a work order for the customer who has brought you the casings. Then click Casings on the Invoice Entry screen. For more information, see Create a Regular Work Order.
Click Invoicing. Then click Core Case on the Open Work Order List. When the Casing Manager opens, click Receive/Buy Casings, and look up the customer who brought you the casings. For more information, see Customer Searches.
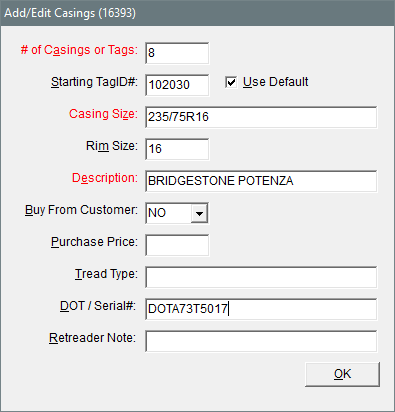
| 2. | Add the following information for the first casing in the group of tires that will be retreaded. Fields for required information are labeled in red. |
The number of casings that the customer brought to you (required).
The starting tag ID number
The size of the casing (required)
The casing’s rim size
A description of the casing (required)
Whether you’ll buy the casing from the customer—select Yes or No from the Buy From Customer drop-down.
The amount you plan to pay the customer for the casing (if you’ll buy it)
The type of tread that will be put on the casing
Type casing’s number
Notes about the casing
| 3. | Click OK. The Process Casings screen opens. The number of rows displayed equals the number that you typed in the # of Casings or Tags field on the Add/Edit Casings screen. |
| 4. | Update the information for each row as needed. For example, you might need to make changes for any variations in sizes, descriptions, or serial numbers. There should be one row for each casing that the customer has brought to you. |
To update information about a casing, click the cell that the information is in. Then click the cell again to make the text editable, and type your changes.
 . For example, if you change the description of the casing in the first row to Goodyear Wrangler and press
  , the description for the second row will change to Goodyear Wrangler.
| 5. | Update the vendor (retreader) if needed. To select a retreader, click Lookup and look up the vendor you want to use. For more information, see Vendor Searches. |
| 6. | To save the casing information, click Complete. |
| 7. | Close the Casing Manager screen. |


