ASAPay
This help topic is applicable to the following TireMaster applications:
|
TireMaster Point of Sale |
TireMaster Plus |
TireMaster Corporate |
|---|---|---|

|

|

|
ASAPay is an integrated payment card processing system for TireMaster. Because ASAPay is accessible directly from TireMaster's point of sale and received on account tools, there is no need for you to run payment cards through a standalone terminal and manually input the approval codes and amounts in TireMaster.
ASAPay for TireMaster was developed in a partnership between ASA Automotive Systems and Constellation Payments (CSI Pay).
Initial Release, October 2024
The following payment cards can be processed with ASAPay:
American Express
Discover
Mastercard
VISA
TireMaster or TireMaster Point of Sale 9.4.0 (or a newer version of either product) installed on your TireMaster server and workstations
Terminals issued by Constellation Payments
Internet connections for your TireMaster server and workstations
To use ASAPay, you should already know how to perform the following tasks, depending on your job role:
Accept work order deposits (for down payments)
Complete sale invoices
Process received on account payments (ROAs)
Before you can install ASAPay do one of the following to locate the installation program:
Access the automatically-deployed installer in the apps directory. For instructions, see Access Automatically-Deployed Installers.
Download the installer from the TireMaster Support site. For instructions, see Download the ASAPay Installer.
Once you’ve located the installer, complete the installation. For instructions, see Complete the ASAPay Installation.
If your TireMaster system is set up to download automatically-deployed installers as part of the nightly backup process, the installer for ASAPay is already available to you. Typically, installers are placed in one of the following locations:
|
c:\TireMaster\apps |
c:\TMPOS\apps |
d:\QDSTM\apps |
|
c:\QDSTM\apps |
d:\TireMaster\apps |
d:\TMPOS\apps |
To access automatically-deployed installers in Windows
| 1. | Depending on the computer's operating system, do one of the following: |
For Windows 11, right-click ![]() and select File Explorer from the menu that appears. Then find This PC on the Home panel. If the computer's drives are not displayed, click
and select File Explorer from the menu that appears. Then find This PC on the Home panel. If the computer's drives are not displayed, click ![]() to open the list.
to open the list.
For Windows 10, right-click  and select File Explorer from the menu that appears. Then scroll to This PC on the Quick Access panel. If File Explorer opened the This PC screen instead, disregard this step.
| 2. | Double-click the letter or icon for the drive in which TireMaster is installed. (Usually, it’s the c: or d: drive.) |
| 3. | Double-click the TireMaster program folder (typically named TireMaster, qdstm, or tmpos). |
| 4. | Double-click the apps folder and locate the file ASAPayInstaller.exe. Once you have located the installer, complete the installation. For instructions, see Complete the ASAPay Installation. |
The installer for ASAPay is available for download from the TireMaster Support site. When you download the installer, save it on your TireMaster server. To log on to the TireMaster Support Site, you need your TireMaster customer number and password. If you no longer have these credentials, log a support request via the online portal, by email, or calling 800-891-7437.
To download the ASAPay Installer
| 1. | Close all applications. |
| 2. | Log on to support.tiremaster.com. |
| 3. | Type your customer number and password and click Login. The Support Center home page opens. |
| 4. | Click Download Programs on the menu. The Download Center page opens. |
| 5. | Under Update Files, click the link for ASAPay. The download begins. If the download doesn't begin, check your browser settings. |
| 6. | Move the installer from the default downloads folder to another folder (optional). |
| 7. | Exit the TireMaster Support site. Once you have finished downloading the installer, you can complete the installation. For instructions, see Complete the ASAPay Installation. |
After you’ve located the installer for ASAPay, you can complete the installation. Install ASAPay on the TireMaster server and workstations.
To in0stall ASAPay
| 1. | Right-click ASAPayInstall.exe and select Run as Administrator. A confirmation message appears. |
| 2. | Click Yes. The TireMaster - Installation Program screen opens. |
| 3. | Click OK. The TireMaster - Search Results screen opens. |
| 4. | Select the TireMaster location in which you want to install ASAPay and click Install. |
| 5. | At the end of the installation, click Finish. |
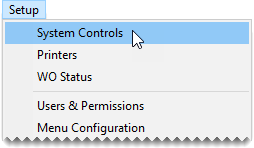
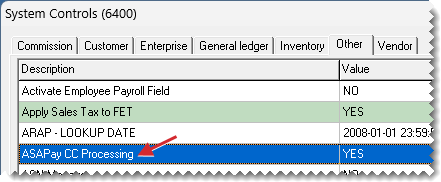
Before you can begin processing debit and credit cards with ASAPay, enable the application and grant the permission that allows your employees to process cards with it.
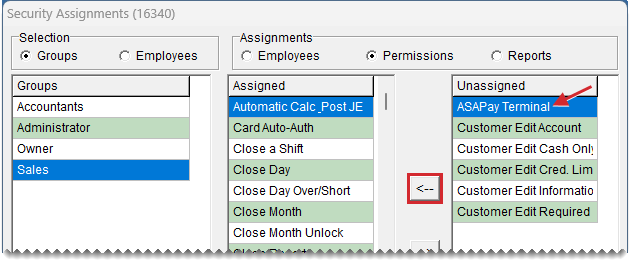
Before employees can use ASAPay to process payments, you need to assign them to security groups that are allowed to use the application.
To assign the ASAPay permission to security groups
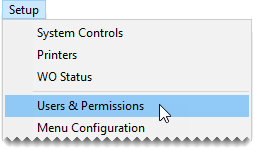
| 1. | Select Setup > Users & Permissions. The User List opens. |
| 2. | Click Security. The Security Assignments screen opens. |
| 3. | Select the security group that will be assigned the permission. |
| 4. | Under Assignments, click Permissions. |
| 5. | Under Unassigned, select ASAPay Terminal and click  . . |
| 6. | To assign the permission to additional security groups, repeat steps 3 through 5. When you’re finished, close the open screens. |
When a customer pays for purchased products and services with a credit or debit card, you can process the payment electronically without leaving TireMaster.
To process a sale payment with ASAPay
| 1. | Retrieve the work order and update it if needed. For more information, see Retrieve a Customer's Work Order. |
| 2. | Click Complete. The Invoice Completion screen opens. |
| 3. | Enter the payment amount in the first Credit/Debit pay type field. The Card Authorization Box opens. |
| 4. | For a card present sale, complete the following steps. If the card is not present, go to step 5. |
| a. | Click OK. |
| b. | If you're prompted to select a payment processor, click ASAPay. |
| c. | Tell the customer to confirm the sale amount displayed on the terminal. |
| d. | Tell the customer to insert, swipe, or tap the card and follow the prompts on the terminal. |
| e. | Go to step 6. |
| 5. | For a card not-present sale, complete the following steps. |
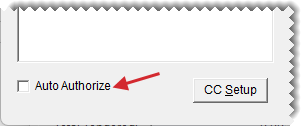
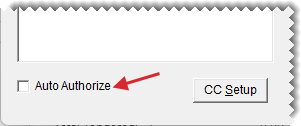
| a. | Clear the Auto Authorize checkbox. |
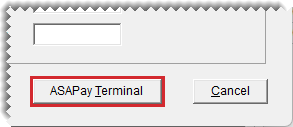
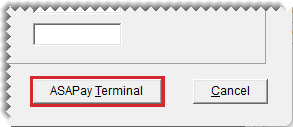
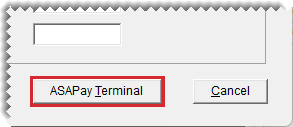
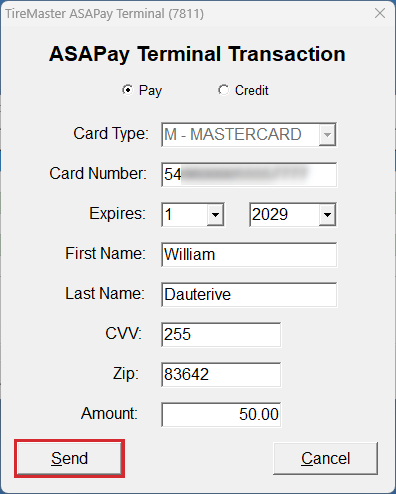
| b. | Click ASAPay Terminal. |
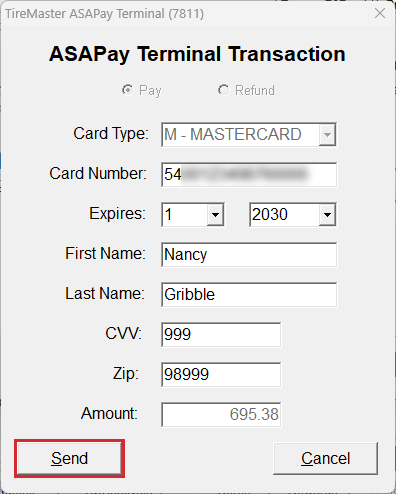
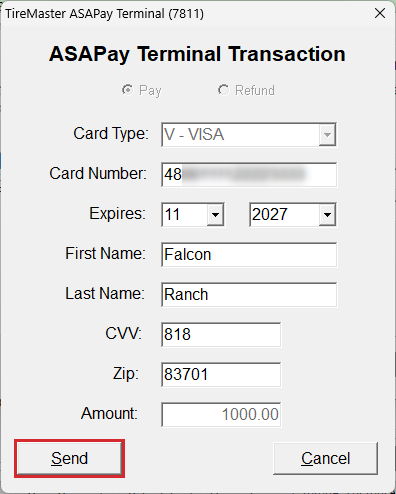
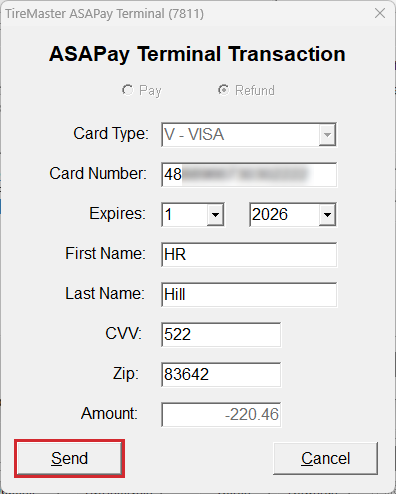
| c. | Enter the following information: |
Type the card number. Then press the Tab key to fill in the card type.
Type the expiration date or select it from the drop-downs.
Type customer's name, CVV code, and zip code.
| d. | Click Send. |
| 6. | Complete and print the invoice. |
Electronically processing a debit or credit card for work order deposit is similar to processing a sale invoice.
To process a deposit with ASAPay
| 1. | Open the work order to which you want to add the deposit or start a new work order. For more information, see Deposits. |
| 2. | Click Deposit. The ROA/Deposit Complete screen opens. |
| 3. | Type the deposit amount in the first Credit/Debit pay type field and press Enter. The Card Authorization Box opens. |
| 4. | If the card is present, complete the following steps. If the card is not present, go to step 5. |
| a. | Click OK. |
| b. | If you're prompted to select a payment processor, click ASAPay. |
| c. | Tell the customer to confirm the sale amount displayed on the terminal. |
| d. | Tell the customer to insert, swipe, or tap the card and follow the prompts on the terminal. |
| e. | Go to step 6. |
| 5. | If the card is not present, complete the following steps. |
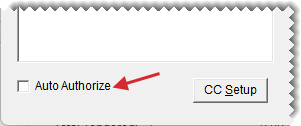
| a. | Clear the Auto Authorize checkbox. |
| b. | Click ASAPay Terminal. |
| c. | Enter the following information: |
Type the card number. Then press the Tab key to fill in the card type.
Type the expiration date or select it from the drop-downs.
Type customer's name, CVV code, and zip code.
| d. | Click Send. |
| 6. | Complete the deposit and print the deposit invoice. |
If you decide that you don't want to complete an invoice immediately after you've processed a card with ASAPay, you need to cancel the sale and void the payment. Voiding the payment removes the charge that was just added to the payment card.
To void a payment made with ASAPay
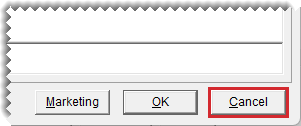
| 1. | After processing the card, click Cancel on the Invoice Completion screen. |
The following message appears:
"WARNING: Card(s) has already been processed. This sale will be voided. Do you want to cancel this sale and void the processed payment."
| 2. | Click Yes. The black card processing screen appears briefly to void the sale in ASAPay. Once the sale has been voided, TireMaster returns to the Invoice Entry screen. |
When a customer returns items that were originally purchased with a credit or debit card more than a day ago, refund the payment to the card. When you process the return, you don't need to swipe or input the card number because the return can be matched to the original invoice.
To process a card refund with ASAPay
| 1. | Start the return. For more information, see Returns and Trade-Ins. |
| 2. | Click Complete. The Invoice Completion screen opens. |
| 3. | Click the first Credit/Debit pay type field and press  to enter the refund amount. The Card Authorization Box opens. to enter the refund amount. The Card Authorization Box opens. |
| 4. | Click OK. The black card processing screen appears briefly as the amount of the return is applied to the payment card. |
| 5. | Complete the return and print the refund invoice. |
When an invoice total is a negative amount because of a trade-in, electronically processing the payment will add a credit to the customer's card balance.
To process a trade-in with ASAPay
| 1. | Add one or more items that the customer is trading to a work order. For more information, see Returns and Trade-Ins. |
| 2. | Click Complete. |
| 3. | Click the first Credit/Debit pay type field and press  to enter the invoice amount. The Card Authorization Box opens. to enter the invoice amount. The Card Authorization Box opens. |
| 4. | If the card is present, complete the following steps. If the card is not present, go to step 5. |
| a. | Click OK. |
| b. | If you're prompted to select a payment processor, click ASAPay. |
| c. | Tell the customer to confirm the amount displayed on the terminal. |
| d. | Tell the customer to insert, swipe, or tap the card and follow the prompts on the terminal. |
| e. | Go to step 6. |
| 5. | If the card is not present, complete the following steps. |
| a. | Clear the Auto Authorize checkbox. |
| b. | Click ASAPay Terminal. |
| c. | Enter the following information: |
Type the card number. Then press the Tab key to fill in the card type.
Type the expiration date or select it from the drop-downs.
Type customer's name, CVV code, and zip code.
| d. | Click Send. |
| 6. | Complete the trade-in and print the invoice. |
When customers offer to pay accounts receivable balances with a credit or debit card, you can electronically process the payment directly from TireMaster's ROA module.
To process an ROA with ASAPay
| 1. | Start the received on account payment. For more information, see ROAs. |
| 2. | On the ROA/Deposit Complete screen, type the payment amount in the first Credit/Debit field and press Enter. The Card Authorization Box opens. |
| 3. | If the card is present, complete the following steps. If the card is not present, go to step 4. |
| a. | Click OK. |
| b. | If you're prompted to select a payment processor, click ASAPay. |
| c. | Tell the customer to swipe the card and follow the prompts on the pin pad. |
| d. | Go to step 5. |
| 4. | If the card is not present, complete the following steps. |
| a. | Clear the Auto Authorize checkbox. |
| b. | Click ASAPay Terminal. |
| c. | Enter the following information: |
Type the card number. Then press the Tab key to fill in the card type.
Type the expiration date or select it from the drop-downs.
Type customer's name, CVV code, and zip code.
| d. | Click Send. |
| 5. | Apply the payment to the customer's account balance now or later. Then print the ROA document. |
If there is ever a reason to process a card payment that is not associated with a TireMaster transaction, the payment can be processed as a standalone sale. This type of sale will not be tracked in TireMaster.
To process a standalone sale
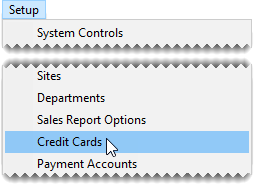
| 1. | Select Setup > Credit Cards. The Credit Card Controls screen opens. |
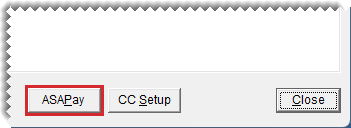
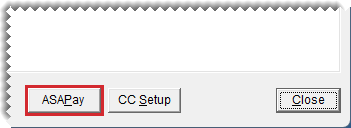
| 2. | Click ASAPay The ASAPay Terminal opens. |
| 3. | Make sure Pay is selected. |
| 4. | Enter the following information: |
Type the card number. Then press the Tab key to fill in the card type.
Type the expiration date or select it from the drop-downs.
Type customer's name, CVV code, and zip code.
| 5. | Click Send. The black card processing screen opens. Then a print receipt prompt appears. |
| 6. | Indicate whether you want to print a receipt. The standalone sale is finished. Printed receipts include the date, customer name, transaction type, card type, last four digits of the card number, transaction ID, and amount. |
On rare occasions, you might need to apply a credit to a customer's payment card balance that is not associated with a TireMaster transaction. In this scenario, the credit will not be tracked in TireMaster.
To process a standalone credit
| 1. | Select Setup > Credit Cards. The Credit Card Controls screen opens. |
| 2. | Click ASAPay The ASAPay Terminal opens. |
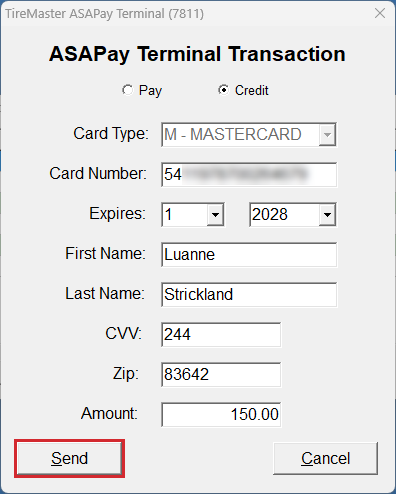
| 3. | Select Credit. |
| 4. | Enter the following information: |
Type the card number. Then press the Tab key to fill in the card type.
Type the expiration date or select it from the drop-downs.
Type customer's name, CVV code, and zip code.
| 5. | Click Send. The black card processing screen opens. Then a print receipt prompt appears. |
| 6. | Indicate whether you want to print a receipt. The card credit is finished.+3 |
