Returns and Trade-Ins
Returns and trade-ins are started in the same way as regular sales. However, you need to enter negative quantities for the items being returned or traded in. When dealing with returns, the type of item being returned and its costing method affect how you perform the return.
Returns of inventoriable items that you keep on hand are the simplest returns to perform.
To process the return of an inventoriable item
| 1. | Start a work order for the customer who is returning the item. For more information, see Create a Regular Work Order. |
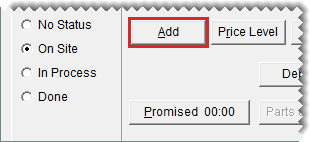
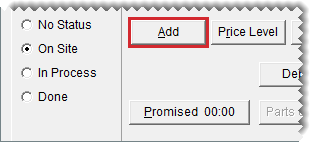
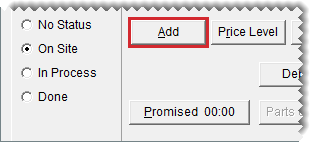
| 2. | Click Add and look up the item being returned. |
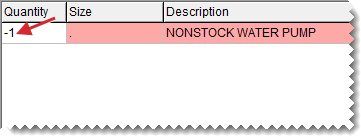
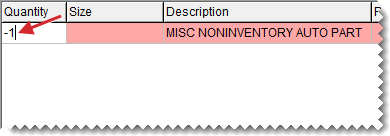
| 3. | Type the quantity of the item being returned in as a negative number and press Enter. |
| 4. | If you want to flag the item being returned, make sure the Mark Return check box is selected. Otherwise, clear the check box and go to step 7. |
| 5. | Locate the item you want to flag. |
To display only the item being returned, select Match Inventory.
To display the items sold for the vehicle selected for the current work order, select Match Vehicle.
To display only items for which the core value has been defined, select the Cores check box.
To change the number of items displayed by invoice date, select Under 90 Days, Under 180 Days or All.
| 6. | Select the returned item. It will be highlighted in yellow the next time you process a return for the same customer. |
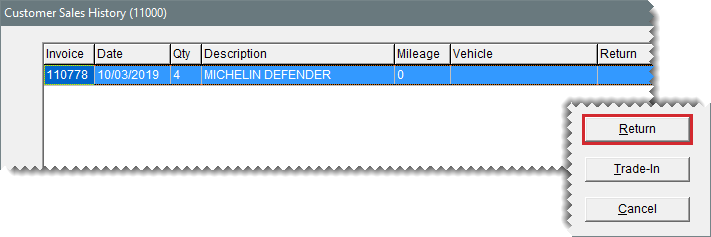
| 7. | Click Return. The Invoice Entry screen opens, and the returned item’s add-ons (if any) are added to the work order. |
| 8. | Delete the add-on items as needed. |
| 9. | Click Complete. Then complete the invoice and reimburse the customer with the original payment method. For more information, see Complete an Invoice |
The method for handling noninventoriable item returns depends on the returned item’s costing method and whether it is tracked.
When a customer returns a tracked option cost item, you record its cost at point of sale and put it on a (negative) receiving document. Because negative receiving documents are used for returning items to vendors (negative RDs remove items from inventory), the returned item will not be available to sell to another customer. Option cost items are typically obtained through outside purchases before being sold to customers.
To process tracked outside purchase returns
| 1. | Review the customer’s original sale invoice and the item’s receiving document. With this information, you can: |
Confirm the item was sold to the customer.
Identify the vendor who sold you the item and the price you paid for it.
For more information, see Verify Noninventoriable Item Returns.
| 2. | Start a work order for the customer who is returning the outside purchase item. |
| 3. | Add the returned item to the work order. |
| a. | Click Add and look up the item. |
| b. | Type the quantity as a negative number (-) and press Enter. |
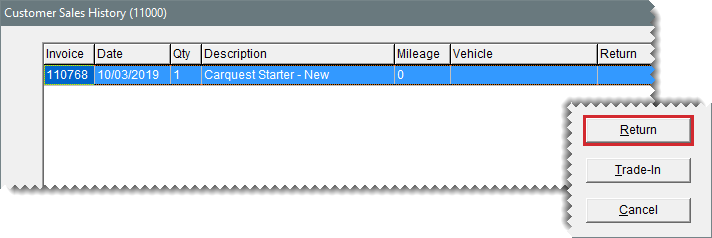
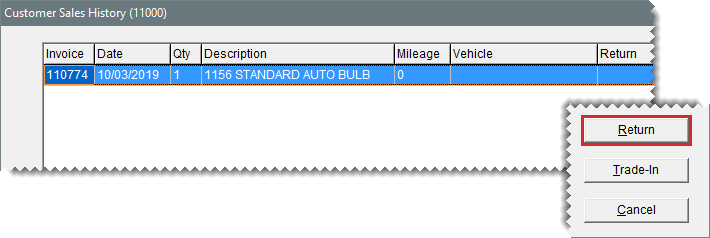
The Customer Sales History screen opens. It lists the items the customer previously bought, returned, or traded-in. Items highlighted in yellow were flagged during previous returns.
| c. | Select the item being returned and click Return. |
| d. | Type the returned item’s description and original selling price. |
| 4. | Enter the returned item’s cost. |
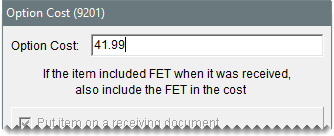
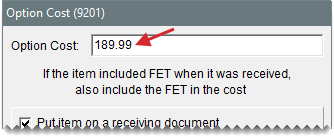
| a. | Click Option Cost. The Option Cost screen opens. |
| b. | Type the item’s cost. |
| 5. | Create the negative receiving document |
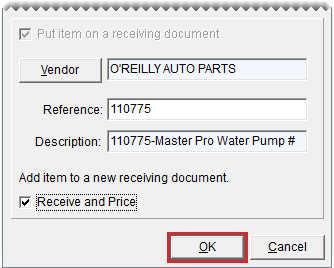
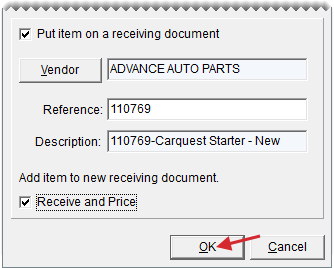
| a. | Click Vendor and search for the vendor who sold you the item. |
| b. | Select the Receive and Price check box. |
| c. | Click OK. The Receiving Document screen opens. |
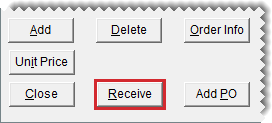
| d. | Click Receive. TireMaster prompts you to price the receiving. |
| e. | Do one of the following: |
If the vendor has issued a return invoice to you, click Yes. The Vendor Invoice screen opens.
If you do not have a return invoice from the vendor, click No. The Report Window opens and displays the receiving document. Print it if needed and close the Report Window. Then go to step 8. You can price the item and create the negative charge later.
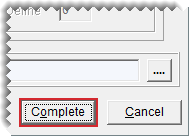
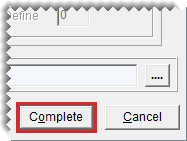
| 6. | To price the negative receiving document, click Complete. |
One of the following occurs:
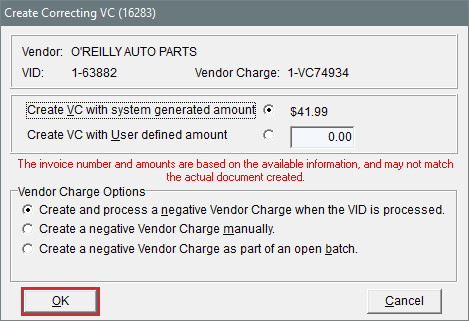
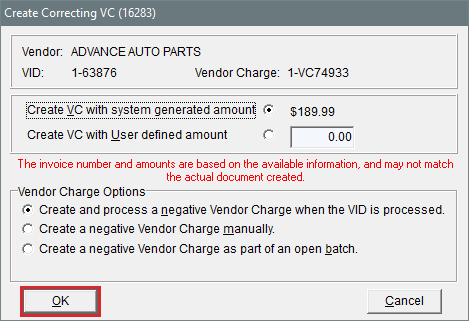
In TireMaster Plus and TireMaster Corporate, the Correcting VC screen opens.
In TireMaster Point of Sale, the Report Window opens and displays the vendor invoice document for the returned item. Print the VID if needed and close the Report Window. Then go to step 8.
| 7. | Define how to handle the negative vendor charge for the returned item. |
| a. | Indicate whether the vendor charge will be a system-generated amount or an amount of your choice: |
For a vendor charge that matches the option cost amount you defined, select Create VC with system generated amount.
For a vendor charge amount of your choice, select Create VC with User defined amount and type the charge amount.
| b. | Select a method for processing the negative vendor charge: |
To automatically create the vendor charge and post it to the vendor’s subledger, select Create and process a negative Vendor Charge when the VID is processed.
To create the vendor charge yourself, select Create a negative Vendor Charge manually. For more information, see Enter a Vendor Charge.
To automatically create the charge and add it to an open batch of charges for the vendor, select Create a negative Vendor Charge as part of an open batch. When the AP Batch Charge screen appears, choose a batch or create a new batch.
| c. | Click OK. The Report Window opens and displays the vendor invoice document (VID) for the returned item. |
| d. | Print the VID if needed, and close the Report Window. Once the negative charge is created, apply it to the vendor’s subledger to reduce the vendor’s balance. For more information, see Apply Payments and Credits to Vendor Balances. |
| 8. | Complete the return invoice. |
| a. | Click Complete. |
| b. | Process the customer’s reimbursement with the same payment method used for the original invoice. |
When a customer returns an option cost item, you need to record its cost at point of sale and you have the option to put the item on a (negative) receiving document. Depending on what you do, once of the following occurs:
If you put the item on a negative RD, it will not be available to sell to another customer (because the negative receiving document is used to return the item to the vendor)
If you disregard putting it on a negative RD, the item will be added to available inventory and can then be sold to another customer
Option cost items are typically obtained through outside purchases before being sold to customers.
To process the return of an untracked option cost item
| 1. | Start a work order for the customer who is returning the item. For more information, see Create a Regular Work Order. |
| 2. | Click Add and look up the item being returned. For more information, see Inventory Searches. |
| 3. | Type the quantity of the item being returned as a negative number, and press Enter. |
| 4. | If you want to flag the item being returned, make sure the Mark Return check box is selected. Otherwise, clear the check box and go to step 7. |
| 5. | Locate the item you want to flag. |
To display only the item being returned, select Match Inventory.
To display the items sold for the vehicle selected for the current work order, select Match Vehicle.
To display only items for which the core value has been defined, select the Cores check box.
To change the number of items displayed by invoice date, select Under 90 Days, Under 180 Days or All.
| 6. | Select the returned item. It will be highlighted in yellow the next time you process a return for the same customer. |
| 7. | Click Return. The Invoice Entry screen opens and the returned item’s add-ons (if any) are added to the work order. |
| 8. | Delete the add-on items as needed. |
| 9. | Update the item’s description and selling (parts) price so they match the original sale invoice. |
| 10. | Enter the item’s cost. |
| a. | Click Option Cost. |
| b. | Type your cost for the item in the Option Cost field. |
| 11. | If you want to put the item on a negative receiving document, do the following. Otherwise go to step 13. |
| a. | Make sure the Put item on a receiving document check box is selected. |
| b. | Click Vendor and look up the vendor who originally sold you the item. For more information, see Vendor Searches. |
| c. | Select the Receive and Price check box. |
| d. | Click OK. The Receiving Document screen opens. |
| e. | Click Receive. TireMaster prompts you to price the receiving document. |
| 12. | Price the receiving document |
| a. | Click Yes. The Vendor Invoice screen opens. |
| b. | Click Complete. |
| c. | Define whether the vendor charge will be a system-generated amount or an amount of your choice (TireMaster Plus and TireMaster Corporate): |
For a vendor charge based on the next cost and next FET calculated by TireMaster, select Create VC with system generated amount.
For a vendor charge amount of your choice, select Create VC with User defined amount and type the charge amount.
| d. | Select a method for processing the vendor charge: |
To automatically create the vendor charge and post it to the vendor’s subledger, select Create and process a negative Vendor Charge when the VID is processed.
To create the vendor charge yourself, select Create a negative Vendor Charge manually. For more information, see Enter a Vendor Charge.
To automatically create the charge and put it in an open batch of charges for the vendor, select Create a negative Vendor Charge as part of an open batch. When the AP Batch Charge screen appears, choose a batch or create a new batch.
| e. | Click OK. The Report Window opens and displays the Vendor Invoice Document. |
| f. | Print the VID if needed, and close the Report Window. Once the negative charge is created, apply it to the vendor’s subledger to reduce the vendor’s balance. For more information, see Apply Payments and Credits to Vendor Balances. |
| 13. | If you don’t want to add the item to a negative receiving document, do the following: |
| a. | Clear the Put item on a receiving document check box. |
| b. | Click OK. |
| 14. | Click Complete. Then complete the invoice and reimburse the customer with the original payment method. For more information, see Complete an Invoice. |
When a customer returns a tracked item that’s assigned the expense or relief percent costing method, the item is put on an unknown receiving document. Depending on what the item is, you could sell it to another customer or return it to the vendor.
To process tracked expense and relief percent item returns
| 1. | Review the customer’s original sale invoice and the item’s receiving document. With this information, you can: |
Confirm the item was sold to the customer.
Identify the vendor who sold you the item and the price you paid for it.
For more information, see Verify Noninventoriable Item Returns.
| 2. | Start a work order for the customer who is returning the outside purchase item. |
| 3. | Click Add and look up the item being returned. |
| 4. | Type the quantity as a negative number (-) and press Enter. |
The Customer Sales History screen opens. It lists the items the customer previously bought, returned, or traded-in. Items highlighted in yellow were flagged during previous returns.
| 5. | Select the item being returned and click Return. |
| 6. | Click OK. A message tells you that the item will be assigned to an unknown receiving document. |
| 7. | Click OK to close the message. |
| 8. | Complete the return invoice. |
| a. | Click Complete. |
| b. | Process the reimbursement with the same payment method used for the original invoice. |
When a customer returns an untracked expense method or relief percent item, it’s added back into inventory. Depending on what the item is, you could sell it to another customer or return it to the vendor.
To process untracked expense and relief percent item returns
| 1. | Start a work order for the customer who is returning the item. For more information, see Create a Regular Work Order. |
| 2. | Click Add and look up the item being returned. For more information, see Inventory Searches. |
| 3. | Type the quantity of the item being returned as a negative number, and press Enter. |
| 4. | If you want to flag the item being returned, make sure the Mark Return check box is selected. Otherwise, clear the check box and go to step 7. |
| 5. | Locate the item you want to flag. |
To display only the item being returned, select Match Inventory.
To display the items sold for the vehicle selected for the current work order, select Match Vehicle.
To display only items for which the core value has been defined, select the Cores check box.
To change the number of items displayed by invoice date, select Under 90 Days, Under 180 Days or All.
| 6. | Select the returned item. It will be highlighted in yellow the next time you process a return for the same customer. |
| 7. | Click Return. |
| 8. | Click Complete. Then complete the invoice and reimburse the customer with the original payment method. For more information, see Complete an Invoice |
When a customer has an item to offer you as a payment or partial payment, add the trade-in to the customer’s work order.
To take a trade-in
| 1. | Start a work order for the customer who is returning the item. For more information, see Create a Regular Work Order. |
| 2. | Click Add and look up the item being traded in. |
| 3. | Type the quantity of the item being returned in as a negative number and press Enter. |
| 4. | Click Trade-In. The Invoice Entry screen opens, and the add-ons for the traded item (if any) are added to the work order. |
| 5. | Delete the add-ons. |
| 6. | If the customer is trading-in a noninventoriable item, update the description. |
| 7. | Type the amount you’re offering the customer (per item) in the Parts price field. |
| 8. | Add other items to the work order or complete the invoice. For more information, see Complete an Invoice. |
