Epicor Integrated Service Estimator Interface
This help topic is applicable to the following TireMaster applications:
|
TireMaster Point of Sale |
TireMaster Plus |
TireMaster Corporate |
|---|---|---|

|

|

|
With the interface for the Epicor® Integrated Service Estimator™ (ISE), you can import the descriptions for parts and labor, along with selling prices, labor times, and labor rates, into work orders, estimates, and vehicle service checklists created in TireMaster. You can also use the ISE Interface to order parts from suppliers.
TireMaster 9.4.4 systems running version 7.0.0 of the Epicor Integrated Service Estimator include the following:
Safeguards to prevent employees from undercharging customers who purchase oil change packages
Simplified access to the job codes setup screen
For more information, see Maintaining Oil Change Package Pricing.
This section describes changes made in version 7.7.0 (July 2021) of the Interface for the EpicorISE.
Now you can define whether supplier part numbers for items retrieved from the ISE are added to quotes/estimates in TireMaster. The setting Quote - Epicor Show Part # has been added to the System Controls screen (Other tab). To include supplier part numbers on quotes/estimates, set the control to Yes.
When labor is added to work orders via the ISE, the TireMaster product codes assigned to the Epicor labor groups (on the TireMaster - Epicor Group Setup screen) are now used instead of the product code for the default labor item.
General ledger posting is now handled correctly when Item Tracking and the Force Option Cost costing method are enabled for the product codes used to order items with the ISE. When a sale invoice for an item ordered via the ISE is completed, cost entries post to the inventory asset and cost of goods sold accounts now. Previously, these entries were not generated.
This update resolves an issue that caused the ordering screen to be empty although items had been added to it via the service checklist (the Quote and Estimate Writer screen).
When you use Epicor to add an option cost item with tracking enabled to a quote/estimate in TireMaster and then turn the quote/estimate into a work order, the item's cost from Epicor is now assigned to the work order.
Prices for labor items configured as Other Parts in the ISE are now transferred to TireMaster.
Local inventory items added to quotes/estimates can be ordered from other suppliers when you don’t have any available to sell. When items handled as local inventory are unavailable, the integration now allows you to order those items from suppliers who are not classified as local inventory.
In multi-store environments, changes made to the Epicor credentials (on the TMEpicor Setup screen) for one store will no longer override the credentials for the other sites when TireMaster’s automated backup process runs.
Each computer that will be used to access the Epicor Integrated Service Estimator needs the following:
TireMaster 9.3.0 or newer
An internet connection
A browser
To set up and use the ISE Interface with TireMaster, you should already know how to perform the following tasks:
Start work orders
Start quotes and estimates
Complete invoices
Search for inventory
Installing and updating the Epicor Integrated Service Estimator Interface is a two-step process. First, do one of the following to locate the installation program:
Access the automatically-deployed installer(s) from the apps directory. For instructions, see Access Automatically-Deployed Installers.
Download the installer(s) from the TireMaster Support site. For instructions, see Download the ISE Interface Installer.
Once you’ve located the installer(s), complete the installation. For instructions, see Complete the ISE Interface Installation or Update.
If your TireMaster system is set up to download automatically-deployed installers as part of the nightly backup process, the installer for the ISE Interface is already available to you. Typically, installers are placed in one of the following locations:
|
c:\TireMaster\apps |
c:\TMPOS\apps |
d:\QDSTM\apps |
|
c:\QDSTM\apps |
d:\TireMaster\apps |
d:\TMPOS\apps |
To access automatically-deployed installers
| 1. | Right-click  and select File Explorer from the menu that appears. and select File Explorer from the menu that appears. |
| 2. | In the Quick Access navigation pane, scroll to This PC. |
| 3. | Double-click the letter or icon for the drive that TireMaster is installed in. (Usually, it’s the c: or d: drive.) |
| 4. | Double-click the TireMaster, qdstm, or tmpos program folder. |
| 5. | Double-click the apps folder, and locate the file tmact00000000-07070000.exe. Once you have located the installer, complete the installation. For instructions, see Complete the ISE Interface Installation or Update. |
The installer for Epicor Integrated Service Estimator Interface is available for download from the TireMaster Support site. When you download the installer, save it on your TireMaster server. To log on to the TireMaster Support Site, you need your TireMaster customer number and password. If you no longer have that information, log a support request via the online portal, by email, or calling 800-891-7437.
To download the TMText Installer
| 1. | Close all applications. |
| 2. | Log on to support.tiremaster.com. |
| 3. | Type your customer number and password, and click Login. The Support Center home page opens. |
| 4. | Click Download Programs on the menu. The Download Center page opens. |
| 5. | Under Update Files, click the link for the Epicor 7.7.0 interface. You’ll be prompted to save the file and possibly run the installation, depending on your browser. |
| 6. | Save the installer on your computer. |
| 7. | Exit the TireMaster Support site. |
Once you have finished downloading the installer, you can complete the installation. For instructions, see Complete the ISE Interface Installation or Update.
After you’ve located the installer for the ISE Interface, you can complete the installation. Run the installation or update on the TireMaster server and workstations.
To install TMText
| 1. | Right-click tmact00000000-07070000.exe, and select Run as Administrator. A confirmation message appears. |
| 2. | Click Yes. The TireMaster - Installation Program screen opens. |
| 3. | Click OK. The TireMaster - Search Results screen opens. |
| 4. | Select the TireMaster location in which you want to install the interface, and click Install. |
| 5. | At the end of the installation or update, click Finish. |
You’ll be prompted to register the ISE Interface the first time you log in to TireMaster after the installation or update. When the Interface Registration screen opens, click Register.
Before you can access and use the Integrated Service Estimator with TireMaster, a variety of settings need to be completed. The settings can also be updated once you start using the ISE.
To enable the transfer of information from the Epicor Integrated Service Estimator to TireMaster, you need to set a pair of system controls that define the following:
The part number for a labor item
The part number for a noninventoriable parts item
To define the interface part numbers
| 1. | Select Setup > System Controls. |
| 2. | Click the Inventory tab. |
| 3. | If you’re working in a multi-store environment, select Store Controls. Otherwise, disregard this step. |
| 4. | Define the interface part number for labor. |
| a. | Select Interface Labor PartNo and press Enter. The Custom Inventory Lookup screen opens. |
| b. | Search for the item you want to use as the interface labor part number. |
| 5. | Define the interface part number for parts. |
| a. | Select Interface Parts PartNo and press Enter. The Custom Inventory Lookup screen opens. |
| b. | Look up the item you want to use as the interface part number for parts. |
| 6. | Close the System Controls screen. |
By setting a group of system controls, you define what happens when items are transferred from the Integrated Service Estimator to TireMaster service checklists and work orders. By setting another control, you define whether shop supplies are included on the service checklist when items are retrieved from the ISE.
Quote - Epicor Show Part #: Defines whether supplier part numbers for items retrieved from the ISE are added to the Size field on service checklists (Quote and Estimate Writer screen) in TireMaster. This setting is on the Other tab. In a multi-store environment, it’s a store control.
Work Orders - Epicor Auto Order: Defines whether to automatically place an order with a supplier, when items are added to a work order.
Work Orders - Epicor Create Receiving Document: Defines whether you want TireMaster to create receiving documents for the items added to work orders via the Integrated Service Estimator. This setting is on the Other tab. In a multi-store environment, it’s a store control.
Work Orders - Epicor Show Part#: Defines whether you want to display supplier part numbers instead of item sizes on work orders (both on screen and printed). This setting is on the Other tab. In a multi-store environment, it’s a store control.
Work Orders - Epicor View Order: Defines whether you want the ability to preview a pending order and make changes before placing the order. Enabling this setting also gives you the ability to associate items retrieved from the Integrated Service Estimator with items in TireMaster at point of sale. This setting is on the Other tab. In a multi-store environment, it’s a store control.
Shop Supplies Service Checklist: Defines whether shop supplies are included on the service checklist (Quote and Estimate Writer screen) when items are retrieved from the ISE. This setting is on the Inventory tab. In a multi-store environment, it’s a store control.
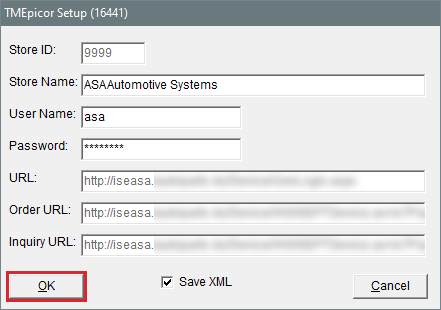
If you need to update the user name and password issued by Epicor, you can access these settings on the Epicor setup screen.
To update your ISE credentials
| 1. | Open an existing work order. The Invoice Entry screen opens. |
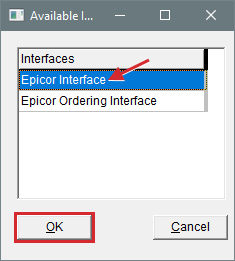
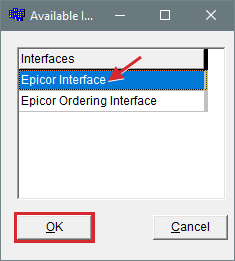
| 2. | Click Parts & Labor. The Available Interfaces screen opens. |
| 3. | Select Epicor Interface and click OK. The TM Interface screen opens. |
| 4. | Click  in the upper-right corner of the screen. The TireMaster - Epicor Interface screen opens. in the upper-right corner of the screen. The TireMaster - Epicor Interface screen opens. |
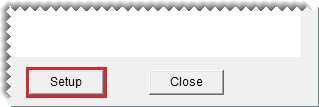
| 5. | Click Setup. |
| 6. | Type the user name and password provided by Epicor. |
| 7. | To save your changes, click OK. |
| 8. | Close the open screens. |
Setting up suppliers establishes a connection between the Integrated Service Estimator and the vendor records for your parts suppliers in TireMaster. Completing the supplier settings also enables automated ordering via the ISE.
To set up suppliers
| 1. | Open an existing work order or start a new work order. |
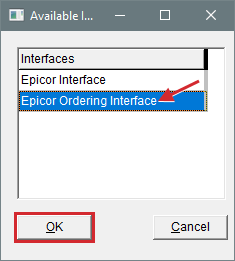
| 2. | Click Parts & Labor on the Invoice Entry screen. The Available Interfaces screen opens. |
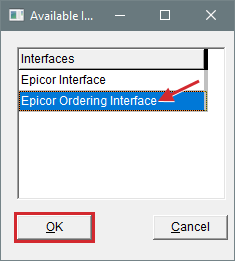
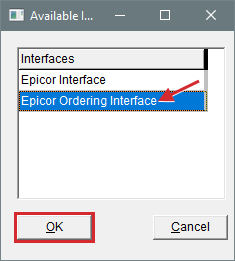
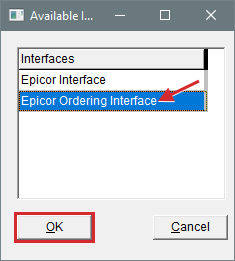
| 3. | Select Epicor Ordering Interface, and click OK. The Epicor - Order Interface screen opens. |
| 4. | Click Supplier Setup. The Supplier/Vendor Relationship screen opens. |
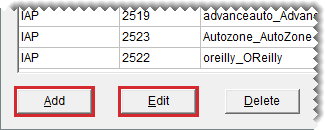
| 5. | To complete the settings for a new supplier, click Add. To update the settings for an existing supplier, click Edit instead. |
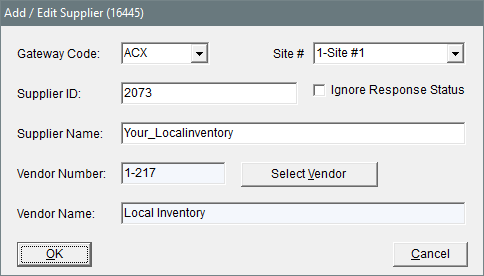
| 6. | Enter or update the settings for the supplier. |
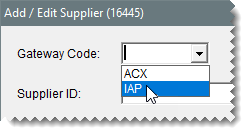
| a. | Select Epicor’s gateway code for the supplier from the drop-down list. |
| b. | If orders for a specific site should be placed with this vendor, select the site from the drop-down (optional). |
| c. | If a supplier will locate a part for you regardless of whether it is in stock, select the Ignore Response Status check box. Otherwise, leave the check box alone. |
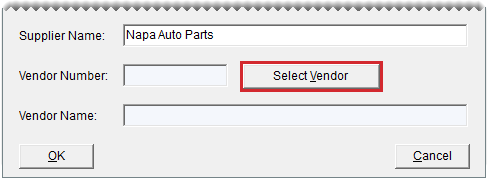
| d. | Type the supplier’s name. The spelling used here must match the spelling used by Epicor. |
| e. | Click Select Vendor, and look up the vendor record you want to associate with the parts supplier. |
| f. | To save your changes, click OK. |
| 7. | Close the open screens. |
Creating estimates with information from the ISE is possible only when there is a connection between TireMaster and the Integrated Service Estimator. This connection is established by associating the following:
The ISE’s parts and labor groups with TireMaster’s service checklist inspection areas and TireMaster’s inventory items
The ISE’s jobs codes with TireMaster’s service checklist inspection areas
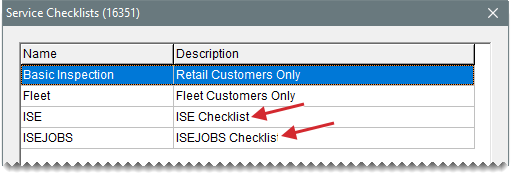
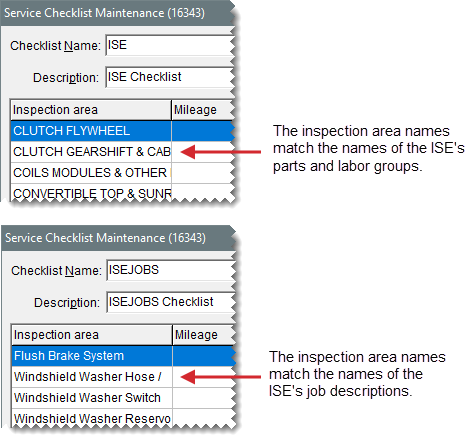
By default, these connections are established automatically when you add the Epicor Integrated Service Estimator to your TireMaster system. When the Integrated Service Estimator is installed, two new service checklists (named ISE Checklist and ISE JOBS Checklist) are added to TireMaster.
The names of the inspection areas for the new ISE checklist match the names of the parts and labor groups used by the Integrated Service Estimator. Similarly, the names of the inspection areas for the ISE JOBS checklist match the job descriptions used by the ISE.
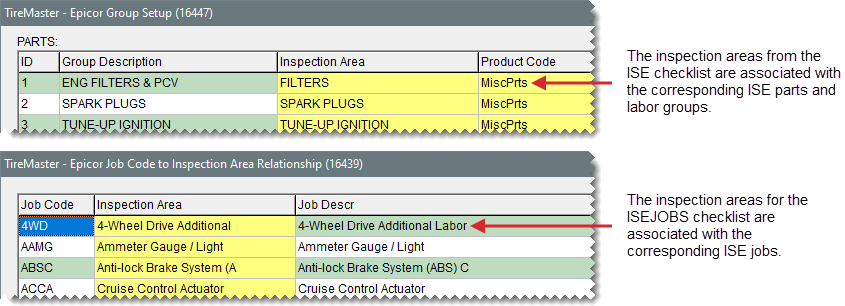
The inspection areas from the new ISE Checklist are automatically associated with the corresponding ISE parts and labor group names. Likewise, the inspection areas from the new ISE JOBS Checklist are automatically associated with the corresponding ISE job descriptions.
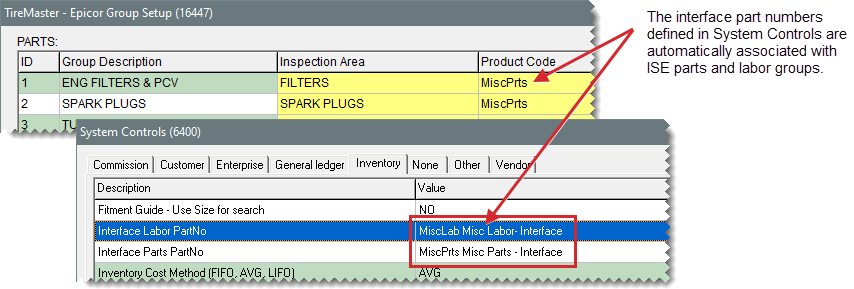
The other type of setting needed to connect TireMaster and the ISE is also completed automatically. When the Integrated Service Estimator is installed, inventory items from TireMaster are associated with the ISE’s parts and labor groups. By default, the associated items are the ones that have been assigned to the interface part number settings in System Controls. For more information, see Defining Interface Part Numbers.
You can use the automatically-generated settings for parts and labor groups, or you can manually associate inspection areas from another checklist, different items, or both with the ISE’s parts and labor groups. For more information, see Associating Inspection Areas and Items with ISE Groups.
Jobs can also be handled in a similar manner. You can use the automatically-generated settings for jobs, or you can manually associate inspection areas from another checklist with the jobs used by the
You can associate service checklist inspection areas and inventory items in TireMaster with the parts and labor groups used by the ISE.
To associate inspection areas and items with ISE groups
| 1. | Open an existing work order. |
| 2. | On the Invoice Entry screen, click Parts & Labor. The Available Interfaces screen opens. |
| 3. | Select Epicor Ordering Interface, and click OK. The TireMaster - Epicor Order Interface screen opens. |
| 4. | Click Checklist Setup. The TireMaster - Epicor Job Setup screen opens. |
| 5. | Click Group Setup. The TireMaster - Epicor Group Setup screen opens. |
| 6. | Update the inspection areas and items associated with ISE parts groups as needed. |
To associate an inspection area with an ISE parts group, click in the Inspection Area column and press  . Then select an inspection area from the list, and click OK.
To associate an item with an ISE parts group, click in the Product Code column, and press  . Then look up the item you want to associate.
| 7. | Update the inspection areas and items associated with ISE labor groups, as needed. |
To associate an inspection area with an ISE labor group, click in the Inspection Area column and press  . Then select an inspection area from the list, and click OK.
To associate an item with an ISE labor group, click in the Product Code column. Then look up the item you want to associate.
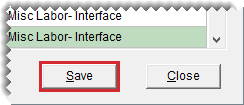
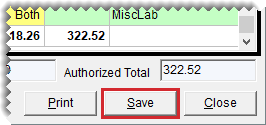
| 8. | Click Save. |
| 9. | Close the open screens. |
You can associate service checklist inspection areas used in TireMaster with job codes from the ISE.
To associate inspection areas and ISE job codes
| 1. | Open an existing work order. The Invoice Entry screen opens. |
| 2. | Click Parts & Labor. The Available Interfaces screen opens. |
| 3. | Select Epicor Ordering Interface, and click OK. The TireMaster - Epicor Order Interface screen opens. |
| 4. | Click Checklist Setup. The TireMaster - Epicor Job Setup screen opens. |
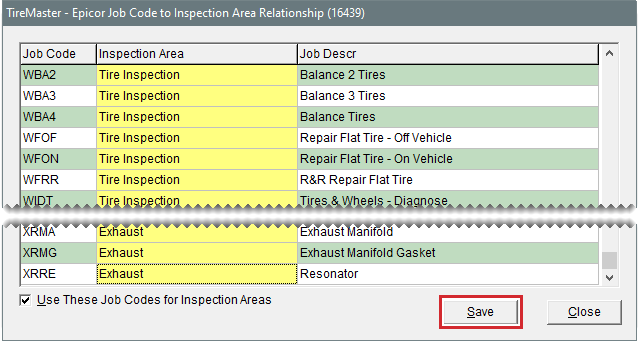
| 5. | Click Associated Job Codes. The TireMaster - Epicor Job Code to Inspection Area Relationship screen opens. |
| 6. | Associate inspection areas with job codes, as needed. |
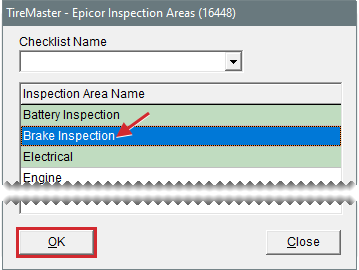
| a. | Click in the inspection area column for a job code, and press  . The TireMaster - Epicor Inspection Areas screen opens. . The TireMaster - Epicor Inspection Areas screen opens. |
| b. | Select a checklist from the Checklist Name drop-down. |
| c. | Select the inspection area you want to associate with the job code, and click OK. |
| d. | Repeat steps 6a through 6c as needed. |
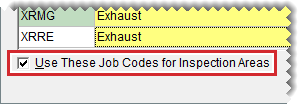
| 7. | If you want to use the ISE job codes as inspection areas on the service checklist, make sure the Use These Job Codes for Inspection Areas check box is selected. |
| 8. | Click Save. |
| 9. | Close the open screens. |
The quick jobs menu is a screen that lists up to 28 commonly-performed jobs. You can define which jobs are included on the quick jobs menu.
When the Integrated Service Estimator is installed, more than 400 jobs are added to TireMaster. These jobs are set up in inventory as noninventoriable items. In the ISE, jobs are identified by codes that are one to five characters long. In TireMaster, these codes are automatically entered in the Product Code, Size, and Quick Look fields on the Inventory Maintenance screen.
To set up the quick jobs menu
| 1. | Open an existing work order. The Invoice Entry screen opens. |
| 2. | Click Parts & Labor. The Available Interfaces screen opens. |
| 3. | Select Epicor Ordering Interface, and click OK. The TireMaster - Epicor Order Interface screen opens. |
| 4. | Click Checklist Setup. The TireMaster - Epicor Job Setup screen opens. |
| 5. | Assign jobs to the menu or change the jobs assigned to the menu. |
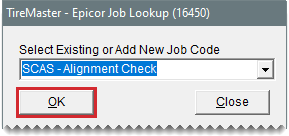
| a. | Click the row for a job, and press  . The TireMaster - Epicor Job Lookup screen opens. . The TireMaster - Epicor Job Lookup screen opens. |
| b. | Select a job from the drop-down, and click OK. |
| c. | To assign remaining jobs, repeat steps 5a and 5b. |
| 6. | Click Save. |
| 7. | Close the open screens. |
When Epicor introduces new job codes, you can add them to your TireMaster system. Adding job codes ensures they can be associated with service checklist inspection areas and assigned to the quick jobs menu.
To add a job code
| 1. | Open the screen for setting up Epicor jobs. |
| a. | Open an existing work order, and click Parts & Labor. |
| b. | Select Epicor Ordering Interface and click OK. The TireMaster - Epicor Order Interface screen opens. |
| c. | Click Checklist Setup. |
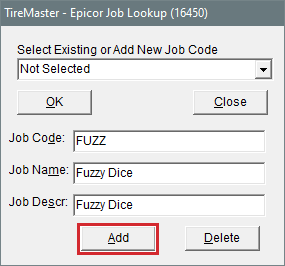
| 2. | Click one of the fields in the Job Code column and press  . The TireMaster - Epicor Job Lookup screen opens. . The TireMaster - Epicor Job Lookup screen opens. |
| 3. | Type the job code, its name, and description. |
| 4. | Click Add. |
| 5. | Close the TireMaster - Epicor Job Lookup screen, and all other open screens. |
Once a job code has been added, it can be associated with a service checklist inspection area and assigned to the quick jobs menu. For more information, see Associating Inspection Areas and ISE Job Codes and Epicor Integrated Service Estimator Interface.
When Epicor discontinues job codes, you can remove them from TireMaster. Once a job code is deleted, it is no longer available on the screen used to establish a relationship between the ISE and the TireMaster service checklist.
To delete a job code
| 1. | Open the Epicor Job Setup screen. |
| a. | Open an existing work order, and click Parts & Labor. |
| b. | Select Epicor Ordering Interface and click OK. The TireMaster - Epicor Order Interface screen opens. |
| c. | Click Checklist Setup. |
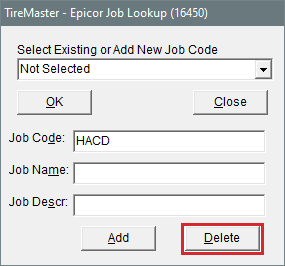
| 2. | Click one of the fields in the Job Code column and press  . The TireMaster - Epicor Job Lookup screen opens. . The TireMaster - Epicor Job Lookup screen opens. |
| 3. | Type the code you want to delete in the Job Code field. |
| 4. | Click Delete. A confirmation message appears. |
| 5. | Click Yes. |
| 6. | Close the open screens. |
With the ISE Interface, you can add parts and labor to work orders and estimates and access vehicle service and repair information.
You can create detailed work orders by importing labor times, labor descriptions, parts descriptions, and suggested retail prices from the Epicor Integrated Service Estimator into TireMaster.
To update a work order with the ISE
| 1. | Start a work order or open an existing work order. The Invoice Entry screen opens. |
| 2. | Open the ISE using one of the following methods: |
Click Parts & Labor on the Invoice Entry screen. Then make sure Epicor Interface is selected on the list that appears, and click OK.
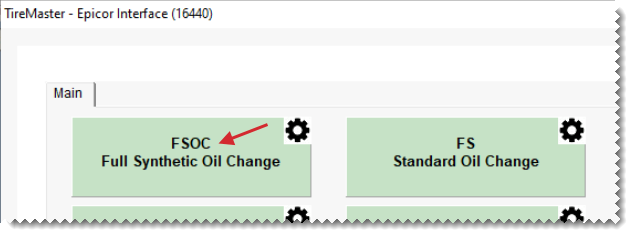
Press F11 to open the Quick Jobs menu. Then click the button for the type of service or repair that will be performed.
| 3. | Identify the vehicle, using one of the following methods. If a valid VIN was entered for the vehicle in TireMaster, the ISE bypasses the vehicle selection screen. |
Select Use VIN, type the vehicle identification number, and click Go. Then click Next.
Select Use Manual Vehicle. Then click Next.
Select Use Activant Vehicle, and choose the vehicle year, make, model, and engine. Then click Next.
| 4. | Look up the parts, labor, or both that are needed for the service or repair. If you launched the ISE with the Quick Jobs menu, disregard this step. |
| a. | Click the Jobs, Parts, Labor, or Service Intervals+ tab. |
| b. | Depending on which tab you clicked, do one of the following to look up parts and labor: |
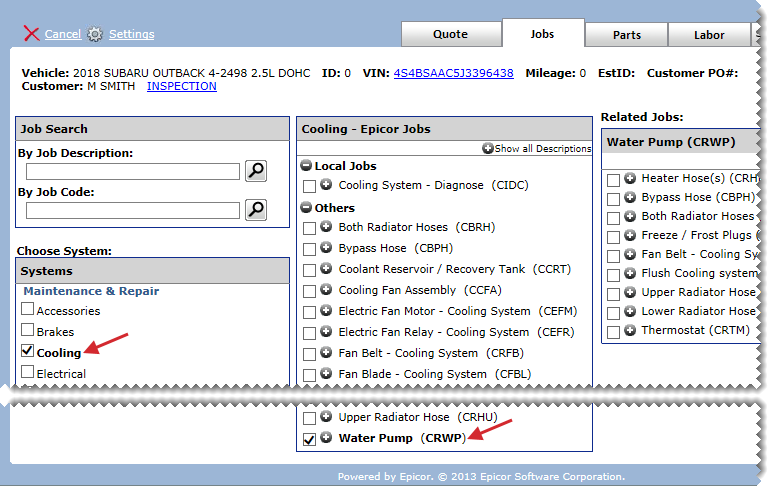
Type a description or code in the search field and click  . Then select a job, parts, or labor from the search results. If you searched by jobs, you can look up information about similar repairs.
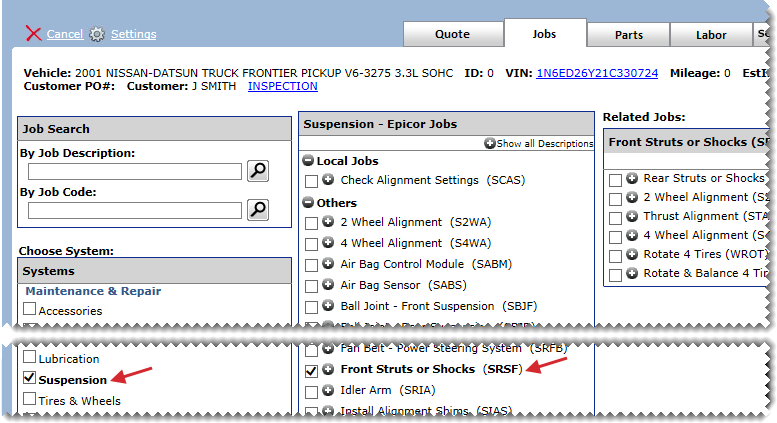
Select a system or a category. Then select one or more jobs, parts, labor, groups, or intervals.
| 5. | Click Next. |
| 6. | If the ISE prompts you for additional information, answer the questions and click Next. |
| 7. | Change the supplier, if needed. |
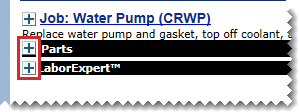
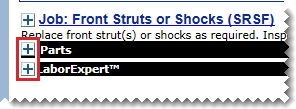
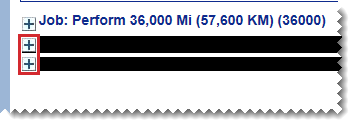
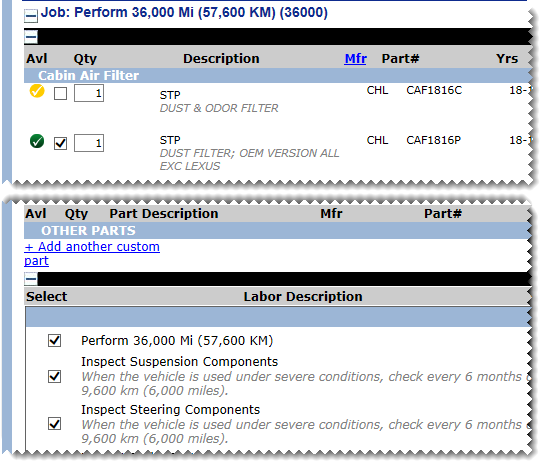
| 8. | Select the parts and labor you want to add to the work order. If you cannot see the individual parts and labor items, click the plus signs to expand the listings. |
| 9. | Click Transfer & Exit. |
The selected items, along with their costs, are added to the work order in TireMaster. (To see an item’s cost, select the item and click Option Cost on the Invoice Entry screen.) If automatic ordering is enabled, an order is also placed with the supplier via the Integrated Service Estimator.
The TireMaster - Epicor Order Interface screen opens. You can order items via the Integrated Service Estimator (click Order), or you can close the screen and place the order later. The items are then added to the work order.
| 10. | To exit the work order, click Quit. |
You can create detailed estimates in TireMaster by importing parts and labor, selling prices, labor times, and labor rates from the Integrated Service Estimator into the service checklist section of the Quote and Estimate Writer.
To update a service checklist with the ISE
| 1. | If you haven’t already, start a new estimate or open an existing estimate. For more information, see Prepare Estimates. |
| 2. | On the Quote and Estimate Writer screen, click Parts & Labor. The Available Interfaces screen opens. |
| 3. | Select Epicor Interface, and click OK. The TireMaster - Epicor Interface screen opens. |
| 4. | Identify the vehicle, using one of the following methods. If a valid VIN was entered for the vehicle in TireMaster, the ISE bypasses the vehicle selection screen. |
Select Use VIN, type the vehicle identification number, and click Go. Then click Next.
Select Use Manual Vehicle. Then click Next.
Select Use Activant Vehicle, and choose the vehicle year, make, model, and engine. Then click Next.
| 5. | Look up the parts, labor, or both that are needed for the service or repair. |
| a. | Click the Jobs, Parts, Labor, or Service Intervals+ tab. |
| b. | Depending on which tab you clicked, do one of the following to look up parts and labor: |
Type a description or code in the search field and click  . Then select a job, parts, or labor from the search results. If you searched by jobs, you can click the Show Related Jobs link to look up information about similar repairs.
Select a system or a category. Then select one or more jobs, parts, labor, groups, or intervals.
| c. | Click Next. |
| 6. | If the ISE prompts you for additional information, answer the questions and click Next. |
| 7. | Change the supplier, if needed. |
| 8. | Select the parts and labor you want to add to the service checklist. If you cannot see the individual parts and labor items, click the plus signs to expand the listings. |
| 9. | Click Transfer & Exit. The items retrieved from the Integrated Service Estimator are added to the service checklist panel on the Quote and Estimate Writer screen. |
| 10. | Save the estimate. |
If you realize that an item you’ve retrieved from the Integrated Service Estimator is one you regularly keep in stock, you can associate the two items. Associating a retrieved item with an item in TireMaster helps you maintain accurate counts, cost, and history for that item.
To associate ISE items with TireMaster items
| 1. | Open the TireMaster - Epicor Order Interface screen. |
| 2. | For each retrieved item you want to associate with a TireMaster item, do the following: |
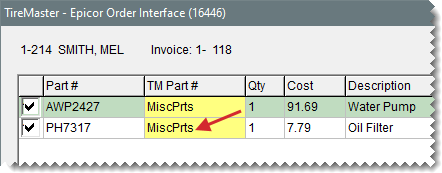
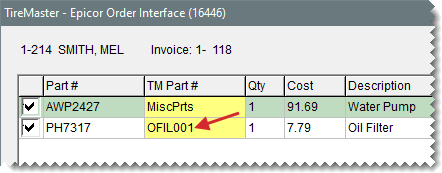
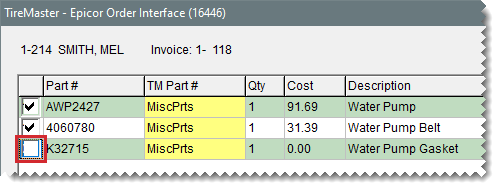
| a. | Click in the TM Part # field for the retrieved item you want to associate, and press  . The Custom Inventory Lookup screen opens. . The Custom Inventory Lookup screen opens. |
| b. | Look up the TireMaster item. The interface part number is replaced with the part number for the item you just looked up in TireMaster. |
| 3. | Order the items or click Close. The items are added to the work order. For more information, see Ordering Items Via the Integrated Service Estimator. |
| 4. | Complete the invoice. |
With manual ordering via the Integrated Service Estimator, you can order items when you add them to a work order or you can wait until later to order items that have already been put on a work order.
To order items via the Integrated Service Estimator
| 1. | Open the existing work order for which you want to order items. |
| 2. | Click Parts & Labor on the Invoice Entry screen. The Available Interfaces screen opens. |
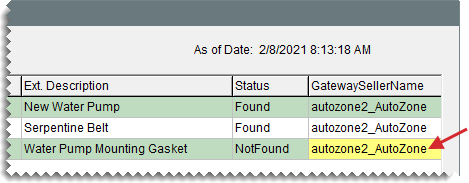
| 3. | Select Epicor Ordering Interface, and click OK. The screen lists all of the pending items for an order. For items that aren’t in stock, the supplier’s name is highlighted in yellow and the status is Not Found. |
| 4. | If an item was not found, you can see if it’s available from another supplier. |
| a. | In the GateWaySellerName column, click the supplier’s name and press  . Then select a different supplier from the list that appears and click OK. The status changes to No Status. . Then select a different supplier from the list that appears and click OK. The status changes to No Status. |
| b. | Click Inquire. If the new supplier has the item in stock, the status changes to Found. If the new supplier doesn’t have the item, the status returns to Not Found. |
| 5. | If you want to exclude an item from the order, clear its check box. |
| 6. | When you’re ready to place the order, click Order. Depending on the status of the items on the order, the order is placed automatically or TireMaster prompts you to continue although one or more of the items on the order are not available. |
| 7. | To close the open work order, click Quit. |
You can generate vehicle inspection sheets from the Integrated Service Estimator. Each sheet includes the vehicle year, make, model, and engine; VIN and mileage; and customer name and phone number. When the VIN is included in the TireMaster vehicle settings or if the VIN is entered in the ISE‘s vehicle selection screen, the inspection sheet also includes specific vehicle service information, such as fluid specifications and the recommended thickness for brake linings.
To generate a vehicle inspection sheet
| 1. | Open the Integrated Service Estimator using one of the following methods: |
On the Invoice Entry screen (a customer’s work order), click Inspect Sheet.
On the main TireMaster screen, press F6. When the vehicle screen opens, type the VIN or choose the year, make, model, and engine, and click Next. Then click Inspection at the top of the screen.
| 2. | Click the printer icon in the upper-right corner of the on-screen inspection sheet. The Windows Print screen opens. |
| 3. | Select a printer and click Print. |
| 4. | Click  to close the on-screen inspection sheet. A confirmation message appears. to close the on-screen inspection sheet. A confirmation message appears. |
| 5. | Click OK to close the message. |
| 6. | Close the TM Interface screen. |
You can generate a list of manufacturer-recommended services based on a vehicle’s mileage when you start a work order.
To print service interval information
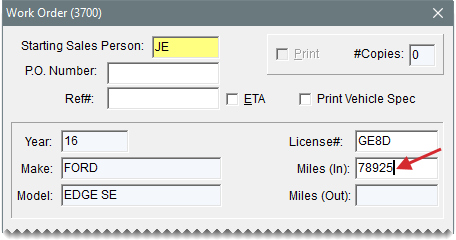
| 1. | Start a work order, and type the vehicle’s mileage in the Miles (In) field on the Work Order screen. |
| 2. | On the Invoice Entry screen opens, click Svc Intervals. The TM Interface screen opens. |
| 3. | If the ISE prompts you for vehicle information, do one of the following and click Next. Otherwise, disregard this step. |
Select you’re prompted for the VIN, select Use VIN. Then type the VIN and click Go.
Select Use Manual Vehicle.
Select Use Activant Vehicle. Then define the year, make, model, and engine.
| 4. | Select intervals, indicators, and additional services as needed. Then answer the questions about the vehicle, if any, and click Next. The interval information sheet opens. |
| 5. | Click the printer icon in the upper-right corner of the on-screen interval sheet. The Windows Print screen opens. |
| 6. | Select a printer and click Print. |
| 7. | Click  to close the on-screen interval sheet. A confirmation message appears. to close the on-screen interval sheet. A confirmation message appears. |
The Integrated Service Estimator includes service interval information for normal, severe, and premium maintenance services. You can look up the parts and labor needed for a particular interval in the ISE and add the items to a customer’s estimate or invoice.
To retrieve service interval information
| 1. | Open the Integrated Service Estimator. |
| a. | From the Invoice Entry screen (a customer’s work order) or the Quote and Estimate Writer, click Parts & Labor. |
| b. | Make sure Epicor Interface is selected and click OK. |
| 2. | Identify the vehicle, using one of the following methods. If a valid VIN was entered for the vehicle in TireMaster, the ISE bypasses the vehicle selection screen. |
Select Use VIN, type the vehicle identification number, and click Go. Then click Next.
Select Use Manual Vehicle. Then click Next.
Select Use Activant Vehicle, and choose the vehicle year, make, model, and engine. Then click Next.
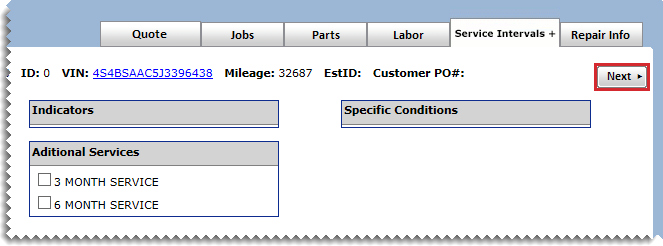
| 3. | Click the Service Intervals+ tab. |
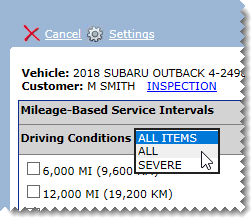
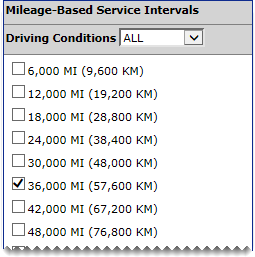
| 4. | Define an interval type and the mileage. |
| a. | Select the type of driving conditions from the drop-down. |
| b. | Select the check box for the service interval that’s closest to the vehicle’s mileage. |
| 5. | Select indicators and additional services as needed. Then answer the questions for the specific conditions, if any. |
| 6. | Click Next. |
| 7. | Print a copy of the services recommended for the interval (optional). |
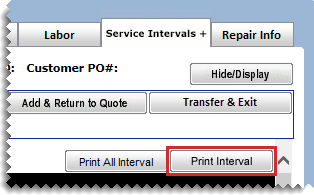
| a. | Click Print Interval. An on-screen copy of the interval appears. |
| b. | Click the printer icon in the upper-right corner of the on-screen interval sheet. The Windows Print screen opens. |
| c. | Select a printer and click Print. |
| d. | Click  to close the on-screen interval sheet. A confirmation message appears. to close the on-screen interval sheet. A confirmation message appears. |
| 8. | Select the parts and labor for the interval. |
| a. | If the parts and labor listings are collapsed, click the plus sign next to the job description. |
| b. | Select the check boxes for the parts needed for the interval service. |
| c. | Select the check box for performing the interval service. The check boxes for individual labor items included in the service are selected automatically. If you want to exclude individual labor items from the work order, clear the check boxes. |
| 9. | To move the items to the work order or estimate, click Transfer & Exit. |
If you’ve subscribed to Mitchell 1® ProDemand®, you can retrieve service bulletins and repair information from the ISE without starting a work order.
To retrieve service and repair information
| 1. | Press F6. The TM Interface screen opens. |
| 2. | Identify the vehicle, using one of the following options: |
Select Use VIN, type the vehicle identification number, and click Go. Then click Next.
Select Use Manual Vehicle. Then click Next.
Select Use Activant Vehicle, and choose the vehicle year, make, model, and engine. Then click Next.
| 3. | Click the Repair Info tab. Mitchell 1 ProDemand opens in a web browser. |
| 4. | If you’re prompted to log in, enter the credentials that Mitchell1 has issued to you. |
| 5. | Search for the service bulletin or repair information that you need on the ProDemand web site. |
| 6. | Print the service bulletin or repair information as needed. |
| 7. | Close the browser window for Mitchell 1 ProDemand and the open TireMaster interface screen. |
ALLDATA subscribers have the option to retrieve recall notices, service bulletins, diagrams, diagnostic trouble codes, and vehicle component information from the ISE without starting a work order.
ALLDATA recall notices and repair bulletins that are normally retrieved through the Epicor Integrated Service Estimator are currently unavailable.
ALLDATA has ended support for the application programming interface (API) that was used to transmit their data to Epicor. Because that connection has been discontinued, clicking the ALLDATA links and Repair Info tab in Epicor no longer routes you to ALLDATA's repair information.
Epicor is working on an update that will allow the Integrated Service Estimator to work with ALLDATA's new API. However, the estimated completion date for that development has not been communicated to ASA.
Until the connection between ALLDATA and Epicor is restored, the following options are available:
You can access ALLDATA repair information by logging on to the ALLDATA website via a browser.
You can switch to a Mitchell 1 subscription and retrieve that organization's vehicle information through Epicor.
If you have questions about this disruption, contact TireMaster Support.
To retrieve ALLDATA recall notices and technical service bulletins
| 1. | Press F6. The TM Interface screen appears. |
| 2. | Identify the vehicle, using one of the following options: |
Select Use VIN, type the vehicle identification number, and click Go. Then click Next.
Select Use Manual Vehicle. Then click Next.
Select Use Activant Vehicle, and choose the vehicle year, make, model, and engine. Then click Next.
| 3. | Do one of the following: |
To open the ALLDATA home screen, click the Repair Info tab.
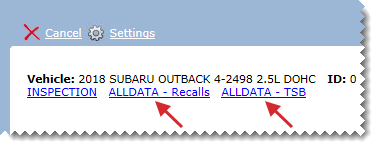
To go directly to a list of recalls or technical bulletins, click the ALLDATA - Recalls or the ALLDATA - TSB link.
| 4. | Click the link for the document you want to review. |
| 5. | For a hard copy, click  . . |
| 6. | To return to TireMaster, click  and then click Close. and then click Close. |
If your inventory includes parts (such as oil filters or brakes pads) that you regularly keep in stock, you’ll typically want to use the items that you have on hand for services and repairs instead of ordering them from your suppliers. Using local inventory makes it possible for you to see whether you have the items needed for a job directly from the ISE.
With local inventory, you can see whether your inventory includes the parts needed for a service or repair directly in the Integrated Service Estimator. If a compatible part is in stock, you can then add it to the work order or service checklist via the ISE.
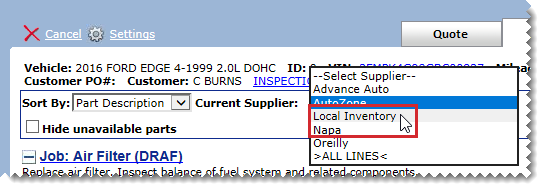
To view your inventory in the Integrated Service Estimator, select Local Inventory from the Current Supplier drop-down. If there are no compatible parts in your inventory, you can then check to see if they’re available from another supplier.
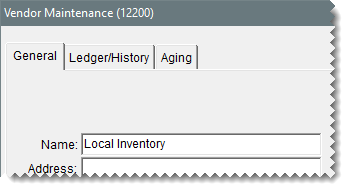
If you don’t have access to local inventory from the ISE and would like to would like to add it, contact your ASA sales representative. If you plan to use local inventory, set up a vendor in TireMaster called Local Inventory.
This vendor will be assigned to the supplier configuration for local inventory.
You can ensure your salespeople consistently sell oil change packages for the proper price.
Using Epicor job codes in conjunction with a generic oil change item prevents undercharging when the oil quantity retrieved from the Integrated Service Estimator is less than the amount of oil included in the package. Here's how it works:
The job codes define package prices and oil quantities
The generic oil change item accommodates price adjustments needed when the amount of oil retrieved from Epicor is less than the amount of oil included in the package.
To see how oil change package pricing works, watch the video.
Before using oil change packages, perform three tasks. Add an inventory item for handling price adjustments, assign the item to a system control, and set the price and oil quantity for each of your oil change job codes.
To ensure customers are charged the package price for oil changes, TireMaster uses a generic inventory item to cover the difference between the price of the package and the total of the parts and labor retrieved from Epicor. Therefore, you need to add an item to your inventory specifically for this purpose. When you add the item,
Classify it as noninventoriable.
Leave the price set to $0.00.
Once the oil change package item exists, assign it to a system control. The control tells TireMaster to include the oil change item on a work order when an oil change package job code is used.
To set the oil change package control
| 1. | Select Setup > System Controls. The System Controls screen opens. |
| 2. | Click the Inventory tab. |
| 3. | Select JobAddon PartNo and press Enter. |
| 4. | Look up the oil change package item and select it from the search results. For more information, see Inventory Searches. |
| 5. | Click OK to save the setting. |
| 6. | Close the System Controls screen. |
Before you sell your oil change packages to customers, update the Epicor job codes you'll use to add the oil change packages to work orders. When you update the job codes, you need to define the following:
The price for the oil change package
The maximum amount of oil included in the package
To update an oil change package job code
| 1. | Open the job code setup screen: |
| a. | Open an existing work order and press F11. The Quick Jobs menu opens. |
| b. | Click  on one of the quick job buttons. on one of the quick job buttons. |
 on any of the quick job buttons, close the Quick Jobs menu and navigate to the setup screen via the Epicor ordering interface. For more information, see Adding Job Codes
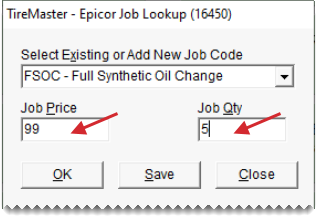
| 2. | Select the job code you want to use for an oil change package from the drop-down. |
| 3. | Set the job price and job quantity. |
Job price is the price of the oil change package associated with the job code.
Job quantity is the maximum quarts of oil included in the price of the oil change package.
| 4. | Click Save. |
| 5. | Close the confirmation message and job code setup screen. |
Add the job code to the Quick Jobs menu, if it's not already on that screen. For more information, see Setting Up the Quick Jobs Menu.
When you sell an oil change package, use the job code for that package to add the service to the work order. Using the job code ensures the customer is charged the package price.
To sell an oil change package
| 1. | Start the work order, and choose the customer and vehicle. For more information, see Create a Regular Work Order. |
| 2. | Press F11 to open the Quick Jobs menu. |
| 3. | Click the button for the oil change package you're selling. The EpicorISE opens. |
| 4. | Select the oil quantity and any other items needed for the oil change. |
| 5. | Click Transfer & Exit. The oil change package is added to the work order with one of the following adjustments: |
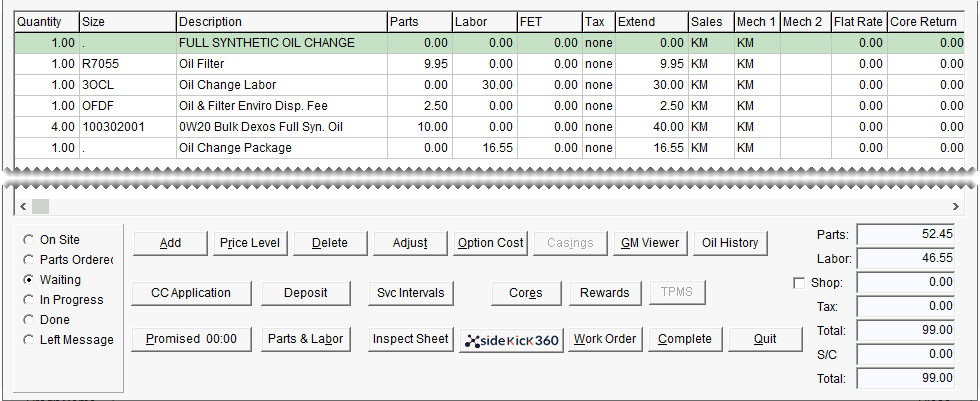
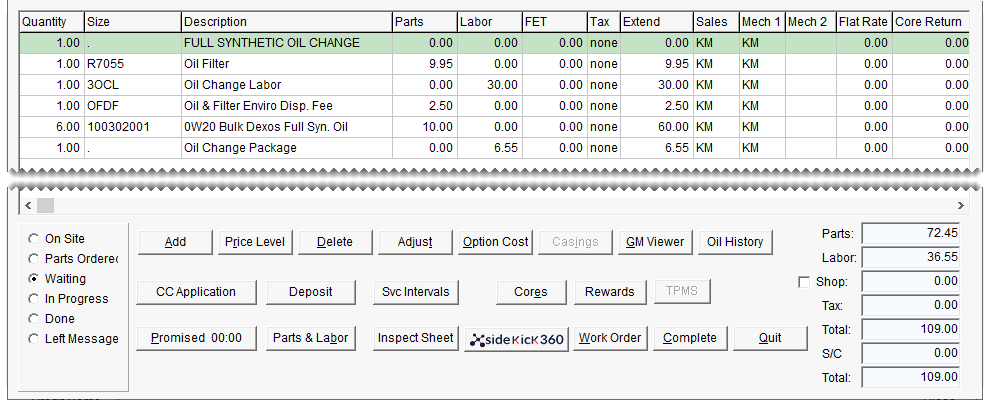
If the actual oil quantity is less than the package oil quantity, TireMaster increases the price of the oil change package item to cover the difference between the package price and the total of parts and labor.
If the actual oil quantity exceeds the package oil quantity, TireMaster adds the price of the additional oil to the package price.
| 6. | Complete the invoice. For more information, see Complete an Invoice. |

