Add-On Packages
This help topic is applicable to the following TireMaster applications:
|
TireMaster Point of Sale |
TireMaster Plus |
TireMaster Corporate |
|---|---|---|

|

|

|
With add-on packages (referred to as add-ons), you can automatically include additional items and services such as alignments, warranties, and disposal fees on a customer's work order. Using add‑on packages includes the following benefits:
It reduces the amount of time needed to create work orders, because you don’t have to add each item one at a time.
It can help you increase sales, because add-on packages remind you to suggest additional items and services to customers.
It can help to prevent liability by prompting you to recommend services that, if declined, might compromise a customer’s safety.
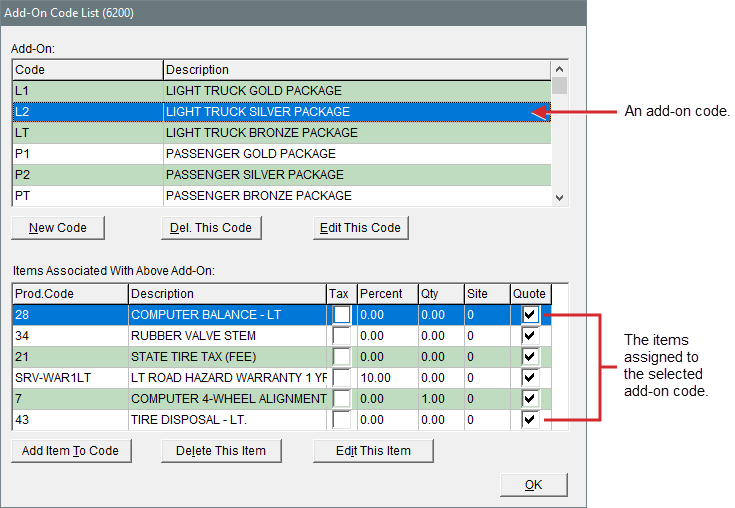
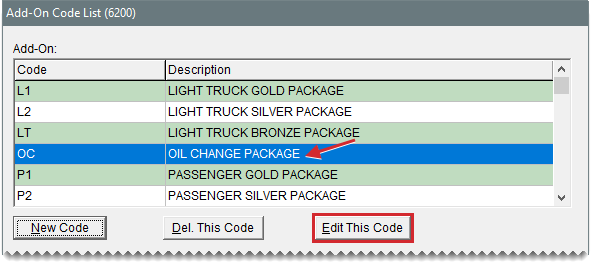
An add-on is made up of an add-on code and one or more items. Add-on codes are displayed at the top of the Add-On Code List, and the items assigned to each of the add-on codes are listed toward the bottom
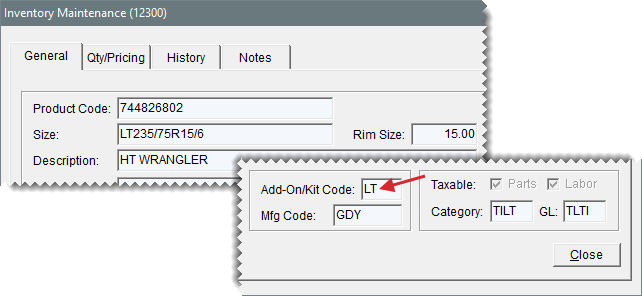
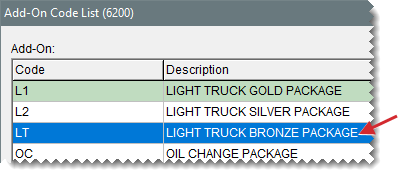
Add-on codes can be assigned to one or more items in your inventory. In the following image, the add‑on code LT is assigned to a tire.
The items that add-on codes are assigned to are referred to as parent items, and they are the main items put on work orders. Tires and oil changes are two examples of parent items. When you put a parent item on a work order, the items linked to its add‑on code (the add-on items) are also added to the work order automatically. If a customer doesn’t want to purchase an add-on item, you can delete it from the work order. On the Invoice Entry screen, the lines for parent items are green and lines for add‑on items are white
The first step in setting up add-ons is creating the add-on codes that can be assigned to (parent) items. The items that add-on codes are assigned to are called parent items. When parent items are sold, the add-on codes prompt TireMaster to automatically include additional items on work orders.
To create an add-on code
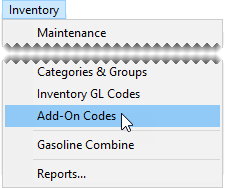
| 1. | Select Inventory > Add-On Codes. The Add-On Code List opens. |
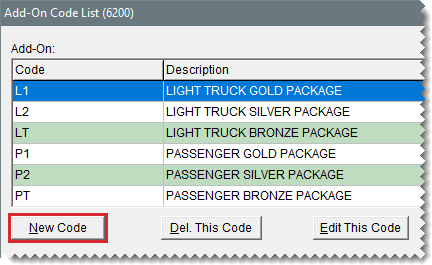
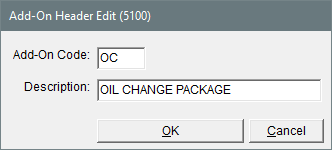
| 2. | Click New Code. The Add-On Header Edit screen opens. |
| 3. | Type a two-character code in the Add-On Code field. |
| 4. | Type a description for the add-on code. |
| 5. | Click OK. Now you can assign items to the new add-on code. For more information, see Assign Items to Add-On Codes. |
You can change the description of existing add-on codes and delete add-on codes that are unused.
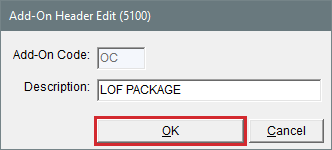
If you don’t like the description for an add-on code, you can change it. However, the add-on code itself cannot be edited.
To change an add-on code's description
| 1. | Select Inventory > Add-On Codes. The Add-On Code List opens. |
| 2. | Select the code whose description you want to change, and click Edit This Code. |
| 3. | Type the new description, and click OK. |
Add-on codes that are not assigned to any items can be deleted.
To delete an add-on code
| 1. | Select Inventory > Add-On Codes. The Add-On Code List opens. |
| 2. | Select the code you want to delete, and click Delete. |
| 3. | When the confirmation message appears, click Yes. The code is removed from the database. |
| 4. | Close the Add-On Code List. |
The second step in creating add-on packages is assigning items to the add-on codes. When you assign items to an add-on code, you need to define whether they'll be sold at the same quantity as the parent item or at a fixed quantity. For example, although you sell a set of four tires, you perform only one alignment check.
You also need to decide whether to sell add-on items at their regular prices or a percentage of the parent item’s price. The prices and quantities of add-on items can be overridden at point of sale if needed.
To assign items to an add-on code
| 1. | Select Inventory > Add-On Codes. The Add-On Code List opens. |
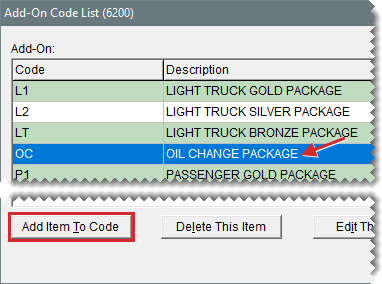
| 2. | Select the code to which you'll assign items (top of screen), and click Add Item to Code (lower left). The Add-On Item Edit screen opens. |
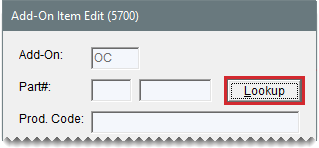
| 3. | Click Lookup, and search for the item you want to assign to the add-on code. For more information, see Inventory Searches. |
| 4. | Define whether the settings for an add-on item are only applicable for a particular site, if needed , and select the site from the Site List. Otherwise disregard this step. , and select the site from the Site List. Otherwise disregard this step. |
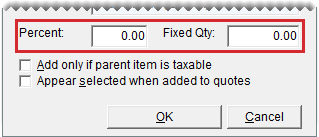
| 5. | Set a price percentage and fixed quantity as needed: |
To sell the add-on item at a percentage of the parent item’s price, type the percentage in decimal form (such as 5.5) in the Percent field. Otherwise, leave the percentage set to 0.00.
To sell the add-on item at a fixed quantity, type the quantity in the Fixed Qty field. Otherwise, leave the quantity set to 0.
| 6. | To exclude the add-on item from tax‑exempt invoices, select the Add only if parent item is taxable check box. Otherwise, leave the check box alone. |
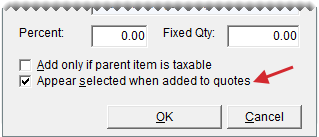
| 7. | To include the add-on item in quoted prices, select the Appear selected when added to quotes check box. Otherwise, leave the check box alone. |
| 8. | Click OK. |
| 9. | To assign additional items to the add-on code, repeat steps 2 through 8. |
| 10. | Close the Add-On Code List. |
If you need to change the percentage, quantity, or tax settings for an add-on item, update its settings.
To update an add-on item
| 1. | From the Inventory menu, select Add-On Codes. The Add-On Code List appears. |
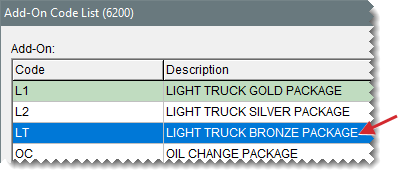
| 2. | Select the code that’s assigned the add-on item you want to update (top list). |
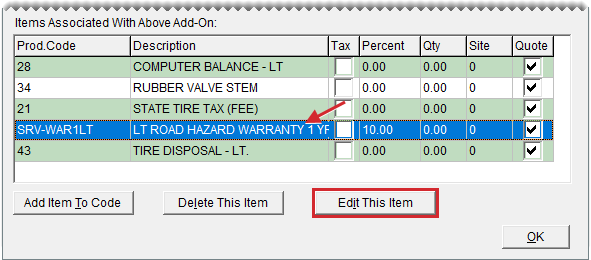
| 3. | Select the item (lower list), and click Edit This Item. The Add-On Item Edit screen opens. |
| 4. | Make the needed changes to the percentage, quantity, and tax settings. |
| 5. | Click OK. |
If an item should no longer be assigned to an add-on code, you can remove the add-on item from the add-on code.
To remove an add-on item from an add-on code
| 1. | Select Inventory > Add-On Codes. The Add-On Code List opens. |
| 2. | Select the code that is assigned the add-on item you want to remove (top list). |
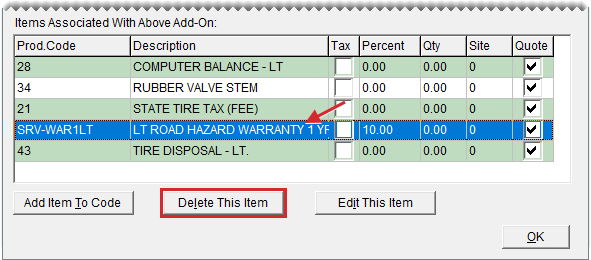
| 3. | Select the add-on item (lower list), and click Delete This Item A confirmation message appears. |
| 4. | Click Yes. The add-on item is removed from the add-on code. |
An add-on code defines which additional items to sell when an item is sold. The add-on code is one of many settings that you can assign to an item on the Inventory Maintenance screen.
To assign an add-on code to an item
| 1. | Look up the item you want to assign the add-on code to. For more information, see Inventory Searches. |
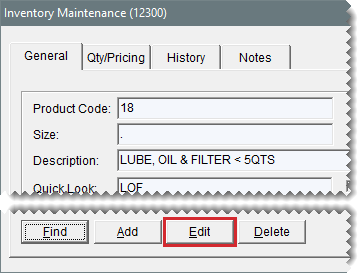
| 2. | On the Inventory Maintenance screen, make sure the General tab is selected and click Edit. |
| 3. | Click the Add-On/Kit Code field, press  , and select an add-on code from the list. , and select an add-on code from the list. |
| 4. | To save your changes, click OK. |
| 5. | Close the Inventory Maintenance screen. |
