Customer Types
This help topic is applicable to the following TireMaster applications:
|
TireMaster Point of Sale |
TireMaster Plus |
TireMaster Corporate |
|---|---|---|

|

|

|
Customer types classify customers and ensure that special handling occurs at point of sale. You can also use customer types to organize information on several reports.
When you start a work order, TireMaster looks at the customer’s type code to determine the following:
Whether you’ll be prompted to select a vehicle
Whether you’ll be prompted to select a tax level
Whether to include add-on items on the work order
Which general ledger accounts the completed sale will post to
TireMaster comes with several customer types that you can customize and you can add your own.
Although TireMaster comes with several customer types, you can create additional types to further classify your clients.
To add a customer type
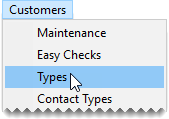
| 1. | Select Customers > Types. The Customer/Vendor Type List opens. |
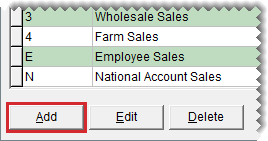
| 2. | Click Add. The Customer/Vendor Type Edit screen opens. |
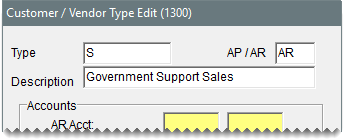
| 3. | Define a unique code for the customer type in the Type field. |
| 4. | In the AP or AR field, type AR. |
| 5. | Type a description for the customer type. |
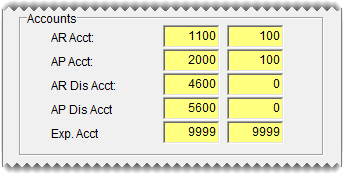
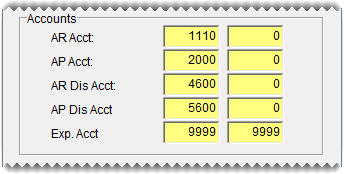
| 6. | Assign the general ledger accounts for posting sales for the new customer type. To assign an account, click the account field, press  , and select an account from the list that appears. , and select an account from the list that appears. |
If you're using TireMaster Plus or TireMaster Corporate, assign the general ledger accounts of your choice.
If you're using TireMaster Point of Sale, assign the following preset accounts.
| For AR Acct, use preset 1110-0. | For AP Dis Acct, use preset 5600-0. |
|
For AP Acct, use preset 2000-0. |
For Exp Acct, use preset 9999-9999. |
| For AR Dis Acct, use preset 4600-0. |
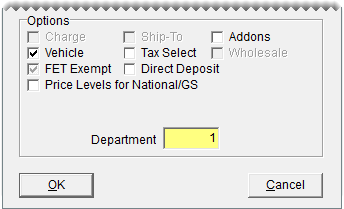
| 7. | Select any options that you want to enable for the customer type. For more information, see Customer Type Edit Screen. |
| 8. | To assign a department to the type, click the Department field, press  , and select an account from the list that appears (optional for TireMaster Plus and TireMaster Corporate systems only). , and select an account from the list that appears (optional for TireMaster Plus and TireMaster Corporate systems only). |
| 9. | To save the customer type, click OK. |
The default customer type is the setting that identifies your typical customer. For example, if most of your customers buy tires and services for their personal vehicles, you would define the retail customer type as the default. The default customer type is automatically assigned each time you add a new customer. The default customer type is defined with a system control.
To set the default customer type
| 1. | Select Setup > System Controls. The System Controls screen opens. |
| 2. | Click the Customer tab. |
| 3. | Select Customer Default Type and press Enter. The Customer/Vendor Type List opens. |
| 4. | Select the type you want to use as the default, and click OK. |
| 5. | Close the System Controls screen. |
When you create a customer record, the default customer type is automatically assigned to the new customer. You can leave this setting alone or change it. You can also change the type assigned to existing customers.
To assign a customer type
| 1. | Add a customer or look up the customer whose type you want to change. For more information, see Add a Cash Customer, Add an AR Customer, or Customer Searches |
| 2. | When the Customer Maintenance screen opens, make sure the General tab is selected. |
| 3. | Click Edit. |
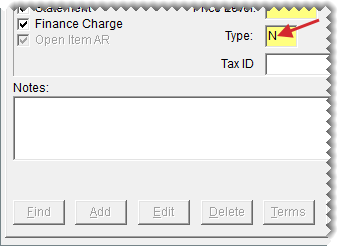
| 4. | Click the Type field and press  . Then select a type from the list that appears. . Then select a type from the list that appears. |
| 5. | To save the change, click OK. |
If you need to update customer types, you can easily adjust the options for handling point of sale and received on account activity. In TireMaster Plus and TireMaster Corporate, you can also choose to post sales activity to different GL accounts.
To update a customer type
| 1. | Select Customers > Types. The Customer/Vendor Type List opens. |
| 2. | Select the type you want to updated and click Edit. The Customer/Vendor Type Edit screen opens. |
| 3. | Do the following as needed: |
Change the GL accounts
Select different options.
Change the department
To update the GL accounts or department, click the field that needs to be changed. Then press  and make a selection from the list that appears.
| 4. | To save your changes, click OK. |
If a customer type is not assigned to any customers, it can be deleted.
To delete a customer type
| 1. | Select Customers > Types. The Customer/Vendor Type List opens. |
| 2. | Select the type you want to remove and click Delete. A confirmation message appears. |
| 3. | Click Yes. |
