Inventory Returns
This help topic is applicable to the following TireMaster application:
When you send items back to a vendor, you need to remove them from your inventory. This change is accomplished by creating a negative receiving document.
Note: If the item being sent back to a vendor is assigned the option cost costing method, performing the following steps might not be necessary because the negative receiving document and possibly a negative charge might already exist. This is always true for
tracked option cost items that customers purchase and then return, because creating the negative receiving document during the return is required. It can also occur when a customer purchases and returns an untracked option cost item. In this scenario, you have the
option to create the negative receiving document and negative vendor charge during the return. For more information, see
Return Tracked Option Cost Items and
Return Untracked Option Cost Items.
To create a negative receiving document
|
2.
|
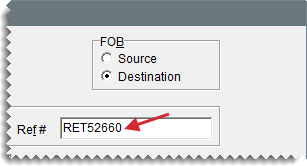
Enter a reference number for the receiving document if needed. |
|
4.
|
Type the returned item’s quantity as a negative number. The Price and FETax fields turn green. |
|
5.
|
Use one of the following methods for processing the return: |
To return an inventoriable item at its next cost and next FET (if any), make sure the Price and FETax fields are green and that the amount in both is $0.00.
To return an inventoriable item at the cost and FET of your choice, change the values in the Price and FETax fields. These fields then turn pink.
For noninventoriable relief-percent items, type the estimated cost (Parts Price x Relief Percent) in the Price field. For example, if an item’s parts price is $50 and its relief percent is 10%, type $5 in the Price field
For noninventoriable option cost and expense method items, type your cost in the Price field.
Note: The cost or estimated cost of a returned item is not included in the receiving document’s total.
|
6.
|
To return additional items, repeat steps 3 through 5. |
Note: If you need to receive any new items at this time, you can add them to the receiving document. For more information, see
Create a Receiving Document.
|
7.
|
Click Receive. TireMaster prompts you to price the RD. |
Note: Depending on how the system controls are set, you might be required to add a reference number if you haven’t already.
|
8.
|
Click Yes. The Vendor Invoice screen appears. |
|
9.
|
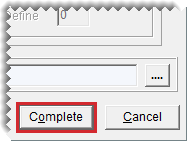
Click Complete. The Report Window opens and displays the vendor invoice document for the return. |
|
10.
|
Print the vendor invoice document and close the Report Window. The completed vendor invoice document (VID) is displayed on the PO System screen and the returned item or items are removed from the inventory. |


