Customer Tab Reports
This help topic is applicable to the following TireMaster applications:
|
TireMaster Point of Sale |
TireMaster Plus |
TireMaster Corporate |
|---|---|---|

|

|

|
This tab includes reports for generating customer information, such as purchase history and account balances.
This report shows accounts receivable activity for one or more customers.
To generate the AR Detail - By Customer Report
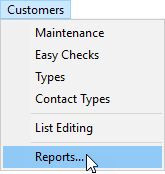
| 1. | Select Customers > Reports. The Report List opens with the Customer tab selected. |
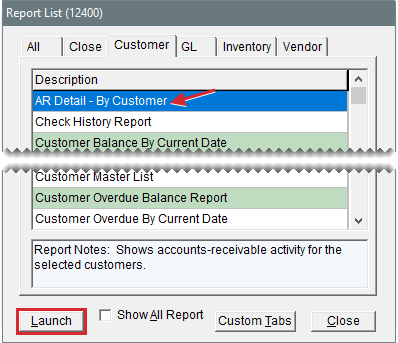
| 2. | Select AR Detail - By Customer and click Launch. The Customer Range screen opens. |
| 3. | Select one or more customers: |
For one customer, click 1 Lookup and look up the customer’s name. For more information, see Customer Searches.
For a range of customers, click 1 Lookup and look up the customer for the beginning of the range. Then click 2 Lookup and look up the customer for the end of the range.
For all customers, leave the Beginning Customer and Ending Customer fields blank.
| 4. | Click OK. The Report Window opens. |
| 5. | Print the report and close the Report Window. |
This report is designed to help you research which checks or direct deposits were used to pay for which invoices. The report includes any checks and direct deposits that were received from the customer at either the time of the sale or received later on account. If a check number was not entered at the time of payment, that check is excluded from the report.
To generate a Check History Report
| 1. | Select Customers > Reports. The Report List opens with the Customer tab selected. |
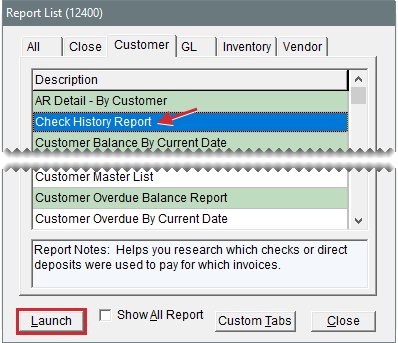
| 2. | Select Check History Report and click Launch. The Check History Report Options screen opens. |
| 3. | Select one of the following: |
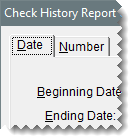
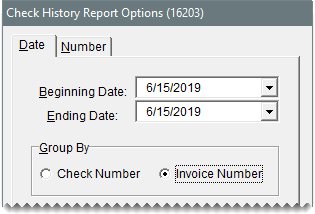
To look up checks written during on a specific day or during a date range, click the Date tab.
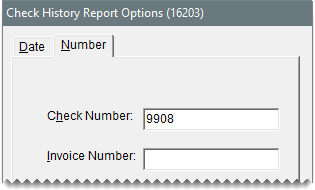
To look up a specific check number or invoice number, click the Number tab. Then go to step 6.
| 4. | Select the starting and ending dates for the report’s date range. |
| 5. | Select one of the following in the Group By area. Then go to step 7 |
Check Number to sort checks by the check number that was entered at point of sale
Invoice Number to sort checks by invoice number
| 6. | Type the check number or the invoice number. |
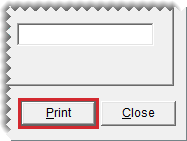
| 7. | Click Print. The Report Window opens. |
| 8. | Print the report and close the Report Window. |
This report lists customers with balances as of the current date. It includes future, current, 30 day, 60 day, and 90 day balances.
To generate a Customer Balance Report
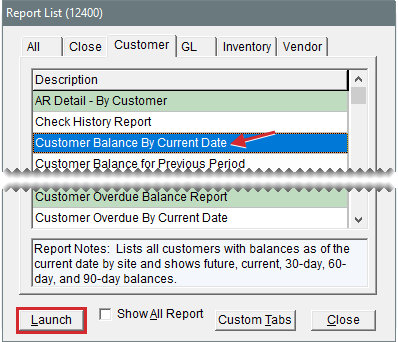
| 1. | Select Customers > Reports. The Report List opens with the Customer tab selected. |
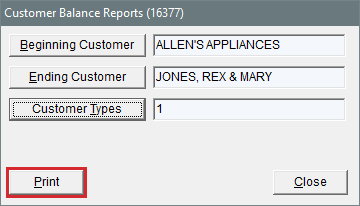
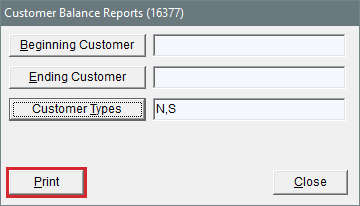
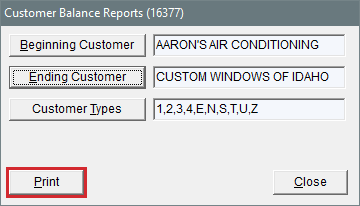
| 2. | Select Customer Balance by Current Date and click Launch. The Customer Balance Reports screen opens. |
| 3. | Select one or more customers: |
For all customers, leave the Beginning Customer and Ending Customer fields blank.
For one customer, click Beginning Customer and look up the customer’s name. For more information, see Customer Searches.
For a range of customers, click Beginning Customer and Ending Customer to look up the first and last customers in the range.
To retrieve information for specific customer types only, click Customer Types. Then select one or more types from the list.
To retrieve information for specific sites only, click Sites
| 4. | Click Print. The Report Window opens. |
| 5. | Print the report and close the Report Window. |
| 6. | Close the Customer Balance Reports screen. |
This report provides balance information for a single customer, a group of customers, or all customers for a previous fiscal period.
New fiscal period data for this report is available once the period ends. If your computer is running at 10:30 PM on the last day of the period (typically the end of the month), the report data is compiled at that time. If your computer is not running then, the compilation occurs the next time the computer is turned on.
The data compiled for this report represents a moment in time. Therefore, it will not include backdated entries posted after the compilation.
To generate a Customer Balance for Previous Period Report
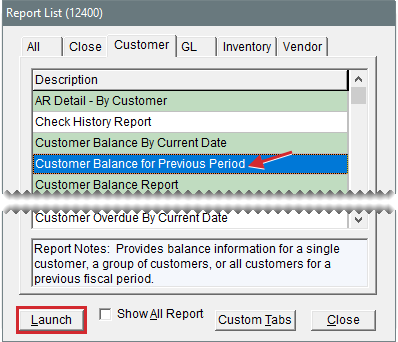
| 1. | Select Customers > Reports. The Report List opens with the Customer tab selected. |
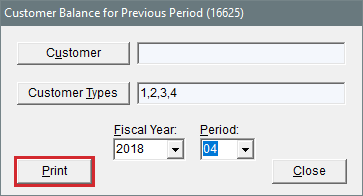
| 2. | Select Customer Balance for Previous Period and click Launch. The Customer Balance History screen opens. |
| 3. | Select one or more customers: |
For a specific customer, click Customer and look up the customer’s name. For more information, see Customer Searches.
For all customers, leave the Customer field blank.
For information for specific customer types only, click Customer Types. Then select one or more types from the list that appears.
| 4. | Select the fiscal year and period from the drop-downs. |
| 5. | Click Print. The Report Window opens. |
| 6. | Print the report and close the Report Window. |
This report lists customers with balances as of the last statement cutoff. It includes future, current, 30 day, 60 day, and 90 day balances.
To generate a Customer Balance Report
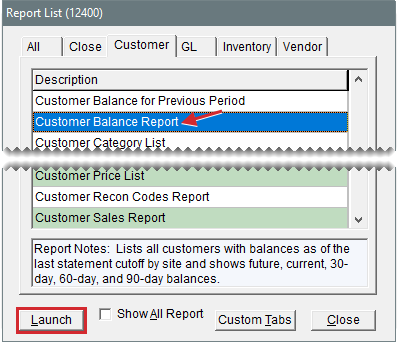
| 1. | Select Customers > Reports. The Report List opens with the Customer tab selected. |
| 2. | Select Customer Balance Report and click Launch. The Customer Balance Reports screen opens. |
| 3. | Select one or more customers: |
For all customers, leave the Beginning Customer and Ending Customer fields blank.
For one customer, click Beginning Customer and look up the customer’s name. For more information, see Customer Searches.
For a range of customers, click Beginning Customer and Ending Customer to look up the first and last customers in the range.
To retrieve information for specific customer types only, click Customer Types. Then select one or more types from the list.
To retrieve information for specific sites only, click Sites
| 4. | Click Print. The Report Window opens. |
| 5. | Print the report and close the Report Window. |
| 6. | Close the Customer Balance Reports screen. |
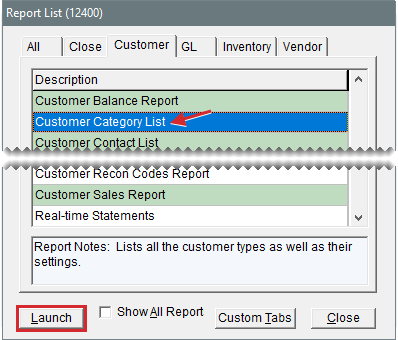
This report lists all the customer types as well as their settings.
To generate a Customer Category List
| 1. | Select Customers > Reports. The Report List opens with the Customer tab selected. |
| 2. | Select Customer Category List and click Launch. The Report Window opens. |
| 3. | Print the report and close the Report Window. |
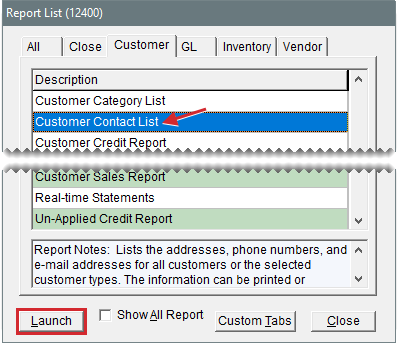
This report lists the addresses, phone numbers, and email addresses for all customers or one or more customer types. Information generated with this report can be printed or exported to a spreadsheet.
To generate a Customer Contact List
| 1. | Select Customers > Reports. The Report List opens with the Customer tab selected. |
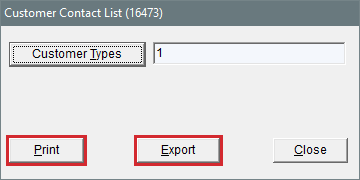
| 2. | Select Customer Contact List and click Launch. The Customer Contact List screen opens. |
| 3. | Define which customers you want to include: |
For all customers, leave the entries in the Customer Types field alone.
For specific customer types, click Customer Types. Then select one or more types from the list that appears, and click OK. For multiple types, press the Ctrl key while you make your selections.
| 4. | To generate the report, do one of the following: |
For a printed copy, click Print. When the Report Window opens, click Print again. When you’re done printing the report, close the Customer Contact List screen.
For a spreadsheet, click Export. Then click OK to close the message. The spreadsheet is saved in the Apps folder inside your TireMaster program directory.
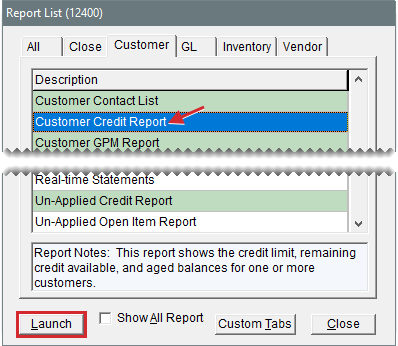
This report shows the credit limit, remaining credit available, and aged balances for one or more customers. You can generate the report for the following:
One customer
Customers who are all assigned the same customer type
Customers who are assigned two or more different customer types
To generate a Customer Credit Report
| 1. | Select Customers > Reports. The Report List opens with the Customer tab selected. |
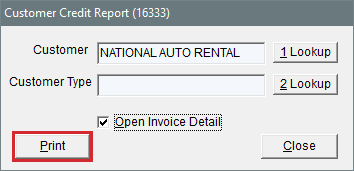
| 2. | Select Customer Credit Report and click Launch. The Customer Credit Report screen opens. |
| 3. | Select one or more customers: |
For one customer, click 1 Lookup. Then look up the name of the customer. For more information, see Customer Searches.
For customers who are all assigned the same type, click 2 Lookup. Then select a type from the list.
For customers who are assigned two or more different types, click 2 Lookup. Then press Ctrl and select each type that you want to include on the report.
| 4. | To include invoices that haven’t been paid, select the Open Invoice Detail check box. Otherwise, leave the check box clear. |
| 5. | Click Print. The Report Window opens. |
| 6. | Print the report and close the Report Window. |
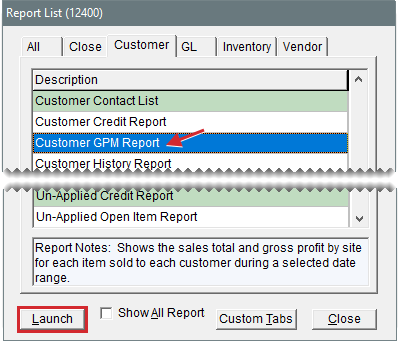
This report shows the sales total and gross profit for each item sold to each customer during a selected date range.
To generate a Customer GPM Report
| 1. | Select Customers > Reports. The Report List opens with the Customer tab selected. |
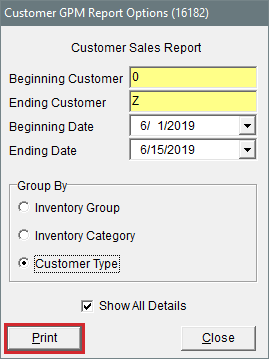
| 2. | Select Customer GPM Report and click Launch. The Customer GPM Report Options screen opens. |
| 3. | Select one or more customers: |
For one customer, click the Beginning Customer field, press  , and look up the customer. Then look up the same customer by repeating this process in the Ending Customer field. For more information, see Customer Searches.
For a range of customers, click the Beginning Customer field, press  , and look up the first customer in range. Then click the Ending Customer field and look up the customer for the end of the range.
For all customers, leave the Beginning Customer and Ending Customer fields as is.
| 4. | Select the starting and ending dates for the report’s date range. |
| 5. | Select one of the following methods for organizing items on the report: |
Inventory Group
Inventory Category
Customer Type
| 6. | To include invoice information, make sure the Show All Details check box is selected. For totals only, clear the Show All Details check box. |
| 7. | Click Print. The Report Window opens. |
| 8. | Print the report and close the Report Window. |
With this report, you can generate the following:
For one customer, the running balance and a list of all transactions that occurred during a date range
For all customers, running balances and a list of all transactions that have occurred since you started using TireMaster
In addition to generating detailed history, you can also print a summary that shows only the balance and sale and payment totals for one or all customers.
To generate a Customer History Report
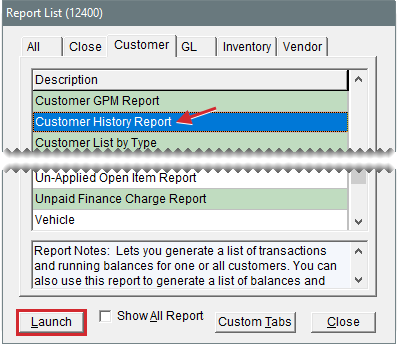
| 1. | Select Customers > Reports. The Report List opens with the Customer tab selected. |
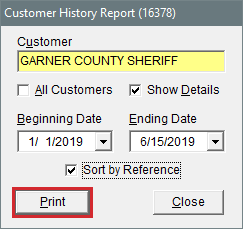
| 2. | Select Customer History Report and click Launch. The Customer History Report screen opens. |
| 3. | Select one or more customers: |
For one customer, click the Customer field and press [accent]. Then look up the customer’s name. For more information, see Customer Searches.
For all customers, leave the Customer field blank and make sure the All Customers check box is selected.
| 4. | To include individual invoice totals, make sure the Show Details check box is selected. To display only balances and sale and payment totals, clear the Show Details check box. |
| 5. | If you’re generating the report for one customer, select a date range. |
| 6. | To sort transactions by reference number, select the check box. Otherwise, leave it alone. |
| 7. | Click Print. The Report Window opens. |
| 8. | To print the report, click Print. Then click Close. |
This report lists the customer types in TireMaster and the customers who are assigned to each of those types.
To generate a customer list by customer type
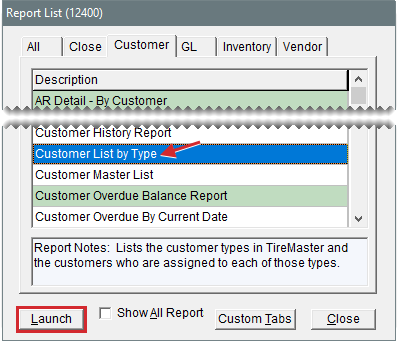
| 1. | Select Customers > Reports. The Report List opens with the Customer tab selected. |
| 2. | Select Customer List by Type and click Launch. The Customer Range screen opens. |
| 3. | Select one or more customers: |
For one customer, click 1 Lookup and look up the customer’s name. For more information, see Customer Searches.
For a range of customers, click 1 Lookup and look up the customer for the beginning of the range. Then click 2 Lookup and look up the customer for the end of the range.
For all customers, leave the Beginning Customer and Ending Customer fields blank.
| 4. | Click OK. The Report Window opens. |
| 5. | Print the report and close the Report Window. |
With this report, you can generate the following:
A list of all active customers
A list of customers assigned one or more customer types
A list of customers assigned to a specific salesperson
A list of customers assigned one or more customer types and a specific salesperson.
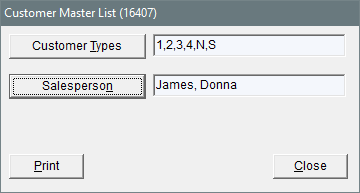
To generate a Customer Master List
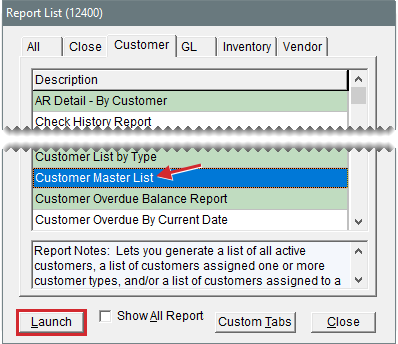
| 1. | Select Customers > Reports. The Report List opens with the Customer tab selected. |
| 2. | Select Customer Master List and click Launch. The Report Window opens. |
| 3. | To limit the report to specific customer types, do the following. |
| a. | Click Customer Types. The Customer/Vendor Type List opens. |
| b. | Select one or more types from the list. For multiple types, press the Ctrl key and select each type that you want to include on the report. |
| c. | Click OK. |
| 4. | To limit the report to customers who are assigned to a specific salesperson, do the following. |
| a. | Click Salesperson. The User List opens. |
| b. | Select the salesperson’s name from the list and click OK. |
| 5. | Click Print. The Report Window opens. |
| 6. | Print the report and close the Report Window. |
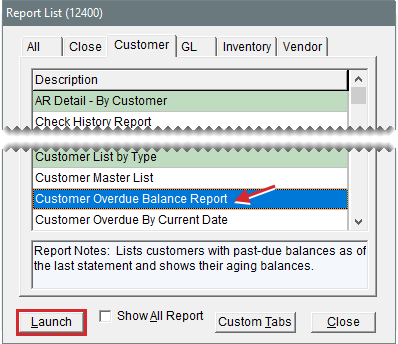
This report lists customers with past due balances as of the last statement and shows their aging balances.
To generate a Customer Overdue Balance Report
| 1. | Select Customers > Reports. The Report List opens with the Customer tab selected. |
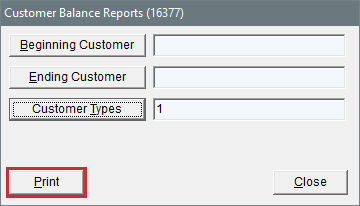
| 2. | Select Customer Overdue Balance Report and click Launch. The Customer Balance Reports screen opens. |
| 3. | Select one or more customers: |
For all customers, leave the Beginning Customer and Ending Customer fields blank.
For one customer, click Beginning Customer and look up the customer’s name. For more information, see Customer Searches.
For a range of customers, click Beginning Customer and Ending Customer to look up the first and last customers in the range.
To retrieve information for specific customer types only, click Customer Types. Then select one or more types from the list.
To retrieve information for specific sites only, click Sites
| 4. | Click Print. The Report Window opens. |
| 5. | Print the report and close the Report Window. |
| 6. | Close the Customer Balance Reports screen. |
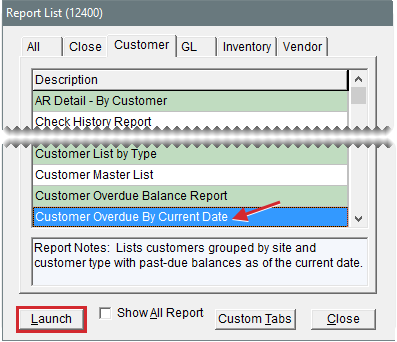
This report lists customers grouped by site and customer type with past due balances as of the current date.
To generate a Customer Overdue Balance by Current Date Report
| 1. | Select Customers > Reports. The Report List opens with the Customer tab selected. |
| 2. | Select Customer Overdue by Current Date and click Launch. The Customer Balance Reports screen opens. |
| 3. | Select one or more customers: |
For all customers, leave the Beginning Customer and Ending Customer fields blank.
For one customer, click Beginning Customer and look up the customer’s name. For more information, see Customer Searches.
For a range of customers, click Beginning Customer and Ending Customer to look up the first and last customers in the range.
To retrieve information for specific customer types only, click Customer Types. Then select one or more types from the list.
To retrieve information for specific sites only, click Sites
| 4. | Click Print. The Report Window opens. |
| 5. | Print the report and close the Report Window. |
| 6. | Close the Customer Balance Reports screen. |
This report helps you identify which items are associated with the price level discount for a price level that’s assigned to a customer.
To generate a Customer Price List
| 1. | Select Customers > Reports. The Report List opens with the Customer tab selected. |
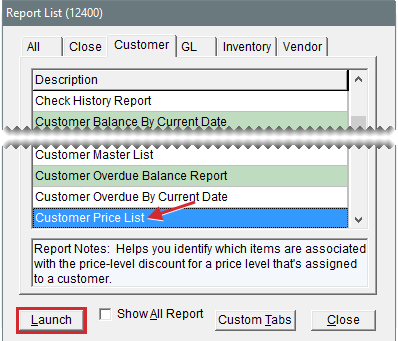
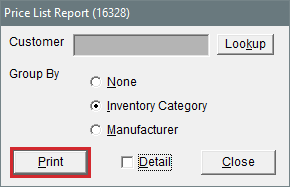
| 2. | Select Customer Price List and click Launch. The Price List Report screen opens. |
| 3. | Select one or all customers: |
For one customer, click Lookup. Then look up the customer whose price level information you want to view. For more information, see Customer Searches.
For all customers, leave the Customer field blank.
| 4. | Select one of the following methods for organizing items on the report: |
None
Inventory Category
Manufacturer
| 5. | To include price level codes and descriptions, make sure the Detail check box is selected. To show items and their prices only, clear the check box. |
| 6. | Click Print. The Custom Inventory Lookup screen opens. |
| 7. | Look up the items that you want to include on the report. The Report Window opens. For more information, see Inventory Searches. |
| 8. | Print the report and close the Report Window. |
| 9. | Close the Price List Report screen. |
This report lists each of the national account and government support settings assigned to your customers. This listing includes the reconciliation code, the customer’s vendor-assigned account number, and your dealer ID number. The report also identifies whether prices and the term “delivery receipt” are to be printed on invoices for each reconciliation code.
To generate a Customer Recon Codes Report
| 1. | Select Customers > Reports. The Report List opens with the Customer tab selected. |
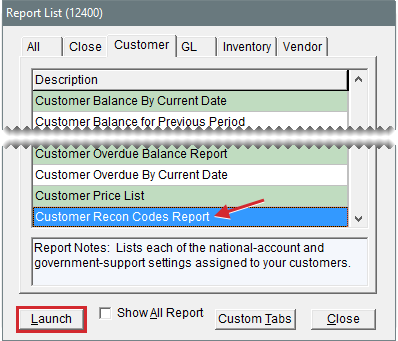
| 2. | Select Customer Recon Codes Report and click Launch. The Customer Range screen opens. |
| 3. | Select one or more customers: |
For one customer, click 1 Lookup and look up the customer’s name. For more information, see Customer Searches.
For a range of customers, click 1 Lookup and look up the customer for the beginning of the range. Then click 2 Lookup and look up the customer for the end of the range.
For all customers, leave the Beginning Customer and Ending Customer fields blank.
| 4. | Click OK. The Report Window opens. |
| 5. | Print the report and close the Report Window. |
This report compares the sales totals of two different dates or date ranges and shows the percentage of change between the two. It provides several different settings for retrieving information, and the first page of the report shows which settings where chosen. Because your selections are saved until you exit the report settings screen, you can go back and modify them after printing.
To generate a Customer Sales Report
| 1. | Select Customers > Reports. The Report List opens with the Customer tab selected. |
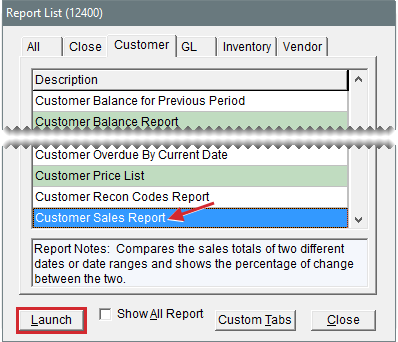
| 2. | Select Customer Sales Report and click Launch. The Customer Sales Report Options screen opens. |
| 3. | Select one of the following report types: |
Store to generate storewide sales figures
Salesperson to generate sales figures by salesperson
| 4. | Select one of the following methods for organizing items on the report: |
Category
Group
Neither
| 5. | Select one of the following in the Sort By area: |
Units to display items from the highest to the lowest number of units sold
Dollars to display items from the highest to lowest dollar amount sold
| 6. | To include items sold on the report, make sure the Show Detail check box is selected. For totals only, clear the check box. |
| 7. | Select dates for which you want to compare sales totals. |
| a. | Select the date or date range for current sales from the Report Date Range pop-up calendars. |
| b. | Select the date or date range that you want to compare your current sales to from the Compare Date Range pop-up calendars. |
| 8. | Define whether you want to display sales figures in report subgroups: |
If you selected the store report type (step 3), select Salesperson or Customer. Then, look up one salesperson, a range of salespeople, one customer, or all customers.
 and select an employee from the list that opens or look up a customer when prompted. For all salespeople or customers, leave the fields blank.
If you selected the salesperson report type (step 3), look up one salesperson, a range of salespeople, or all salespeople. Then limit the report to one customer or include all customers.
If you don’t want to display the information in subgroups, select Suppress Salesperson/Customer Grouping.
| 9. | Click Print. The Report Window opens. |
| 10. | Print the report and close the Report Window. |
When you generate customer statements, you can produce them for all customers or limit the statement run to those who meet specific requirements. Then you can send statement emails and print the hard copies.
To generate real time statements
| 1. | Open the statements screen using one of the following methods: |
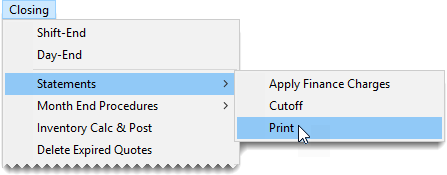
Select Closing > Statements > Print.
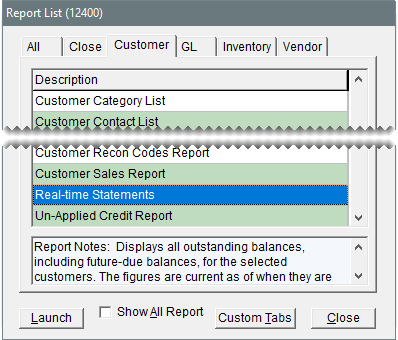
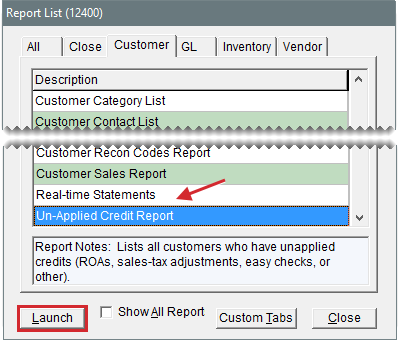
Click Reports to open the Report List. Click the Customer tab, select Real-time Statements, and click Launch.
| 2. | To define whether all customers, a group of customers, or individual customers will receive statements, do one of the following: |
For all customers, leave all of the fields blank.
For one customer, click Beginning Customer and look up the customer for whom you want to generate a statement.
For a range of customers, click Beginning Customer and search for the first customer in the range. Then click Ending Customer and search for the last customer in the range.
For specific customer types, click Customer Types. Then select one or more types from the list that appears and click OK.
For transactional activity from specific sites, click Sites and select one or more sites from the list that appears. Then select Customer Sites to print statements for customers added at the selected site(s), or select Invoice Sites to print statements for customers for with invoices completed at the selected site(s).
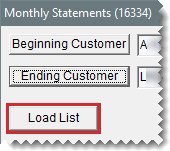
| 3. | Click Load List. TireMaster adds the names and account balances for the customers who will receive statements to the screen. |
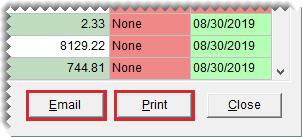
The colors, codes, and dates in the Email and Print columns indicate the following:
The color green means a statement can be generated for a customer
The color red means a statement has been printed or emailed to a customer
The code None means the delivery method is not used for a customer
The date is the date when a statement was last emailed or printed.
| 4. | If you want to narrow down the number of customers displayed, do one of the following. By default, all customers with balances are displayed regardless of whether they receive statements. |
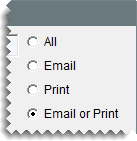
For only the customers with balances who receive statements by email, select Email.
For only the customers with balances who receive printed statements, select Print.
For customers with balances who receive statements, select Email or Print.
| 5. | Generate the statements. |
| a. | Click EMail. TireMaster emails statements to customers assigned the email delivery method. |
| b. | Click Print. Statements for customers assigned the print delivery method are sent to the printer. |
Once a customer’s statement is printed or emailed, the Print field, Email field, or both turn red (depending on the customer’s delivery method) and the statement-generation date appears.
| 6. | If you experience an issue such as a printer jam or an email failure, resend the affected statements as needed. Otherwise, disregard this step. For more information, see Customer Tab Reports. |
| 7. | Close the statements screen. |
This report lists all customers who have unapplied credits (ROAs, sales tax adjustments, easy checks, or other). For each unapplied credit, the report shows the document type and number, the original credit amount, the applied amount, and the unapplied amount. You should generate this report before printing statements.
To generate an Unapplied Credit Report
| 1. | Select Customers > Reports. The Report List opens with the Customer tab selected. |
| 2. | Select Unapplied Credit Report and click Launch. The Customer Range screen opens. |
| 3. | Select one or more customers: |
For one customer, click 1 Lookup and look up the customer’s name. For more information, see Customer Searches.
For a range of customers, click 1 Lookup and look up the customer for the beginning of the range. Then click 2 Lookup and look up the customer for the end of the range.
For all customers, leave the Beginning Customer and Ending Customer fields blank.
| 4. | Click OK. The Report Window opens. |
| 5. | Print the report and close the Report Window. |
This report displays the open items in accounts receivable subledgers for the selected customers. These items include ROAs, finance charges, discounts, and other items that haven’t been fully applied. This report shows the original amount, the applied amount, and the unapplied amount.
To generate an Unapplied Open Item Report
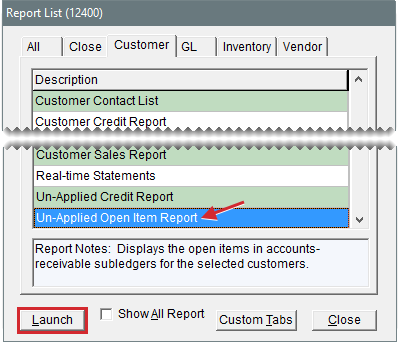
| 1. | Select Customers > Reports. The Report List opens with the Customer tab selected. |
| 2. | Select Unapplied Open Item Report and click Launch. The Customer Range screen opens. |
| 3. | Select one or more customers: |
For one customer, click 1 Lookup and look up the customer’s name. For more information, see Customer Searches.
For a range of customers, click 1 Lookup and look up the customer for the beginning of the range. Then click 2 Lookup and look up the customer for the end of the range.
For all customers, leave the Beginning Customer and Ending Customer fields blank.
| 4. | Click OK. The Report Window opens. |
| 5. | Print the report and close the Report Window. |
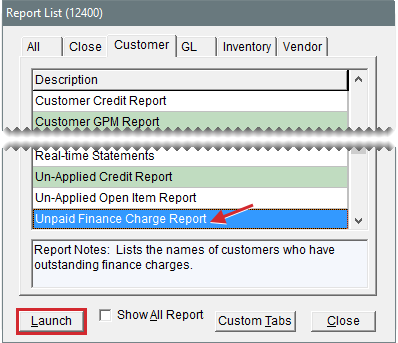
This report lists the names of customers who have outstanding finance charges. It displays the original amount for each outstanding charge, the amount paid on the charge, and the remaining amount due. In addition to those numbers, the report also includes aging information for the outstanding charges.
To generate an Unpaid Finance Charge Report
| 1. | Select Customers > Reports. The Report List opens with the Customer tab selected. |
| 2. | Select Unpaid Finance Charge Report and click Launch. The Customer Range screen opens. |
| 3. | Select one or more customers: |
For one customer, click 1 Lookup and look up the customer’s name. For more information, see Customer Searches.
For a range of customers, click 1 Lookup and look up the customer for the beginning of the range. Then click 2 Lookup and look up the customer for the end of the range.
For all customers, leave the Beginning Customer and Ending Customer fields blank.
| 4. | Click OK. The Report Window opens. |
| 5. | Print the report and close the Report Window. |
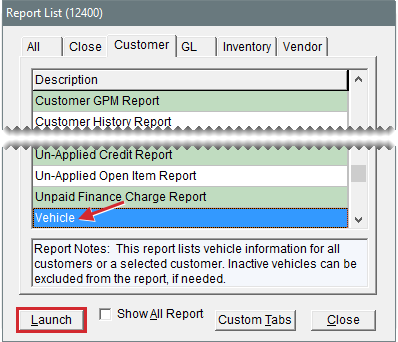
This report lists vehicle information for all customers, active customers, or a selected customer. For each vehicle, the report includes the year, make, model, mileage, license plate number, VIN, and the date of the last service.
To generate a Vehicle Report
| 1. | Select Customers > Reports. The Report List opens with the Customer tab selected. |
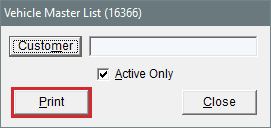
| 2. | Select Vehicle and click Launch. The Vehicle Master List screen opens. |
| 3. | Select the vehicles for one or more customers: |
For a list of all vehicles, leave the Customer field blank.
For a list of vehicles belonging to a particular customer, click Customer. Then look up the customer’s name. For more information, see Customer Searches.
| 4. | To exclude inactive vehicles from the report, make sure the Active Only check box is selected. For all vehicles, clear the check box. |
| 5. | Click Print. The Report Window opens. |
| 6. | Print the report and close the Report Window. |
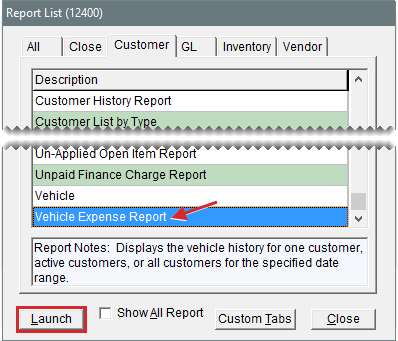
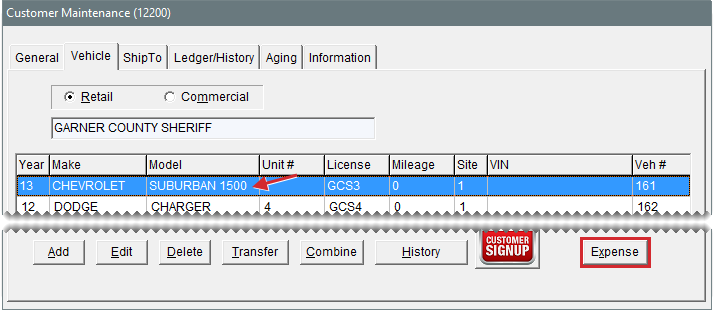
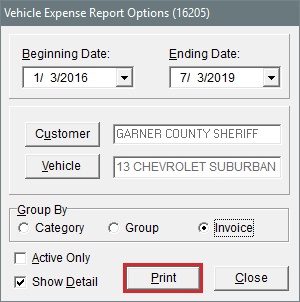
The Vehicle Expense Report displays the vehicle history for one customer, active customers, or all customers for the specified date range. It can be printed from either the Report List or the Vehicle tab on the Customer Maintenance screen.
To generate a Vehicle Expense Report
| 1. | Do one of the following to launch the report: |
Select Reports from the Customers menu. Then select Vehicle Expense Report and click Launch.
On the Customer Maintenance screen, click the Vehicle tab. Then select a vehicle and click Expense.
The Vehicle Expense Report Options screen opens.
| 2. | Select the starting and ending dates for the report’s date range. |
| 3. | Define whether to generate a report for one customer or all customers. If you’re generating this report from Customer Maintenance, disregard this step. |
For one customer, click Customer and look up the customer. For more information, see Customer Searches.
For all customers, leave the Customer field blank.
| 4. | Define whether to generate a report for one vehicle or all vehicles: |
For one vehicle, click Vehicle and select a vehicle from the list that opens.
For all vehicles, leave the Vehicle field blank.
| 5. | Select one of the following methods for organizing items on the report: |
Category
Group
Invoice
| 6. | To exclude inactive vehicles from the report, select the Active Only check box. |
| 7. | To include invoice information, make sure Show Detail is selected. To only display totals, clear the check box. |
| 8. | Click Print. The Report Window opens and displays the report. |
| 9. | Print the report and close the Report Window. |
