Statements
This help topic is applicable to the following TireMaster applications:
|
TireMaster Point of Sale |
TireMaster Plus |
TireMaster Corporate |
|---|---|---|

|

|

|
If you have customers with in-store charge accounts, you need to send them regular statements so they know their account balances and can make payments on their accounts.
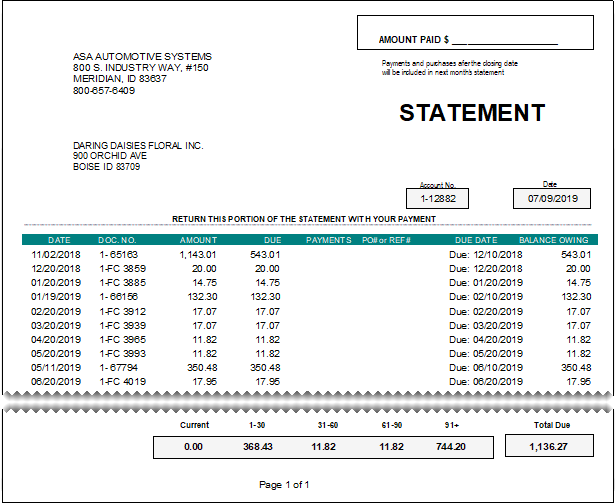
Statements include balances and a list transactions affecting customer accounts, such as invoices, finance charges, and payments.
|
Item |
Description |
|
Date |
Displays the date of transactions affecting the customer’s balance since the last statement cutoff. |
|
Doc. No |
Displays the document numbers for transactions affecting the customer’s balance since the last statement cutoff. |
|
Amount |
Displays the original amounts for transactions affecting the customer’s balance since the last statement cutoff. |
|
Due |
Displays the amounts due for charges to the customer’s account since the last statement cutoff. |
|
Payments |
Displays the amounts of payments (as negative numbers) received from the customer since the last statement cutoff. |
|
PO# or Ref# |
Displays the purchase order number entered on an invoice, the reference number entered on an invoice, or nothing. The entry, if any, for this column is defined in the statement print options. For more information, see Define Statement Print Options. |
|
Due Date |
Displays the original due dates for invoices, finance charges, overdue charges, and payments that have not been applied to the customer’s account. |
|
Balance Owing |
Displays the amount owed to you for transactions affecting the customer’s balance since the last statement. |
|
Current |
Displays the balance resulting from in-house charge and finance-charge activity that occurred since the last statement cutoff. This balance also includes the following: Any negative charges that have not been fully applied to positive invoices. Any payments that have not been applied to the customer’s balance. Any balances that will be due on future statements (only when the Include Future Due check box is selected on the Statement Setup screen). For more information, see Define Statement Print Options. |
|
1–30 |
Displays any balances due as of the last statement. |
|
31–60 |
Displays any balances due as of the second-to-last statement. |
|
61–90 |
Displays any balances due as of the third-to-last statement. |
|
91+ |
Displays any balances due for more than 90 days. |
|
Total Due |
Displays the amount the customer owes you as of the statement cutoff date. Note: Any in-house charges and finance charges due in the future are excluded from this amount.
|
Statement configuation includes customizing statement forms, preparing to send statements by email, and defining how customers will receive their statements.
You can add your store logo to the statement form. The logo image file used for statements needs to meet the following requirements or recommendations:
The file extension must be .jpg
The dimensions of the logo should be small enough to fit in the limited amount of white space in the statement header.
The file size cannot exceed 500 KB.
The resolution should be at least 300 DPI (dots per inch)
Before you add the logo, note its dimensions. You’ll use this information when adding it to the statement form.
To add a logo to the statement form
| 1. | Prepare to load the logo. |
| a. | If the logo isn’t already stored on your computer, save a copy of it on the computer’s desktop or in a folder. |
| b. | Right-click the image’s file name and select Properties. The properties screen opens. |
| c. | Click the Details tab. Then locate the height and width, and write down those values. |
| 2. | Open the Statement Setup screen. |
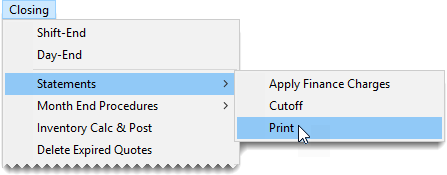
| a. | Select Closing > Statements > Print. The Monthly Statements screen opens. |
| b. | Click  . . |
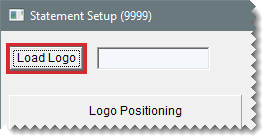
| 3. | Click Load Logo, go to the location on your computer where the logo is stored, and select it. |
| 4. | Define the position of the logo. |
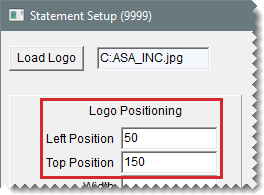
| a. | In the Left Position field, type the number of pixels from the left edge of the available print space where the logo will be placed. |
| b. | In the Top Position field, type the number of pixels from the top edge of the available print space where the logo will be placed. |
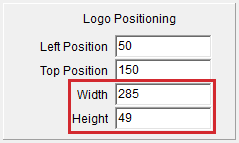
| 5. | Referring to the dimensions recorded in step 1c, type the height and width of the logo. |
| 6. | Review the placement of the logo. |
| a. | Click Lookup Customer and search for a customer who receives statements. |
| b. | Click Test Logo. The Report Window opens and displays a sample statement. |
| c. | If the logo position needs to be adjusted, change the position values. |
| d. | If the logo needs to be resized, change the dimensions in an image-editing program. Then reload the logo and update the values in the Width and Height fields. Examples of image-editing programs include Microsoft® Paint, Tech-Smith® Snag-It, and GIMP. |
| e. | Click Test Logo (again) to review your changes. |
| f. | Repeat steps 6c through 6e until you’re satisfied with the sample statement’s appearance. |
| 7. | Click Save Logo. |
By setting the statement print options, you define the type of information that prints on statements and whether to generate statements for customers with $0 balances.
To set the statement print options
| 1. | Open the Statement Setup screen. |
| a. | Select Closing > Statements > Print. The Monthly Statements screen opens. |
| b. | Click  . . |
| 2. | Select the following as needed: |
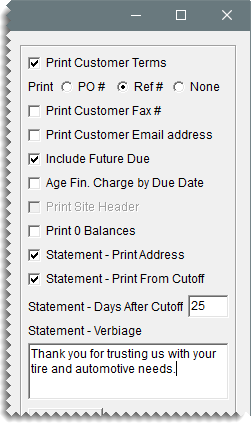
To include customer payment terms on statements, select Print Customer Terms.
To define whether customer purchase order or reference numbers print on statements, select PO# or Ref#. To exclude PO numbers and reference numbers, select None.
To include customer fax numbers on statements, select Print Customer Fax.
To include customer email addresses on statements, select Print Customer Email address.
To include future due balances on statements, select Include Future Due.
To use the customer’s payment due date as the due date for finance charges, select Age Fin. Charge by Due Date. To use the statement cutoff date as the due date for finance charges instead, clear the Age Fin. Charge by Due Date check box.
To include site information on statements instead of the information for the corporate site, select Print Site Header
To generate statements for customers with $0 balances, select Print 0 Balances.
To include your business address on statements, select Statement - Print Address.
To generate the statement as of the last statement cutoff date, select the Statement - Print from Cutoff check box. For a statement as of today’s date, clear the Statement - Print from Cutoff check box.
Type the number of days that need to pass before previously-generated statements can be printed or emailed again in the Statement - Days After Cutoff field. This value is set to 25 by default.
To include a message in the statement header (underneath the word STATEMENT at the top of the page), type the message in the Statement - Verbiage field.
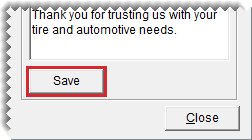
| 3. | Click Save. |
Define the email address that will be used for sending statements to customers and customize the subject and body text for statement emails.
To complete statement email configuration
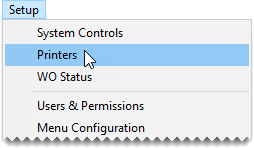
| 1. | Select Setup > Printers. The Printer Selection screen opens. |
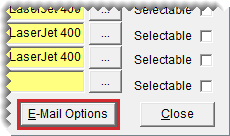
| 2. | Click E-Mail Options. |
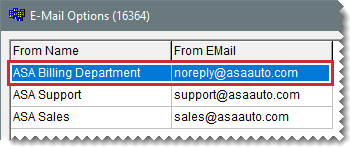
| 3. | On the left side of the screen, select the name and email address that emails will be sent from. |
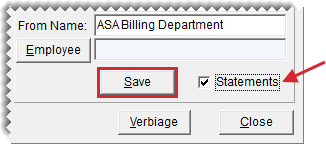
| 4. | In the lower-right corner of the screen, select the Statements check box and click Save. |
| 5. | Update the subject and body text for statement emails (optional). |
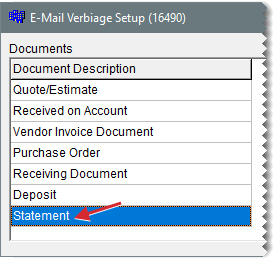
| a. | Click Verbiage. The E-Mail Verbiage Setup screen opens. |
| b. | Under Documents, select Statement. |
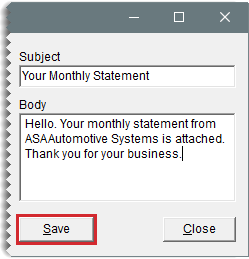
| c. | Type the subject line and body text for statement emails in the applicable fields. |
| d. | Click Save. |
| 6. | Close the open screens. |
Settings in individual customer records define whether customers receive printed statements, emailed statements, or emailed statements and the corresponding invoices. For customers who receive statements by email, you also need to define the email addresses to which statements will be sent.
To define a customer’s statement delivery method
| 1. | Search for the customer whose statement delivery method you want to define. For more information, see Customer Searches. |
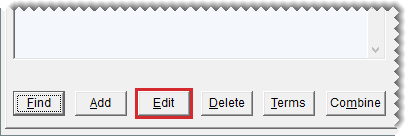
| 2. | On the Customer Maintenance screen, click Edit. |
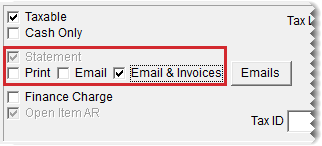
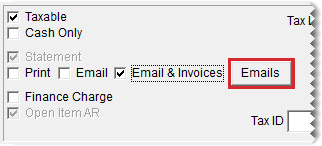
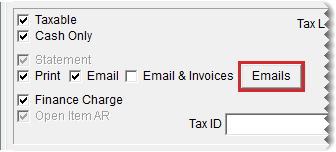
| 3. | Under Statement, select one or more of the following delivery methods: |
For a hard copy of a statement to send by US mail, select Print.
To send a statement by email, select Email.
To send a statement and copies of the documents listed on the statement, select Email & Invoices.
For a customer who does not receive statements, clear the Print, Email, and Email & Invoices check boxes.
| 4. | If the customer will receive statements by email, define the email addresses to which the statements will be sent. If the customer will receive only printed statements, disregard this step. |
| a. | Click Emails. The Customer Statement screen opens. |
| b. | Do the following as needed: |
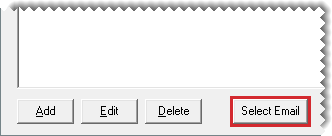
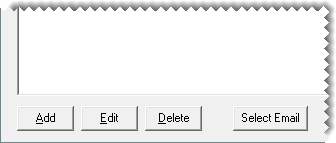
To send statements to an email address that’s in the customer’s contact information, click Select Email and choose a name from the list that appears. Repeat as needed.
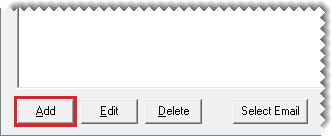
To send statements to an email address that’s not in the customer’s contact information, click Add. Then type the email address and a name (or description) of the email address in the screen that opens, and click OK. Repeat as needed.
| c. | Close the Customer Statement screen. |
| 5. | On the Customer Maintenance screen, click OK to save your changes. Then click Close. |
Occasionally, you might need to change the email addresses used to distribute statements to existing customers. The following functionality is available in TireMaster 9.4.0.
To update a customer’s statement email addresses
| 1. | Search for the customer whose statement email addresses needs to be updated. For more information, see Customer Searches. |
| 2. | On the Customer Maintenance screen, click Edit. |
| 3. | Click Emails. The Customer Statement screen opens. |
| 4. | Use the following options to update the email addresses: |
To add an email address that’s in the customer’s contact information, click Select Email and choose a name from the list that appears.
To add an email address that’s not in the customer’s contact information, click Add. Then type the email address and a name (or description) of the email address in the screen that opens, and click OK.
To update (or correct) an existing email address, select it and click Edit. Then make your changes and click OK.
To remove an existing email address, select it and click Delete.
| 5. | When you’re done making changes, close the open screens. |
Processing statements include applying finance charges, performing the statement cutoff, and generating printed statements and statement emails.
Before you perform the statement cutoff, you should apply any finance charges to outstanding customer balances.
To apply finance charges
| 1. | Select Closing > Statements > Apply Finance Charges. The Report Window opens and displays the Finance Charge Edit Report. |
| 2. | Review the charges listed on the report. |
| 3. | Print the report if needed and close the Report Window. A confirmation message appears. |
| 4. | To post the finance charges, click Yes. A confirmation message appears. |
Once you’ve applied finance charges, you can run the statement cutoff. This process ages customer balances. You should perform this procedure on the same day every month.
To cut off customer statements
| 1. | Generate a Customer Balance Report and review your customers’ balances (optional). For more information, see Customer Balance Report. |
| 2. | Select Closing > Statements > Cutoff. TireMaster prompts you to print an unapplied credit report. |
| 3. | Click Yes. The Report Window opens and displays the Unapplied Credit Report. |
| 4. | Print the report or view it on the screen. |
| 5. | Close the Report Window. A confirmation message appears. |
| 6. | Click Yes. Another confirmation message appears. |
| 7. | Click OK. |
Once you’ve completed the cutoff, you can generate statements to send to customers as part of your monthly billing cycle. When you generate customer statements, you can produce them for all customers or limit the statement run to those who meet specific requirements. Then you can send statement emails and print the hard copies.
To generate statements
| 1. | Open the statements screen using one of the following methods: |
Select Closing > Statements > Print.
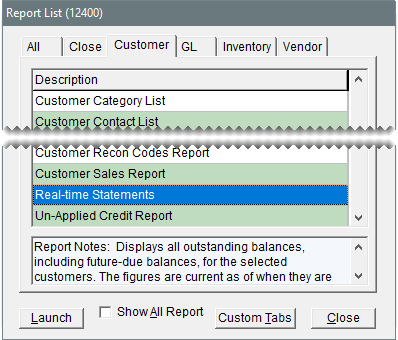
Click Reports to open the Report List. Click the Customer tab, select Real-time Statements, and click Launch.
| 2. | To define whether all customers, a group of customers, or individual customers will receive statements, do one of the following: |
For all customers, leave all of the fields blank.
For one customer, click Beginning Customer and look up the customer for whom you want to generate a statement.
For a range of customers, click Beginning Customer and search for the first customer in the range. Then click Ending Customer and search for the last customer in the range.
For specific customer types, click Customer Types. Then select one or more types from the list that appears and click OK.
For transactional activity from specific sites, click Sites and select one or more sites from the list that appears. Then select Customer Sites to print statements for customers added at the selected site(s), or select Invoice Sites to print statements for customers for with invoices completed at the selected site(s).
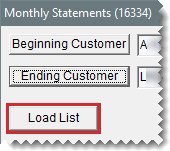
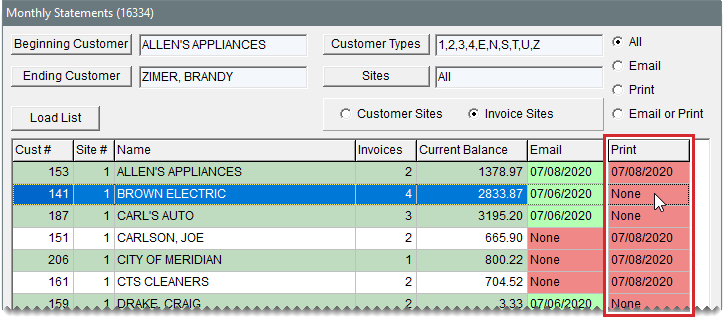
| 3. | Click Load List. TireMaster adds the names and account balances for the customers who will receive statements to the screen. |
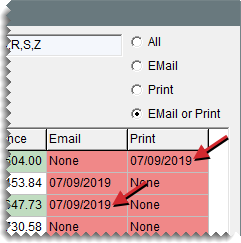
The colors, codes, and dates in the Email and Print columns indicate the following:
The color green means a statement can be generated for a customer
The color red means a statement has been printed or emailed to a customer
The code None means the delivery method is not used for a customer
The date is the date when a statement was last emailed or printed.
| 4. | If you want to narrow down the number of customers displayed, do one of the following. By default, all customers with balances are displayed regardless of whether they receive statements. |
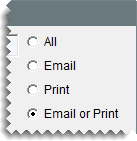
For only the customers with balances who receive statements by email, select Email.
For only the customers with balances who receive printed statements, select Print.
For customers with balances who receive statements, select Email or Print.
| 5. | Generate the statements. |
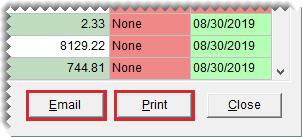
| a. | Click EMail. TireMaster emails statements to customers assigned the email delivery method. |
| b. | Click Print. Statements for customers assigned the print delivery method are sent to the printer. |
Once a customer’s statement is printed or emailed, the Print field, Email field, or both turn red (depending on the customer’s delivery method) and the statement-generation date appears.
| 6. | If you experience an issue such as a printer jam or an email failure, resend the affected statements as needed. Otherwise, disregard this step. For more information, see Regenerate Statements. |
| 7. | Close the statements screen. |
Statements can be reprinted or resent to customers if they need duplicates or if you encountered an issue during a statement run.
To regenerate statements
| 1. | If the statement screen isn’t already open, select Closing > Statements > Print. |
| 2. | Define the customer or customers for whom you want to regenerate statements. |
| 3. | For each statement that needs to be resent, double-click the red field in the Email or Print column. |
| 4. | If any of the statements need to be delivered by email, click Email. Otherwise, disregard this step. |
| 5. | If any of the statements need to be delivered by the postal service, click Print. Otherwise, disregard this step. |
| 6. | Close the statement screen. |
A duplicate, or second, set of statements can be printed if you need a set to send to customers and one to keep on file.
To generate a duplicate set of statements
| 1. | Print the first set of statements. For more information, see Generate Customer Statements. |
| 2. | Press the Ctrl key and double-click one of the entries in the Print column. |
| 3. | When TireMaster prompts you to reverse the entire column, click Yes. The red column entries (for customers who received printed statements) change to green. |
| 4. | Click Print to generate the second set of statements. |
