User Accounts
This help topic is applicable to the following TireMaster applications:
|
TireMaster Point of Sale |
TireMaster Plus |
TireMaster Corporate |
|---|---|---|

|

|

|
Each person who uses TireMaster or does any sales or mechanic work needs to have a user account. User accounts allow you to capture the following information:
Who started or completed an invoice
Who worked on a vehicle
Who paid expenses with cash out of the till
Employees who need to use TireMaster are required to log in with a user ID and corresponding password.
Once users are logged in, they can work in the program areas they're allowed to access. For more information, see Security Groups.
If you’re running TireMaster in a multi-store environment, see User Accounts in TireMaster Corporate for additional information about working with passwords and handling site access.
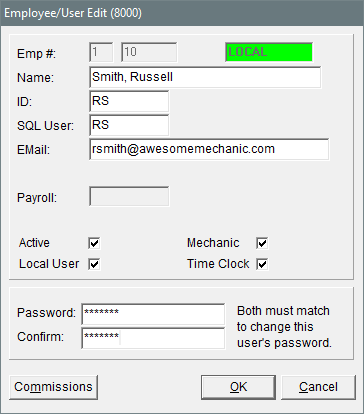
For tracking and access purposes, you need to define various properties for each user. You can set these properties on the Employee/User Edit screen.
|
Item |
Description |
|
Emp # |
Displays the system-generated number for the user. The first field contains the number for the site where the user account was created. |
|
Name |
Lets you type the user’s name. |
|
ID |
Lets you define a code for logging in to TireMaster, such as the first and last initials of the employee’s name. The ID can be up to five characters long. |
|
SQL User |
Lets you assign a unique ID for accessing the TireMaster database. The SQL user can be up to 15 letters. It cannot begin with a space, number, or symbol. Note: ASA recommends that you set the SQL user only once. If you change it at a later time, you will need to reset the password. Otherwise the password will, by default, be blank.
|
|
|
Lets you store the user’s email address. |
|
Payroll |
Displays a value that can be set through some third‑party applications. |
|
Active |
Lets you define whether the employee currently works for the company. Note: Clearing this check box removes employees from security groups and deletes all of their permissions.
|
|
Time Clock |
Lets you define whether to track the employee’s time worked with the time clock. This checkbox is typically selected for employees who are paid hourly. Available in TireMaster 9.4.0 or newer. |
|
Mechanic |
Lets you define whether the employee is a mechanic. Selecting this check box enables you to assign the employee (mechanic) to appointments created with the TireMaster Scheduler. |
|
Local User |
Lets you define whether the employee is allowed to log in at a site. In TireMaster Plus and TireMaster Point of Sale, this check box is always selected. |
|
Password |
Lets you set a password for the user. For more information, see Create New Passwords. Note: Passwords are case sensitive.
|
|
Confirm |
Lets you confirm the user’s password. |
|
Commissions |
Lets you access the Commission Matrix screen to complete sales commissions settings for the user. For more information, see Set Up an Employee Commission Matrix. |
You need to create user accounts for employees who use TireMaster and those whose work needs to be tracked by TireMaster, such as mechanics. Depending on how you run your business, you might want to set up a single user account that multiple employees can use to log in to the program. For more information, see Group Users.
To add a user account
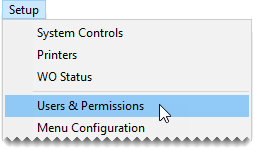
| 1. | Select Setup > Users & Permissions. The User List opens. |
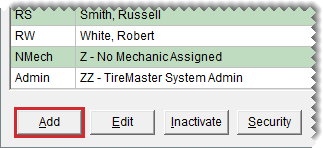
| 2. | Click Add. The Employee/User Edit screen opens. |
| 3. | Type the name of the employee or group user. |
| 4. | Type an ID for the employee or group to use to log in to TireMaster. |
| 5. | In the SQL User field, type a password for logging in to the TireMaster database. |
| 6. | Type the user’s e-mail address (optional). |
| 7. | If the user is a technician, make sure the Mechanic check box is selected. Otherwise, leave it clear. When the check box is selected, the employee’s name will be added to the Scheduler’s appointment calendar. For more information, see Define Mechanics . |
| 8. | If you want to track the employee’s time worked with the Time Clock, select the Time Clock check box. (Available in TireMaster 9.4.0.) |
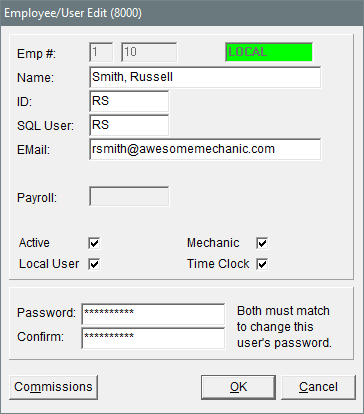
| 9. | Type a password for the user. For information about creating secure passwords, see Create New Passwords. |
| 10. | Type the password again in the Confirm field. |
| 11. | To save the new user, click OK. |
Some employees, such as the owner and system administrator, should have two user accounts. One account should provide access to all program areas and the other should be for performing every day, low-security functions.
Having two accounts for these employees reduces the chance that they will leave the system open while logged in as the owner or system administrator, exposing high‑security areas to unauthorized employees.
If you don’t want employees to log in and out of TireMaster repeatedly, you can set up a group user account (which is not the same as a security group). You could create a user account called “Sales” for all of your salespeople.
With regular maintenance, your data remains secure and your User List is easy to manage.
To maintain the security of your system, each account in TireMaster needs to have a password. Whenever users start TireMaster, they need to type the user IDs and passwords. If a user needs to log in at multiple sites, assign a for each site.
When you create passwords, use caution and common sense:
Choose a password that is six to eight characters long. Short passwords are too easy to break, and long passwords take too long to type.
Don’t use a word or phrase that would be easy for someone to guess, such as a birthday, a family member’s name, or a pet’s name.
Change your password on a regular basis.
To create new passwords
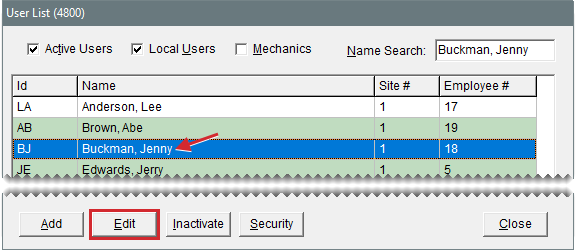
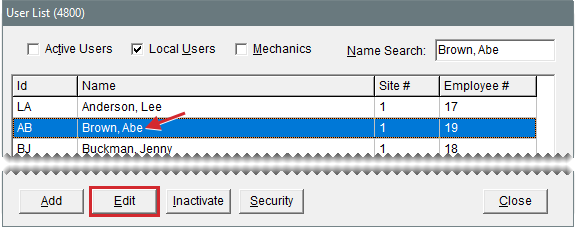
| 1. | Select Setup > Users & Permissions. The User List opens. |
| 2. | Select the name of the user whose password you want to change, and click Edit. The Employee/User Edit screen appears. |
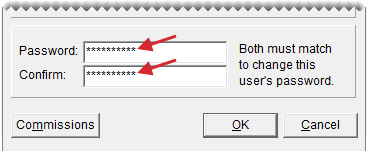
| 3. | Type the new password in both the Password and Confirm fields. |
| 4. | To save the new password, click OK. |
When an employee no longer works for you, inactivate his or her user account. Inactivating a user account results in the following:
It removes the user from security groups.
It removes any permissions and reports associated with that user.
To inactivate user accounts
| 1. | Select Setup > Users & Permissions. The User List opens. The User List appears. |
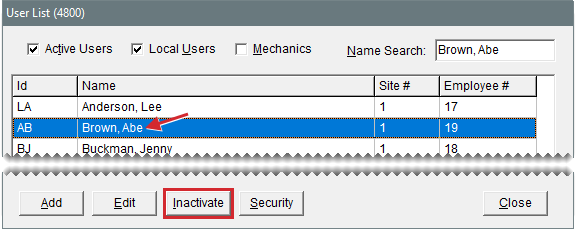
| 2. | Select the name of the user who you want to make inactive. |
| 3. | Click Inactivate. |
| 4. | To confirm that you want to inactivate the user, click Yes. |
If you inactivate a user account by accident or if a former employee comes back to work for you, you can activate his or her user account.
To activate a user account
| 1. | Select Setup > Users & Permissions. The User List opens. |
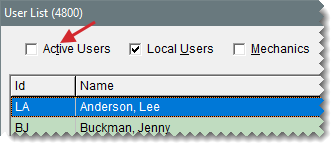
| 2. | Clear the Active Users Only check box to display the names of both inactive and active users. |
| 3. | Select the name of the user account you want to make active and click Edit. The Employee/User Edit screen appears. |
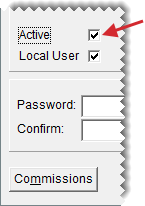
| 4. | Select the Active Only check box. A confirmation message appears. |
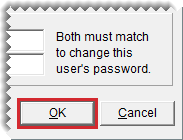
| 5. | To verify that the user is now active, click OK. |
| 6. | To save your changes, click OK. |
| 7. | Close the User List. |
