Commissions
This help topic is applicable to the following TireMaster applications:
|
TireMaster Point of Sale |
TireMaster Plus |
TireMaster Corporate |
|---|---|---|

|

|

|
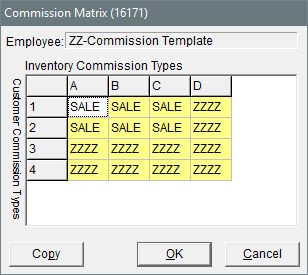
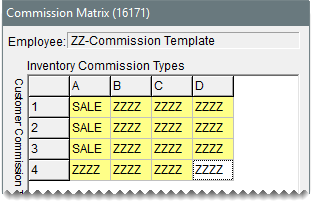
TireMaster calculates employee commissions based on a variety of preset values arranged in a grid, called the Commission Matrix. You can set up a Commission Matrix for each employee.
Before you can design a commission matrix for each employee, you need to add the following to TireMaster:
Customer commission types, which are listed down the left side of the matrix
Inventory commission types, which are listed across the top of the matrix
Commission codes (also called commission matrix codes), which are contained in the cells of the matrix
To calculate the commission for a sale, TireMaster looks at the code entered in the spot on the matrix where the customer’s commission type meets the commission type for the items sold. In other words, the amount of commission calculated depends on the type of customer and the type of items involved in a sale.
With customer commission types, you can calculate commissions based on the different kinds of customers who buy your products and services. For example, you might pay a higher commission for commercial sales than you would for regular sales.
New customers are automatically assigned the default customer commission type. However, you can change customer's assigned type if needed.
If you want to calculate commissions based on sales to different groups of customers, you need to create multiple customer commission types. You should also set up a type to use for non-commission sales, such as transfers.
To create a customer commission type
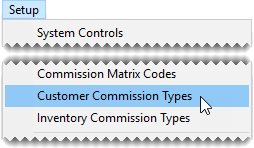
| 1. | Select Setup > Customer Commission Types. The Customer Commission Types screen opens. |
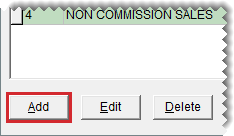
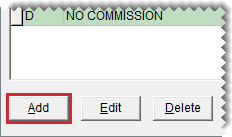
| 2. | Click Add. The Customer Commission Type Edit screen opens. |
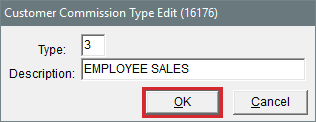
| 3. | Type a unique 1-character code in the Type field. |
| 4. | Type a name for the customer commission type in the Description field. (For example, Regular Sales or Commercial Sales.) |
| 5. | To save the new customer commission type, click OK. |
| 6. | Close the Customer Commission Types screen. |
If you want to pay commissions, you need to assign customer commission types to your clientele. Assigning commission types to customers defines how TireMaster calculates commissions when you sell products and services to them.
To assign a customer commission type
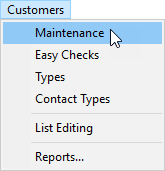
| 1. | Select Customers > Maintenance. TireMaster prompts you for the customer's name. |
| 2. | Search for the customer to whom you want to assign a commission type. For more information, see Customer Searches. |
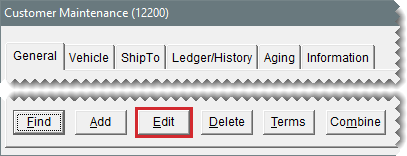
| 3. | On the Customer Maintenance screen (General tab), click Edit. |
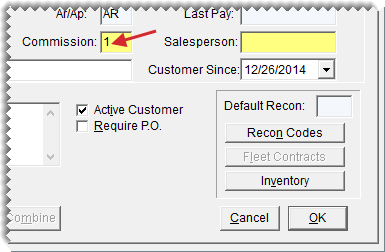
| 4. | Click the Commission field, press  and select the type you want to assign from the list. and select the type you want to assign from the list. |
| 5. | To save your changes click OK. Then close the Customer Maintenance screen. |
If you don’t assign a commission type to a customer, TireMaster automatically assigns the default commission type, which is defined by setting a system control. When you set the default customer commission type, use the one that you’d assign to the majority of your customers. For instructions, see Set the Commission Controls.
With inventory commission types, you can calculate commissions based on the different kinds of items sold. For example, you might pay a higher commission for tires than you would for service parts.
New items are assigned the default inventory commission type automatically. However, you can change the type assigned to a customer if needed.
If you want to calculate commissions based on sales of different kinds of items, you need to create multiple inventory commission types. Also set up a type to use for items for which no commission is paid, such as shop supplies and disposal fees.
To add an inventory commission type
| 1. | Select Setup > Inventory Commission Types. The Inventory Commission Types screen opens. |
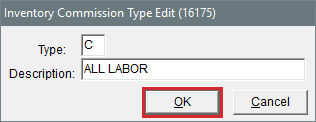
| 2. | Click Add. The Inventory Commission Type Edit screen opens. |
| 3. | Type a unique 1-character code in the Type field. |
| 4. | Type a name for the commission type in the Description field (for example, Tires & Wheels or Warranties). |
| 5. | To save the new type, click OK. |
| 6. | Close the Inventory Commission Types screen. |
If you want to pay commissions, you need to assign inventory commission types to your items. Assigning commission types to items defines how TireMaster calculates commissions when you sell them.
To assign an inventory commission type
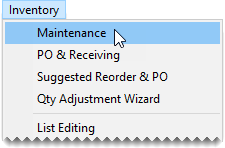
| 1. | Select Inventory > Maintenance. TireMaster prompts you to search for an item. |
| 2. | Look up the inventory item whose commission type you want to assign. For more information, see Inventory Searches. |
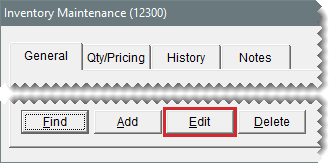
| 3. | On the Inventory Maintenance screen (General tab), click Edit. |
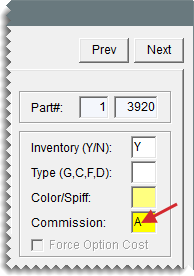
| 4. | Click the Commission field, press  , and select the commission type you want to assign from the list. , and select the commission type you want to assign from the list. |
| 5. | To save your changes, click OK. Then close the Inventory Maintenance screen. |
If you don’t assign a commission type to an inventory item, TireMaster automatically assigns the default commission type, which is defined by setting a system control. When you set the default inventory commission type, use the one that you’d assign to the majority of your items. For instructions, see Set the Commission Controls.
Commission codes define the rates for calculating commissions. Commission codes are assigned to employees in the Commission Matrix. TireMaster then calculates the commission based on the combination of customer and inventory commission types. You can pay different commissions depending on the role (mechanic or salesperson) an employee plays during a sale.
Commission codes define how the following commission rates are calculated:
Unit Rate is the primary rate for the commission. This value can be either a percentage or a flat dollar amount.
Mechanic 2 Rate is the amount of commission that a second mechanic gets for a sale. This value is a percentage of the unit rate.
You can base the calculations for commission rates on the percentage of the profit, a percentage of a sale, or you can set a fixed dollar amount. When you create commission codes, set up one for each rate, along with one to use for those instances in which no commission is paid.
To create a commission code
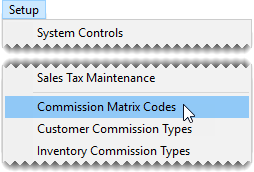
| 1. | Select Setup > Commission Matrix Codes. The Commission Codes list opens. |
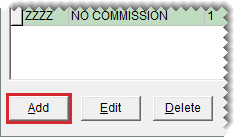
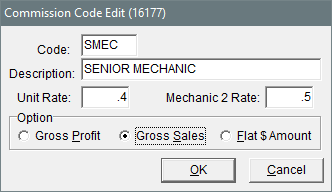
| 2. | Click Add. The Commission Code Edit screen opens. |
| 3. | Type a code for the commission. |
| 4. | Type a name for the commission code in the Description field. (For example, Senior Mechanic or Sales.) |
| 5. | Type the percentage or dollar amount for the commission in the Unit Rate field. For a percentage of gross sales or gross profit, enter the rate in decimal form (such as .10 or .30). |
| 6. | Type the percentage of the commission that a second mechanic receives in the Mechanic 2 Rate field. |
| 7. | Select an option for calculating the commission: |
Gross Profit calculates the commission based on gross profit.
Gross Sales calculates the commission based on total sales.
Flat $ Amount calculates the commission based on a set dollar amount for each unit.
| 8. | To save the new commission code, click OK. |
Commission codes can be assigned to the commission matrix for each employee. Assigning commission codes defines the rate to pay when a certain customers buy certain items. For more information, see Set Up an Employee Commission Matrix.
If you don’t assign a commission code to a matrix, TireMaster automatically assigns the default commission type, which is defined by setting a system control. For more information, see Set the Commission Controls.
When you’re finished adding commission codes and types, set the commission defaults in System Controls. TireMaster uses these default settings when customers, items, or users do not have a commission type or code assigned to them.
To set the commission controls
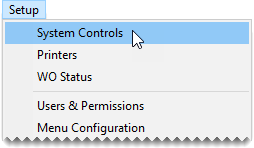
| 1. | Select Setup > System Controls. The System Controls screen opens. |
| 2. | Make sure the Commission tab is selected. |
| 3. | Set the commission cutoff date. |
| a. | Select Commission Cutoff Date - Most Recent, and press Enter. |
| b. | Select the date of your most recent commission cutoff, and click OK. |
| 4. | Set the default commission matrix code. |
| a. | Select Default Commission Matrix Code, and press Enter. |
| b. | Select the code that you want to use as the default, and click OK. |
| 5. | Set the default customer commission type. |
| a. | Select Default Commission Type - Customer, and press Enter. |
| b. | Select the type that you want to use as the default, and click OK. |
| 6. | Set the default inventory commission type. |
| a. | Select Default Commission Type - Inventory, and press Enter. |
| b. | Select the default inventory commission type that you want to use, and click OK. |
| 7. | Set the commission matrix that will be assigned to users by default. |
| a. | Select Default Employee - Commission Matrix, and press Enter. |
| b. | Select the name of an employee or a commission matrix template. The matrix for the selected employee or template will be used as the default matrix. |
| 8. | Close the System Controls screen. |
You can define how much commission an employee will earn by setting up a grid called the Commission Matrix.
To set up an employee’s commission matrix, you need to assign a commission code to each combination of customer and inventory commission types. The number of combinations available, along with the number of codes you need to assign, depends on how many customer and inventory commission types are have been set up in TireMaster.
You can reduce the amount of time needed to set up a commission matrix in two ways:
Copy another user’s matrix into the one you’re setting up, and make any needed changes.
Copy a commission matrix template into the one you’re setting up, and make any needed changes. For more information, see Create Commission Matrix Templates.
To set up an employee commission matrix
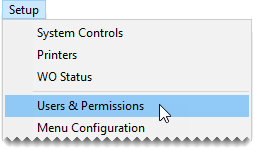
| 1. | Select Setup > Users & Permissions. The User List opens. |
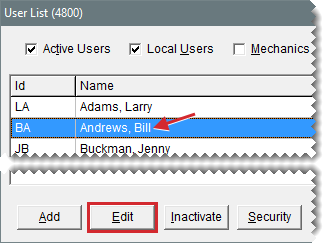
| 2. | Select the user whose matrix you want to set up, and click Edit. The Employee/User Edit screen opens. |
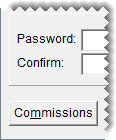
| 3. | Click Commissions. The Commission Matrix screen opens. |
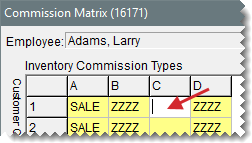
| 4. | Enter a code into each cell of the matrix, using one of the following methods: |
Click the cell whose code you want to update, press  , and select a code from the list. Repeat this process until all cells in the matrix are filled.
To copy another user’s matrix or commission matrix into the one you’re setting up, click Copy and make a selection from the list that appears. You can leave the copied matrix as is or modify it using the method described above.
| 5. | To save the changes to the matrix, click OK. |
| 6. | Close the Employee/User Edit screen. |
If the commission matrix will be the same or similar for several employees, you can reduce the amount of setup time by creating one or more commission matrix templates. Creating a template includes setting up a generic user and the entering codes for the generic user’s matrix.
To create a commission-matrix template
| 1. | Select Setup > Users & Permissions. The User List opens. |
| 2. | Create a generic user. |
| a. | Click Add. The Employee/User Edit screen appears. |
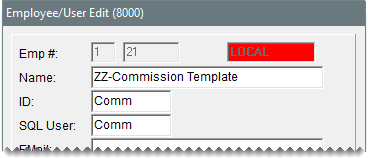
| b. | For the name, type ZZ-Commission Template or another similar name. |
| c. | For the user ID and password, type COMM or another similar code. |
| 3. | Set up the generic user’s matrix. |
| a. | Click Commissions. The Commission Matrix screen appears. |
| b. | Enter a commission code into each cell of the matrix. Click the cell you want to update, press  , and select a commission code from the list. Repeat this process until all cells in the matrix are filled. , and select a commission code from the list. Repeat this process until all cells in the matrix are filled. |
| c. | To save the changes to the matrix, click OK. |
| 4. | Close the Employee/User Edit screen. |
By generating the Commission Report, you can determine the amount of commission to pay. A few days before the end of each pay period, you might want to print the report and review it with your employees. If there are discrepancies, you can change commission percentages before the end of the pay period.
Once you’re satisfied with the calculations, you can lock the commissions for the pay period by launching the report again and clicking Save & Lock. Once the commissions are locked, they cannot be changed. For more information, see Commission Report.
