Add and Manage Vendors
This help topic is applicable to the following TireMaster applications:
|
TireMaster Point of Sale |
TireMaster Plus |
TireMaster Corporate |
|---|---|---|

|

|

|
With vendor records, you can track the purchases of tires and service parts from your suppliers.
Before you can order items from a vendor, a vendor record must exist in TireMaster
To add a vendor
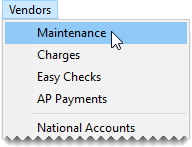
| 1. | Select Vendors > Maintenance. TireMaster prompts you for the vendor's name. |
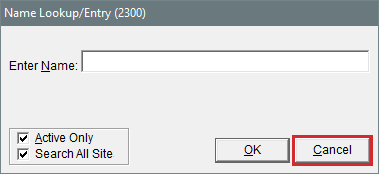
| 2. | Click Cancel to close the Name Lookup/Entry screen. |
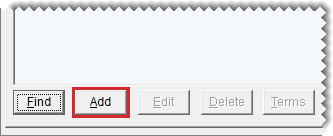
| 3. | When the Vendor Maintenance screen opens, click Add. TireMaster prompts you for the vendor’s name. |
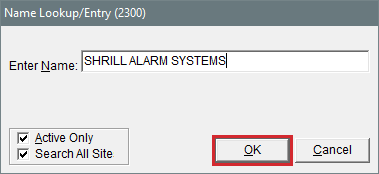
| 4. | Type the vendor’s name and click OK. The new vendor record is created. |
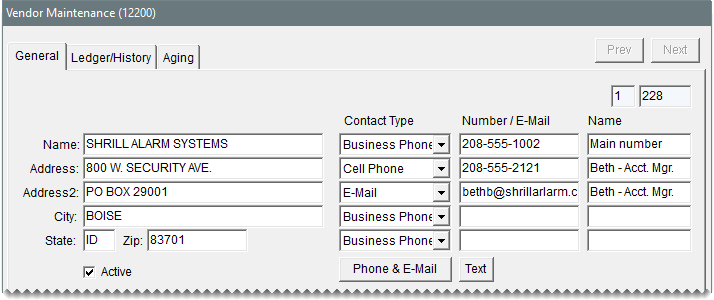
| 5. | Enter the vendor’s contact information. |
| a. | Type the vendor’s street or mailing address. |
| b. | Type the vendor’s zip code. If the zip code has already been used in TireMaster, the Zip Codes screen appears. |
| c. | Click OK. The city and state are added to the vendor’s contact information. |
| d. | Add the phone numbers that you want to have on record for the vendor. For more information, see Add Phone Numbers and Email Addresses. |
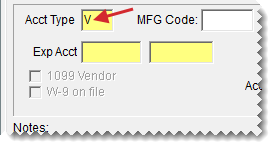
| 6. | If you need to assign a different type to the vendor, click the Acct Type field, press  , and select a type from the list. Otherwise, leave the vendor type set to V. , and select a type from the list. Otherwise, leave the vendor type set to V. |
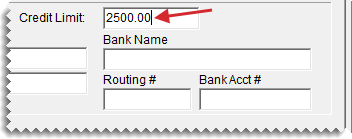
| 7. | If the vendor has given you a credit limit, type it in the Credit Limit field. |
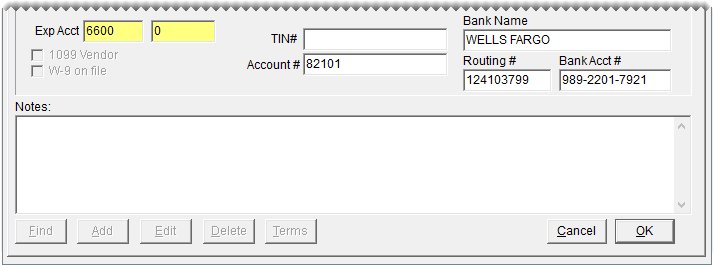
| 8. | To assign a default expense account to the vendor, click the Exp Acct field. Then press  and select an account from the list that appears. and select an account from the list that appears. |
| 9. | Enter the vendor’s tax reporting information if needed. |
| a. | Type the vendor’s Tax Identification number or Social Security number in the TIN# field. The 1099 Vendor and W-9 on file check boxes become active. |
| b. | If you need to complete a 1099-Misc form for the vendor, select the 1099 Vendor check box. |
| c. | If you have IRS form W-9 in your possession for the vendor, select the W-9 on file check box. |
| 10. | Type the account number the vendor has assigned to you in the Account# field if needed. |
| 11. | Add the name of the vendor’s bank, the bank’s routing number, and the account number if needed. |
| 12. | If you have any notes about the vendor that you want to save, type them in the Notes field. |
| 13. | To save the new vendor’s record, click OK. |
Occasionally, you might need to make changes to vendor records because their account information has changed or you're no longer business partners.
You can change details for a vendor record, such as the address or a phone number.
To change a vendor record
| 1. | Search for the vendor whose information you want to update. For more information, see Vendor Searches. |
| 2. | When the Vendor Maintenance screen opens, make sure the General tab is selected. Then click Edit. |
| 3. | Make the needed changes. For information about settings on this screen, see Vendor Maintenance Screen. |
| 4. | To save your changes, click OK. |
When you need to update settings for more than one vendor, you can update the information for a range of vendor records.
To update multiple vendor records
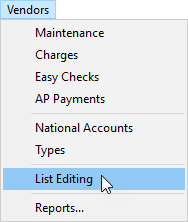
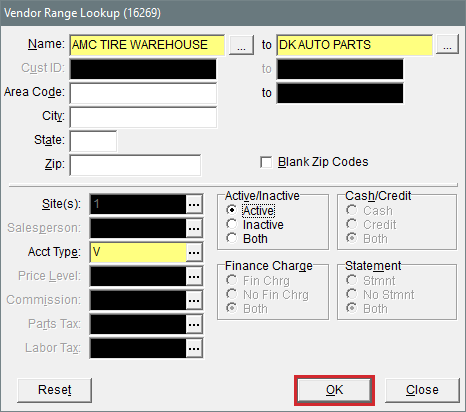
| 1. | Select Vendors > List Editing. The Vendor Range screen opens. |
| 2. | To search for a range of records to edit, use one or more of the following: |
Staring and ending name
Area code (starting and ending), city, state, or zip code
Blank zip codes
Site (for the corporate site of TireMaster Corporate systems only)
Account type
Active, inactive, or both
| 3. | Click OK. The Vendor List Editing screen opens. |
| 4. | Select a column and update the records as needed. You can type your changes or make a selection from a list. To select a setting from a list, click or press  . . |
| 5. | When you’re finished updating the records, click Close. |
In the event of business mergers or if duplicates exist, you can combine two or more vendor records. When you combine vendors, TireMaster makes one or more vendor records inactive and adds that information to an existing vendor record which is maintained. This functionality is available in TireMaster 9.4.0 and newer.
To combine vendors
| 1. | Search for and select the vendor whose record you want to keep. This vendor will be referred to as the master vendor. For more information, see Vendor Searches. |
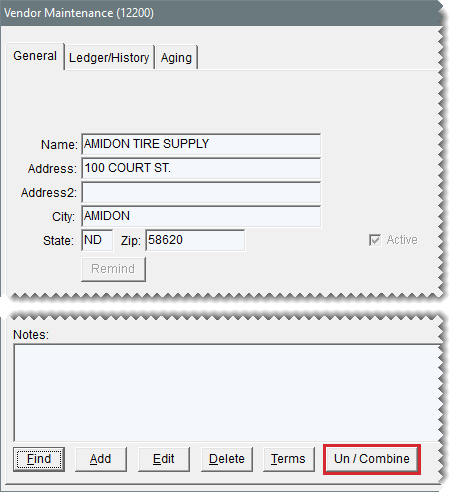
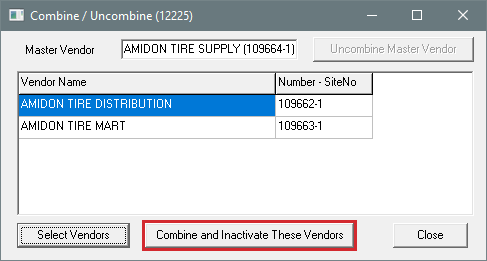
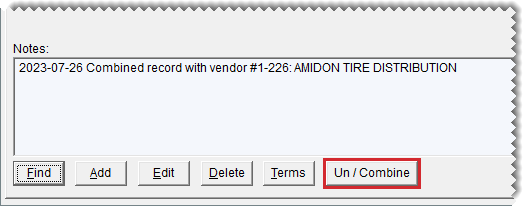
| 2. | On the Vendor Maintenance screen, make sure the General tab is selected and click Un/Combine. The Combine/Uncombine screen opens. |
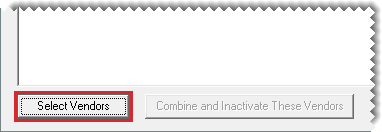
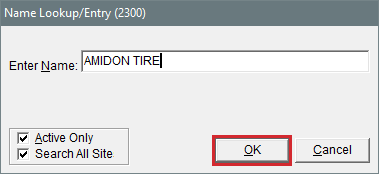
| 3. | Click Select Vendors. TireMaster prompts you for a name. |
| 4. | Type all or part of the name of the vendor whose record you want to combine with the master vendor you selected in step 1 and click OK. The Vendor List opens. |
| 5. | Select the vendor’s name, and click OK. The selected vendor is added to the list on the Combine/Uncombine screen. |
| 6. | To combine additional vendors with the master vendor, repeat steps 3 through 5 as often as needed. |
| 7. | Click Combine and Inactivate These. |
A message similar to the following appears:
“You are about to remove/combine these vendors with the Master Vendor AMIDON TIRE SUPPLY(109664-1). Continue?”
| 8. | Click Yes. TireMaster inactivates the selected vendor or vendors and adds that vendor information to the record you selected in step 1. A note is also added to newly inactive vendor records, providing a paper trail for research purposes. |
| 9. | Close the open screens. |
| 10. | Update the vendor record that you kept as needed. |
If vendor records are combined in error or you need to separate vendor records for another reason, you can uncombine them from the master vendor.
To uncombine vendors
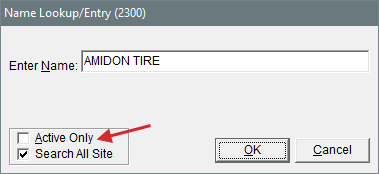
| 1. | Search for the vendor you want to remove from the master vendor record, making sure to clear the Active Only check box on the name lookup screen. For more information, see Vendor Searches. |
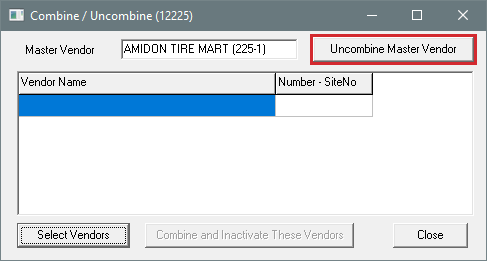
| 2. | On the Vendor Maintenance screen, make sure the General tab is selected and click Un/Combine. The Combine/Uncombine screen opens. |
| 3. | Click Uncombine Master Vendor. A confirmation message appears. |
| 4. | Click OK. |
| 5. | Close the Combine/Uncombine screen. A note is also added to newly uncombined vendor record, providing a paper trail for research purposes. |
| 6. | Click OK to save your changes. |
| 7. | Close the Vendor Maintenance screen. |
If you have vendors with whom you no longer do business, you can remove them from the list of active vendors. Doing so makes your vendor list easier to manage and use.
To make a vendor record inactive
| 1. | Search for the vendor you want to make inactive. For more information, see Vendor Searches. |
| 2. | When the Vendor Maintenance screen opens, make sure the General tab is selected. Then click Edit. |
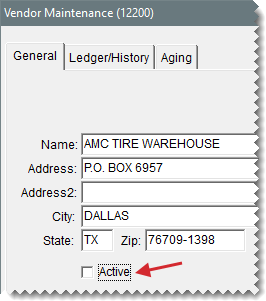
| 3. | Clear the Active check box. |
| 4. | To save your changes, click OK. |
If you've never used a vendor record for purchasing products, you can delete it.
To delete a vendor
| 1. | Search for the vendor whose record you want to delete. For more information, see Vendor Searches. |
| 2. | When the Vendor Maintenance screen opens, make sure the General tab is selected and click Delete. A confirmation messages appears. |
| 3. | Click Yes. The vendor is removed from the database. |
