Vehicle Inspections
This help topic is applicable to the following TireMaster applications:
|
TireMaster Point of Sale |
TireMaster Plus |
TireMaster Corporate |
|---|---|---|

|

|

|
TireMaster includes space for recording and storing vehicle inspection results. This information is kept in the Quote and Estimate Writer, the application for preparing tire quotes and service and repair estimates.
When it’s time to inspect a customer’s vehicle, you can print a service checklist to take out to the shop. As you examine the vehicle, you can write notes on the checklist and keep track of which inspection areas you’ve already checked.
Service checklists generated with TireMaster include the name and description for each inspection area. If inventory items have been assigned to any of the inspection areas, those items are also included on the printout.
To print a service checklist
| 1. | Do one of the following to open the Service Checklists screen: |
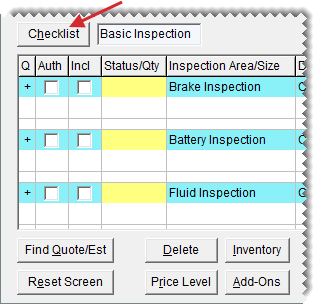
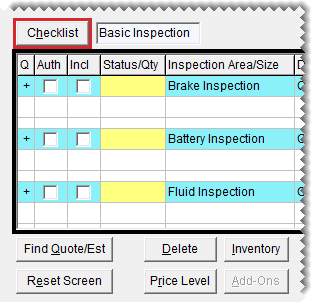
On the Quote and Estimate Writer screen, click Checklist. When TireMaster prompts you to continue, click Yes.
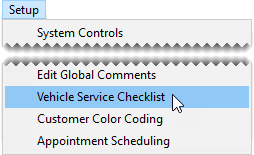
Select Setup > Vehicle Service Checklist.
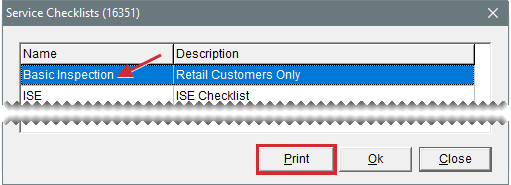
| 2. | Select the checklist you want to print and click Print. The Report Window opens. |
| 3. | Print the checklist and close the Report Window. |
| 4. | Close any open screens. |
When vehicle inspections are finished, you can record the results of the inspections in TireMaster. This information can be used to write estimates for recommended services or repairs.
To record the vehicle inspection results
| 1. | Press F12 to open the Quote and Estimate Writer. |
| 2. | If the customer and vehicle information isn’t already on the checklist, add it using one of the following methods: |
Click Customer. Then look up the customer and select the vehicle when prompted. For more information, see Customer Searches.
Type the customer’s name and the vehicle’s year, make, and model.
| 3. | Type the phone number at which the customer can be reached, or click Contact and select a phone number from the list. |
| 4. | If you need to change the customer’s tax level, click Tax Level and select a different tax level. |
| 5. | To enlarge the checklist panel, click  until it reaches the size you want. This button is located on the right side of the screen between the quote and checklist panels. until it reaches the size you want. This button is located on the right side of the screen between the quote and checklist panels. |
| 6. | If you haven’t already activated the checklist panel, click it. The checklist panel is active when it’s surrounded by a black box. |
| 7. | If you want to record the inspection results on a different checklist, click Checklist. When TireMaster prompts you to save your changes, click No and select the checklist you want to use. |
| 8. | Set the status for each inspection area and add any related notes. If you didn’t check an inspection area, leave its status blank. |
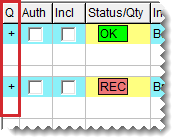
| a. | Click the Status/Qty field for an inspection area. Then press  repeatedly until the applicable status is listed. You can set the status to one of the following: repeatedly until the applicable status is listed. You can set the status to one of the following: |
 The inspection area is OK.
 It’s suggested the inspection area be repaired soon.
 It’s recommended that repairs be performed immediately.
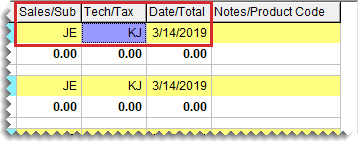
| b. | Assign a different salesperson, mechanic, or change the date if needed. To change the salesperson or mechanic, type the employee’s user ID or press  and make a selection from the list that appears. For dates, choose a different date from the calendar. and make a selection from the list that appears. For dates, choose a different date from the calendar. |
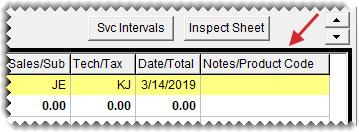
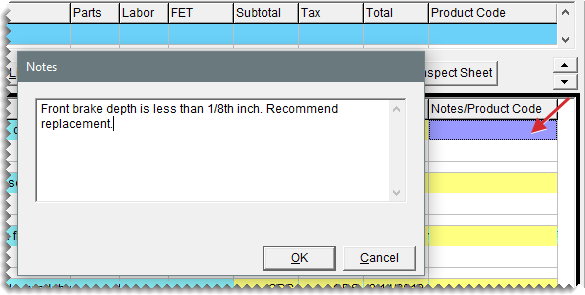
| c. | Select the Notes/Product Code field for an inspection area, and press  to open the Notes screen. Then type your notes for the inspection area, and click OK. to open the Notes screen. Then type your notes for the inspection area, and click OK. |
| 9. | Define which parts and labor are needed to complete recommended services or repairs. These items can be included on an estimate for the customer: |
See if any items have already been associated with an inspection area by clicking  in the inspection area’s heading (blue) row.
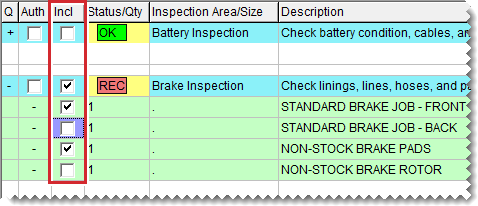
Select the check boxes Incl column for the items you want to sell for the repair.
Add items to an inspection area if needed. To add an item, select a row for the inspection area. Then click Inventory and look up the item that you want to add. For more information, see Inventory Searches.
Change the quantities, descriptions, prices, and federal excise tax for items as needed.
Change whether sales tax is calculated for an item’s part price, labor price, both, or none as needed. Click in the Tax column for that item and repeatedly press  to choose both, none, parts, or labor.
| 10. | Save your changes and close the Quote and Estimate Writer. |
