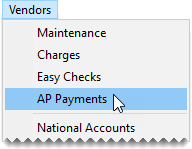
You can efficiently generate payments for a group of vendors with the AP Payments module. With this application, payments are automatically applied to the applicable vendor balances. When you process AP payments, you can print checks to give to your vendors or you can record payments that were made with debit cards or your bank’s online bill pay application.
Note: You can also pay vendors with AP easy checks. For more information, see
Easy Checks.
To generate a group of AP payments
|
2.
|
To sort the documents on the screen, select the Due, Name, Ref, and Invoice Date (available in TireMaster 9.4.0) check boxes. Select the check box for the primary organization method first, followed by the others from most to least important. Numbers appear next to the check boxes based on the order in which they’re selected. |
Note: By default, the charges are sorted alphabetically by name.
|
3.
|
To display only the charges that need to be paid by a certain date, type the number of days until that date in the Show Next ____ days field. Then click Refresh. |
|
4.
|
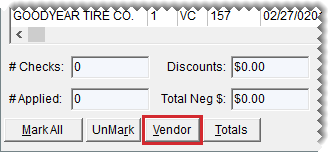
To display only the charges for a single vendor, click Vendor and look up the vendor. For more information, see Vendor Searches. |
Tip: If you decide to display payments for all vendors, click Vendor. Then click Cancel on each of the two screens that open.
|
5.
|
Define which charges you want to pay and the payment amounts. |
|
a.
|
For each charge you want to pay, type an A in the PAY field. |
Tip: To mark payments for all charges, click Mark All. To unapply charges, click UnMark All or UnMark. You can also unmark individual charges by clicking the A in the PAY field and pressing the Space Bar.
|
b.
|
Change the payment and discount amounts as needed. |
|
a.
|
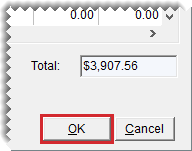
Click OK. A confirmation message appears. If |
|
b.
|
Click Yes to confirm that you want to process the payment. The Pending Payment Check Listing opens. |
Note: If you decide that you do not want to generate the payment for one of the vendors listed, clear the check box in the Print field for that vendor.
|
c.
|
To generate a Check Edit Report, click Report. Then print the report and close the Report Window. |
|
d.
|
If you want to generate checks to give to the vendors, make sure the Print Checks check box is selected. If the payment was processed with a debit card or your bank’s online bill pay application, clear the check box. |
|
8.
|
Click Yes. One of the following occurs: |
If you printed checks, TireMaster prompts you to verify the checks printed okay. If they did, click Yes and generate a check detail report (if needed). If you need to reprint the checks, click No and follow the on screen instructions.
If you didn’t print checks, generate the check detail report (if needed).
Note: Depending on a system control setting,
TireMaster either returns to or closes the
AP Payments screen. For more information, see
Print Checks Return to AP Payments.


