Inventory Returns
This help topic is applicable to the following TireMaster applications:
|
TireMaster Point of Sale |
TireMaster Plus |
TireMaster Corporate |
|---|---|---|

|

|
When you need to send items back to a vendor, perform an inventory return. The inventory return process includes slight differences depending on whether items being returned are inventoriable or noninventoriable. You also have the option to return items and receive new items at the same time.
Returning items to a vendor includes the following tasks.
Create a negative receiving document, which removes the item from the inventory and records the cost and federal excise tax of the returned item. When you create the negative receiving document, you can use the item’s system-generated next cost and federal excise tax, or you can use the cost and FET or your choice.
Create a negative vendor charge (VC), which records the credit or reimbursement that will reduce the vendor’s balance. TireMaster can create the charge automatically or you can create it manually.
Once the negative vendor charge is created, either automatically or manually, you need to apply it to one or more invoices in the vendor’s subledger. Before you can return items to a vendor, you need to define an inventory clearing account.
To perform inventory returns, you need to include an inventory clearing account in your chart of accounts. This account can be an existing liability account (such as Accounts Payable – Expected Credits), or you can create an account solely for the purpose of tracking inventory returns. Once you decide which account to use, you need to define the inventory clearing account.
To define the inventory clearing account
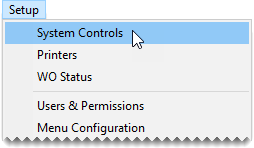
| 1. | Select Setup > System Controls. The System Controls screen opens. |
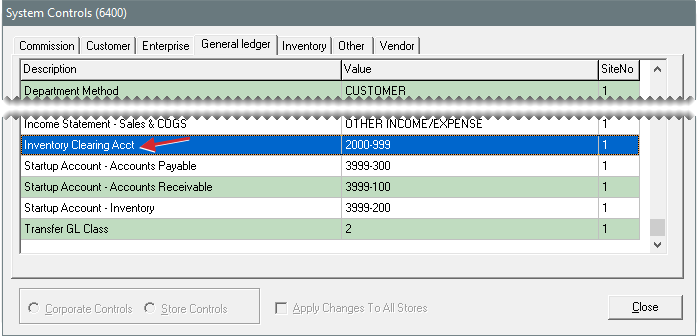
| 2. | Click the General Ledger tab. |
| 3. | Select Inventory Clearing Acct and press Enter. |
| 4. | Select the account you want to use for tracking inventory returns from the chart of accounts and click OK. |
| 5. | Close the System Controls screen. |
When you return an inventoriable item to a vendor, you can post one of the following to the general ledger:
The item’s next cost and next FET
The cost and FET of your choice
To an return inventoriable item
| 1. | Create a receiving document for the vendor who sold you the item. For more information, see Create a Receiving Document. |
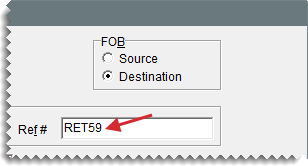
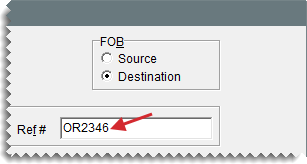
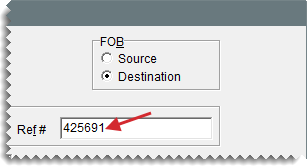
| 2. | Enter a reference number for the return if needed. |
| 3. | Click Add and look up the item you want to return or scan the item’s bar code. For more information, see Inventory Searches or Enter Bar Codes on Purchase Orders and Receiving Documents . |
| 4. | Type the returned item’s quantity as a negative number and press Enter. The Price and FETax fields turn green. |
| 5. | Define how to post the cost and FET of the returned item to the general ledger: |
To post the next cost and next FET (if any) make sure the Price and FETax fields are green and the amount in both is $0.00.
To post the cost and FET of your choice, change the values in the Price and FETax fields. Those fields turn pink to indicate you’re no longer performing a standard return.
| 6. | To return additional items, repeat steps 3 through 5. |
| 7. | Click Receive. TireMaster prompts you to price the RD. |
| 8. | Click Yes. The Vendor Invoice screen opens. |
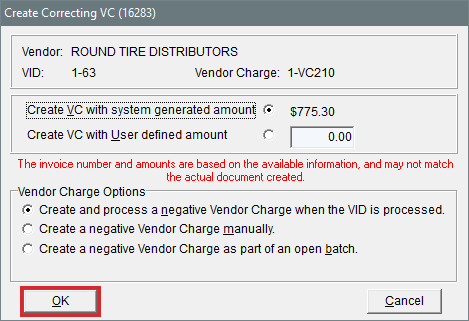
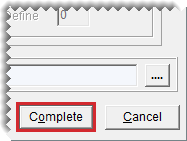
| 9. | Click Complete. The Create Correct VC screen opens. |
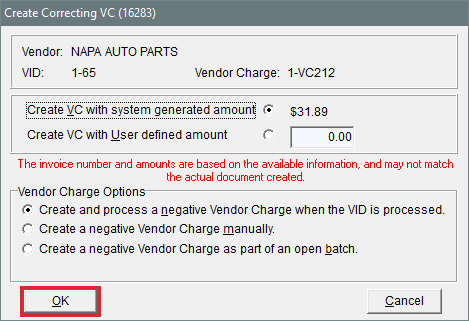
| 10. | Define whether the vendor charge will be a system-generated amount or an amount of your choice: |
To base the vendor charge on the next cost and next FET calculated by TireMaster, select Create VC with system generated amount.
To use the amount of your choice, select Create VC with User defined amount and type the charge amount.
| 11. | Select a method for processing the vendor charge: |
To automatically create the vendor charge and post it to the vendor’s subledger, select Create and process a negative Vendor Charge when the VID is processed.
To create the vendor charge yourself, select Create a negative Vendor Charge manually. For more information, see Enter a Vendor Charge.
To automatically create the charge and add it to an open batch of charges for the vendor, select Create a negative Vendor Charge as part of an open batch. When the AP Batch Charge screen appears, choose a batch or create a new batch.
| 12. | Click OK. The Report Window opens and displays the Vendor Invoice Document. |
| 13. | Print the VID and close the Report Window. |
After the negative charge is created, apply it to the vendor’s subledger to reduce the vendor’s balance. For more information, see Apply Payments and Credits to Vendor Balances.
When you return a noninventoriable item to a vendor, you need to enter your cost or an estimated cost for the item on the negative receiving document.
To return noninventoriable items
| 1. | Start a receiving document for the vendor who sold you the item. For more information, see Create a Receiving Document. |
| 2. | Enter a reference number for the return, if needed. |
| 3. | Click Add and look up the item you want to return or scan the item’s bar code. For more information, see Inventory Searches or Enter Bar Codes on Purchase Orders and Receiving Documents . |
| 4. | Change the item’s description if needed. |
| 5. | Type the returned item’s quantity as a negative number. |
| 6. | Enter the item’s cost using one of the following methods: |
For relief percent items, type the estimated cost (Parts Price x Relief Percent) in the Price field. For example, If an item’s parts price is $50 and its relief percent is 10%, type $5 in the Price field.
For option cost and expense method items, type your cost in the Price field.
| 7. | To return additional items, repeat steps 3 through 6. |
| 8. | Click Receive. TireMaster prompts you to price the RD. |
| 9. | Click Yes. The Vendor Invoice screen appears. |
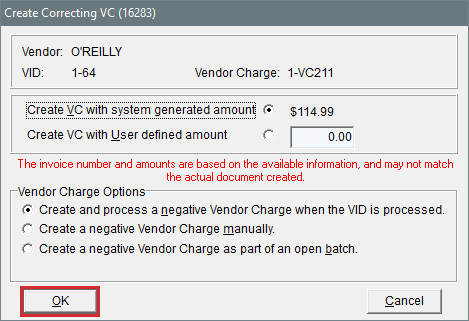
| 10. | Click Complete. The Create Correcting VC screen appears. |
| 11. | Define whether the vendor charge will be a system-generated amount or an amount of your choice: |
For a vendor charge based on the next cost and next FET calculated by TireMaster, select Create VC with system generated amount.
For a vendor charge amount of your choice, select Create VC with User defined amount and type the charge amount.
| 12. | Select a method for processing the vendor charge: |
To automatically create the vendor charge and post it to the vendor’s subledger, select Create and process a negative Vendor Charge when the VID is processed.
To create the vendor charge yourself, select Create a negative Vendor Charge manually. For more information, see Enter a Vendor Charge.
To automatically create the charge and put it in an open batch of charges for the vendor, select Create a negative Vendor Charge as part of an open batch. When the AP Batch Charge screen appears, choose a batch or create a new batch.
| 13. | Click OK. The Report Window opens and displays the Vendor Invoice Document. |
| 14. | Print the VID and close the Report Window. |
Once the negative charge is created, apply it to the vendor’s subledger to reduce the vendor’s balance. For more information, see Apply Payments and Credits to Vendor Balances.
You can perform an inventory return when you're receiving items from a vendor. The receiving document created in this scenario, includes items with both negative and positive quantities.
To combine inventory returns and receivings
| 1. | Start a receiving document for the vendor. For more information, see Create a Receiving Document. |
| 2. | Type a reference number for the receiving. |
| 3. | Add each item you’re receiving from the vendor, along with its quantity, price (your cost), and FET. |
| 4. | Add each item you want to return to the vendor and its quantity entered as a negative number. Then enter the price (your cost) and FET using one of the following methods: |
For an inventoriable item, leave $0.00 in the Price and FETax fields or change the cost and federal excise tax to amounts of your choice. For more information, see Return Inventoriable Items.
For noninventoriable items, type your cost (expense or option cost method) or the estimated cost (relief percent method) in the Price field. For more information, see Return Noninventoriable Items.
| 5. | Click Receive. TireMaster prompts you to price the RD. |
| 6. | Click Yes. The Vendor Invoice screen appears. |
| 7. | Click Complete. |
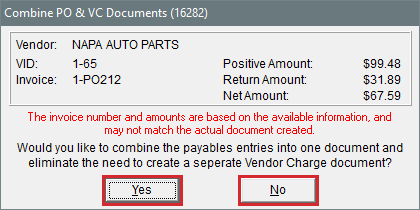
| 8. | The Combine PO & VC Documents screen appears. It lists the following: |
The total of the newly received items
The total cost of the returned items
The difference between those two amounts
| 9. | Define whether you want to combine the payable entries: |
To post the listed amounts to the GL and skip creating a vendor charge for the cost of the returned items, click Yes. Then print the vendor invoice document. The receiving is completed and you can disregard steps 10 through 12.
To create a vendor charge for the returned items instead, click No. The Create Correcting VC screen appears.
| 10. | Define whether the vendor charge will be a system-generated amount or an amount of your choice: |
For a vendor charge based on the next cost and next FET of the returned items, select Create VC with system generated amount.
For a vendor charge amount of your choice, select Create VC with User defined amount and type the charge amount.
| 11. | Select a method for processing the vendor charge: |
To automatically create the vendor charge and post it to the vendor’s subledger, select Create and process a negative Vendor Charge when the VID is processed.
To create the vendor charge yourself, select Create a negative Vendor Charge manually. For more information, see Enter a Vendor Charge.
To have TireMaster automatically create the charge and add it to an open batch of charges for the vendor, select Create a negative Vendor Charge as part of an open batch. When the AP Batch Charge screen appears, choose a batch or create a new batch.
| 12. | Click OK. The Report Window opens and displays the Vendor Invoice document. |
| 13. | Print the VID and close the Report Window. |
After the negative charge is created, apply it to the vendor’s subledger to reduce the vendor’s balance. For more information, see Apply Payments and Credits to Vendor Balances.
