Item Tracking
This help topic is applicable to the following TireMaster applications:
|
TireMaster Point of Sale |
TireMaster Plus |
TireMaster Corporate |
|---|---|---|

|

|

|
With item tracking, you can match noninventoriable items on customer work orders to the receiving documents for those same items.
The purpose of item tracking is to prevent fraud. Item tracking helps to ensure that when a noninventoriable item is returned, it’s an item you actually sold to a customer. Item tracking also allows you to verify that an outside purchase was not stolen by an employee.
Items can be tracked regardless of whether they’re assigned the option cost, expense, or relief percent costing methods. However, the items you’ll mostly likely track are those assigned the option cost costing method.
The following videos provide background information and show how to track noninventoriable items in TireMaster. Click the image for the video you want to watch.
Item Tracking Overview (2:40)
Tracking Option Cost Items (6:19)
Tracking Expense and Relief Percent Items (2:27)
Verifying Noninventoriable Returns (3:02)
Item tracking is initiated at point of sale. When you add a tracked item to a work order, you also identify which receiving document is for the item. The method for linking an item on a customer’s work order and a receiving document depends on the item’s costing method:
Option Cost Items: When you add a tracked option cost item to a work order, you are required to define the item’s cost and identify the vendor who delivered the item. When you do this, TireMaster generates the receiving document for the item. Items assigned the option cost method are typically obtained via outside purchases and then sold to customers. For more information, see Track Option Cost Items and Outside Purchases for Tracked Items.
Expense Method and Relief Percent Items: When you add a tracked item assigned the expense or relief percent costing method to a work order, a list of receiving documents appears. Then you select the corresponding receiving document on the list. For more information, see Track Expense Method and Relief Percent Items.
Once an item’s work order and a receiving document are linked, you can use the Item Tracking screen to do the following when a customer returns a noninventoriable item:
Identify the vendor who sold you the item
Identify the receiving document that was processed when the item was delivered
This information helps you verify that the noninventoriable item being returned is an item you actually purchased from a vendor and then sold to the customer, because you can easily find the supporting documentation.
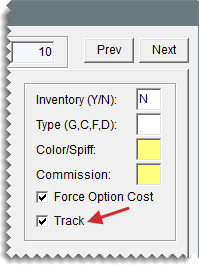
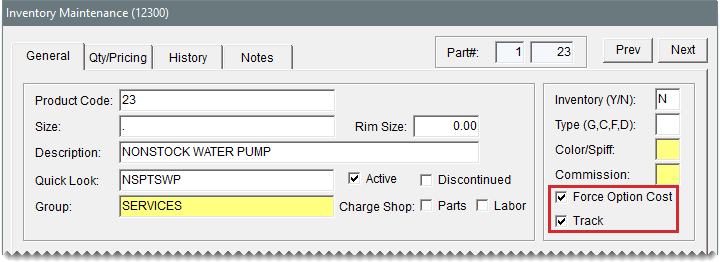
Before you can track a noninventoriable item, you need to enable tracking for it. The track item setting is on the Inventory Maintenance screen (General tab).
To enable item tracking
| 1. | Add or look up the item for which you want to enable tracking. For more information, see Add an Inventory Item or Inventory Searches. |
| 2. | On the Inventory Maintenance screen (General tab), click Edit. |
| 3. | Select the Track check box. If the check box is disabled, the item is inventoriable and cannot be tracked. |
| 4. | Click OK. |
| 5. | To enable tracking for additional items, repeat steps 1 through 4. |
To track an item that’s assigned the expense costing method or the relief percent costing method, you need to identify the receiving document that includes the item when you add it to a work order.
To track expense method and relief percent items
| 1. | Start a work order. For more information, see Create a Regular Work Order. |
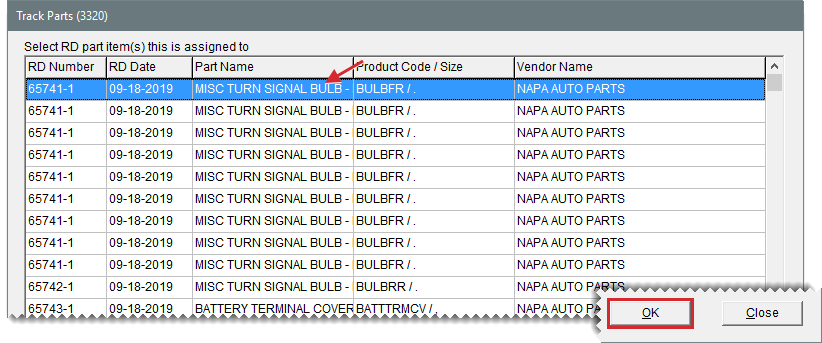
| 2. | Add the item to the work order. Then type the quantity and press Enter. The Track Parts screen opens. It lists receiving documents that include the item that was just added to the work order. |
| 3. | Do one of the following: |
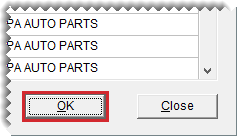
Select the receiving document that includes the item you put on the work order, and click OK. If there are multiple lines for a receiving document, press Ctrl and select a line for each item.
If there is no receiving document for the item on list, click Close. When TireMaster prompts you to assign the item to an unknown receiving document, click Yes.
| 4. | Do one of the following as needed: |
Put additional items on the work order.
Update items that were already on the work order (for example, change prices, edit descriptions, assign technicians).
Click Quit to close the work order.
Complete the invoice. For more information, see Complete an Invoice.
To track an item that’s assigned the option cost costing method, you create the receiving document for the item when you define its cost at point of sale. Option cost items cannot be linked to receiving documents that were already created in the PO System. The option cost method is used for recording the cost of nonstock parts and tires obtained through outside purchases. For more information, see Outside Purchases.
To track option cost items
| 1. | Start a work order. For more information, see Create a Regular Work Order. |
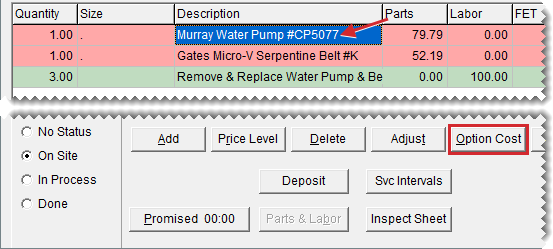
| 2. | Add one or more items to the work order. When an option cost item is added to a work order, the item’s line turns pink. The line remains pink until the item’s cost is entered. |
| 3. | For each option cost item, update the description on the work order so it matches the description of the item you’re getting from the vendor. You can also update the description of other noninventoriable items if needed. |
| 4. | Update selling prices for the items as needed. |
| 5. | Define an item’s cost and put it on a receiving document. |
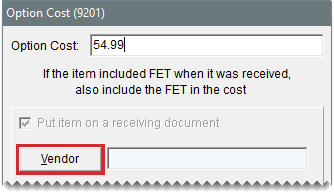
| a. | Select an item and click Option Cost. The Option Cost screen opens. |
| b. | Type your cost for the item in the Option Cost field. |
| c. | To put the item on a receiving document, click Vendor and look up the vendor who sold you the item. |
| d. | Do one of the following: |
If the shipment included only a packing slip, leave the Receive and Price check box clear and click OK. The item or items in the shipment will be received now and can be priced later, when the vendor sends you an invoice.
If there is one option cost item on the work order and the vendor sent you an invoice, select the Receive and Price check box and click OK. TireMaster prompts you to receive and price the item before returning to work order.
If there are multiple option cost items on the work order and the vendor sent you an invoice, leave the Receive and Price check box alone until you’ve entered the cost for the last item. Then click OK. When you enter the price for the last item and select the check box, TireMaster prompts you to receive and price the items before returning to work order.
| 6. | Do one of the following as needed: |
Put additional items on the work order.
Update items that were already on the work order (for example, change prices, edit descriptions, assign technicians).
Click Quit to close the work order.
Complete the invoice. For more information, see Complete an Invoice.
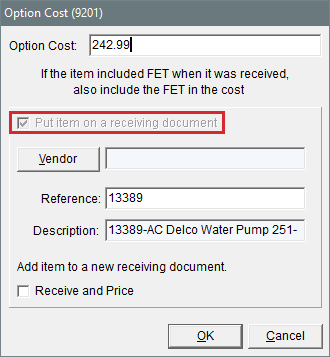
When you add a tracked, option cost item to a work order, you are typically required to add the item to a receiving document. This happens because the Put item on a receiving document check box is automatically selected on the Option Cost screen and cannot be changed.
There is, however, an instance which you can clear the check box for a tracked, option cost item. This occurs when the item is already in your inventory, because it was not sold or it was returned by a customer.
In this scenario, you have the following options:
If the available item can be sold on the new work order, enter its cost and clear the check box. Then click OK. Because the item was previously received, there is no need to create a receiving document.
If the available item cannot be sold on the new work enter, enter its cost and leave the check box selected. Then define the vendor and create the receiving document.
If you use the Epicor® Integrated Service Estimator (ISE) with your TireMaster system, you can track the parts you order via Epicor.
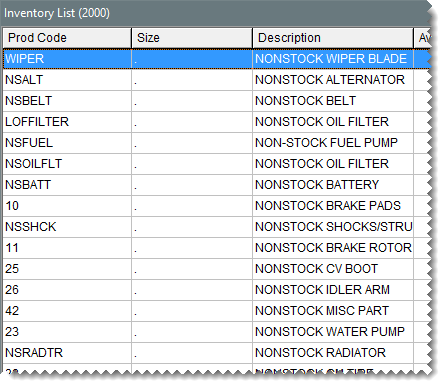
Items from Epicor are tracked by linking them to unique, noninventoriable items in TireMaster, instead of the miscellaneous parts item which is normally used for placing orders with Epicor. For example, TireMaster items used for tracking products retrieved from Epicor could include Nonstock Brake Pads, Nonstock Water Pump, and Nonstock Shocks/Struts.
To ensure items from Epicor can be tracked, the Item Tracking check box must be selected in Inventory Maintenance for the TireMaster items to which they’ll be linked. If you also want to track the cost of items ordered with Epicor, select Force Option Cost (recommended).
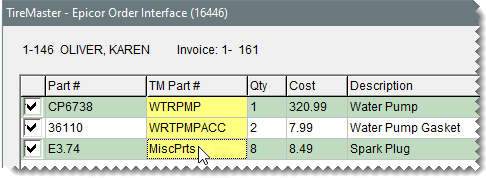
When you add tracked items to work orders with the Epicor ISE, you need to associate the Epicor items to corresponding noninventoriable items in TireMaster (on the Epicor ordering screen). Then you can link the TireMaster work order and the receiving document created for the order placed via Epicor.
To add tracked items to work orders with the ISE
| 1. | Access the Epicor ISE as usual. |
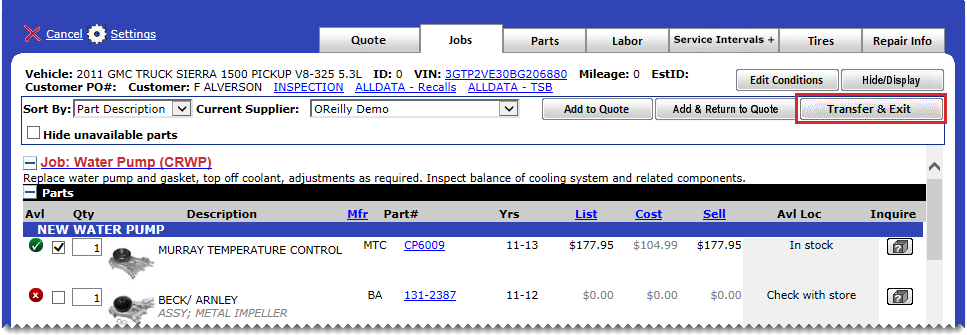
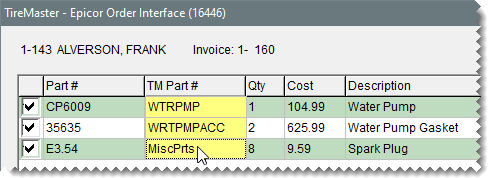
| 2. | Search for and select the items in the ISE. Then click Transfer & Exit. The Epicor ordering screen opens. |
| 3. | Associate each Epicor item with the corresponding noninventoriable item in TireMaster. |
| a. | Click an item’s TM Part# field and press  . The Custom Inventory Lookup screen opens. . The Custom Inventory Lookup screen opens. |
| b. | Look up the TireMaster item. The miscellaneous interface part number is replaced with the part number from TireMaster. |
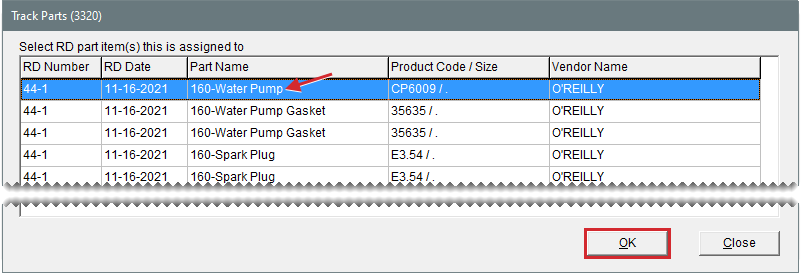
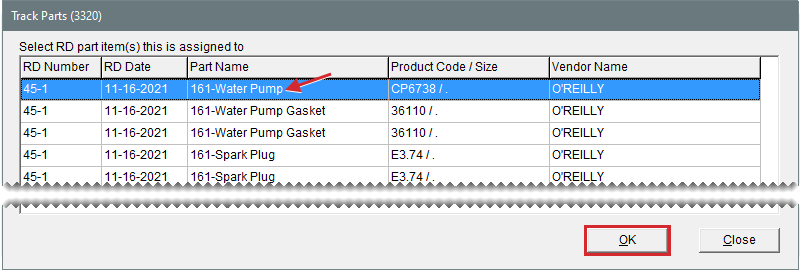
| 4. | Make sure the check box is selected for each of the items you want to order. Then click Order. The Track Parts screen opens. |
| 5. | Link the work order and the receiving document for each of the items. To do this, select an item and click OK. Then repeat this process for the remaining items. |
The process of adding tracked items to an estimate from the Epicor ISE is the same as using the ISE to add non-tracked items. However, when you turn the estimate into a work order, you need to associate the Epicor items with the corresponding items in TireMaster. Then you can link the new work order to the receiving document that was created when the items were ordered electronically.
To add tracked items to estimates with the Epicor ISE
| 1. | Access the Epicor ISE as usual. |
| 2. | Search for and select the items in the ISE. Then click Transfer & Exit. |
| 3. | When you've added all of the items to the estimate, save it. |
| 4. | When the customer decides to purchase the items, open the customer’s estimate. For more information, see Retrieve Quotes and Estimates. |
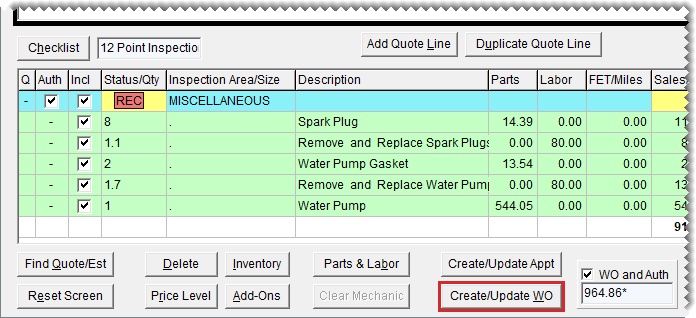
| 5. | Make sure the items that you want to move to a work order are selected, and click Create/Update WO. The Epicor ordering screen opens. |
| 6. | Associate each Epicor item with the corresponding noninventoriable item in TireMaster. |
| a. | Click an item’s TM Part# field and press  . The Custom Inventory Lookup screen opens. . The Custom Inventory Lookup screen opens. |
| b. | Look up the TireMaster item. The miscellaneous interface part number is replaced with the part number from TireMaster. |
| 7. | Make sure the check box is selected for each of the items you want to order. Then click Order. The Track Parts screen opens. |
| 8. | When the work order confirmation message appears, click OK. |
| 9. | Close the Quote and Estimate Writer screen. |
| 10. | To retrieve the new work order, click Invoicing. Then select the work order and click Select. The Track Parts screen opens. |
| 11. | Link the work order and the receiving document for each of the items. To do this, select an item and click OK. Then repeat this process for the remaining items. |
When a customer wants to return a tracked noninventoriable item, you can use the Item Tracking screen to identify the receiving document for the item being returned. With this information, you can do the following:
Verify that you actually purchased the item from a vendor and then sold it to the customer
Determine how much you paid the vendor for the item (You need to know your cost for the item to process the return to the vendor.)
To verify a noninventoriable item return
| 1. | Select Inventory > Item Tracking. The Item Tracking screen opens. |
| 2. | Do one of the following: |
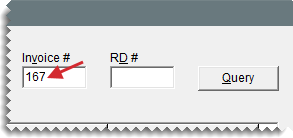
If the customer provides the original sale invoice, type the document number in the Invoice# field and click Query.
If the customer does not have the original sale invoice, click the Customer field and press  . Then search for the customer. For more information, see Customer Searches.
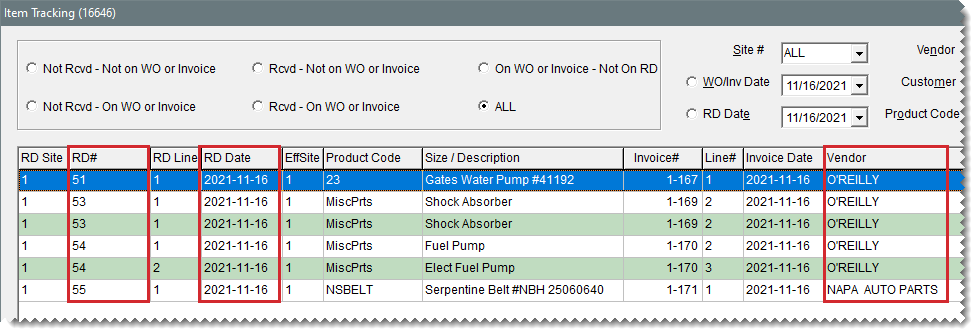
Depending on the search method, TireMaster retrieves the item sold on the specified invoice or a list of the items sold to the customer.
| 3. | Take note of the entries in the RD#, RD Date, and Vendor columns. You will use this information to find the item’s receiving document. |
| 4. | For a hard copy of the entries on the screen, click Print. When the Report Window opens, print the report. Then close the Report Window. |
| 5. | Close the Item Tracking screen. |
| 6. | Locate the receiving document for the item being returned. |
| a. | Click PO List or select Inventory > PO & Receiving. |
| b. | Click the Receiving Documents tab. |
| c. | Do one of the following: |
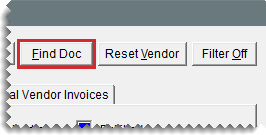
Click Find Doc. In TireMaster 9.4.5 and older, type the receiving document number and click OK. In TireMaster 9.4.7 and newer, select Document #, type the document number, and click Find.
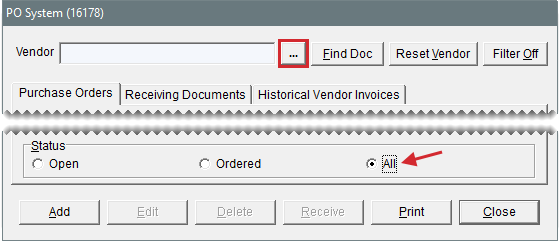
Select the status All. Then click  and look up the vendor. For more information, see Vendor Searches.
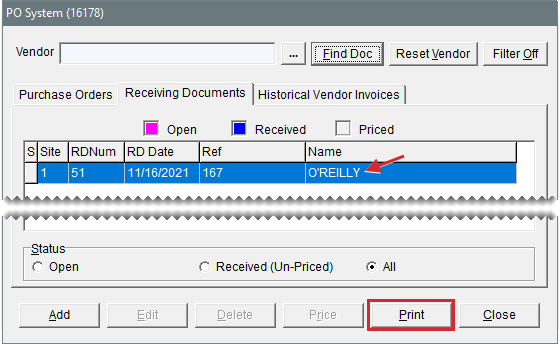
| 7. | Select the receiving document and click Print. The Report Window opens and displays the receiving document. |
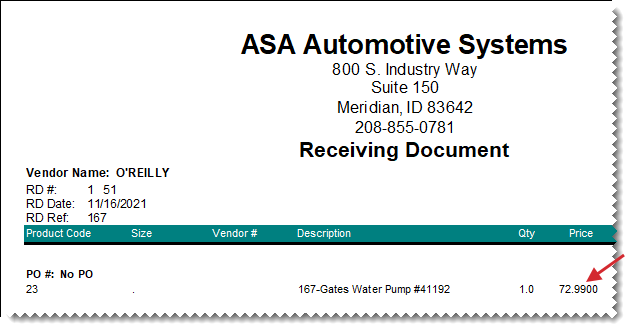
| 8. | Take note of the item’s price. You need that amount for the negative receiving document that will be used to return the item to the vendor. |
You can reduce the number of entries on the Item Tracking screen by removing the items that were assigned to unknown receiving documents. Items assigned to unknown receiving documents are those items that already had available quantities when tracking was enabled. (In other words, those items were received before tracking began.)
To delete items from the tracking screen
| 1. | If the Item Tracking screen isn’t already open, select Inventory > Item Tracking. |
| 2. | Select the item you want to remove and click Delete. The item is removed. When there are multiple lines for an item (because the item’s quantity on the RD was higher than 1), all of the lines are removed. |
When a customer returns tracked parts or tires that you obtained through an outside purchase, process the return and create a negative receiving document at point of sale. The return invoice is for refunding the customer and the negative receiving document is for sending the returned item back to the vendor. Because outside purchase items are assigned the option cost costing method, TireMaster requires you to record item costs prior to creating the negative receiving documents. For more information, see Option Cost Method and Outside Purchases for Tracked Items
To process tracked outside purchase returns
| 1. | Review the customer’s original sale invoice and the item’s receiving document. With this information, you can: |
Confirm the item was sold to the customer.
Identify the vendor who sold you the item and the price you paid for it.
For more information, see Verify Noninventoriable Item Returns.
| 2. | Start a work order for the customer who is returning the outside purchase item. |
| 3. | Add the returned item to the work order. |
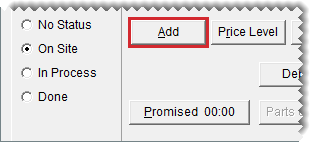
| a. | Click Add and look up the item. |
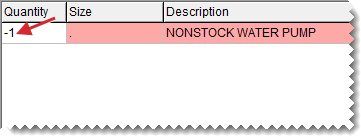
| b. | Type the quantity as a negative number (-) and press Enter. |
The Customer Sales History screen opens. It lists the items the customer previously bought, returned, or traded-in. Items highlighted in yellow were flagged during previous returns.
| c. | Select the item being returned and click Return. |
| d. | Type the returned item’s description and original selling price. |
| 4. | Enter the returned item’s cost. |
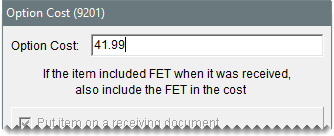
| a. | Click Option Cost. The Option Cost screen opens. |
| b. | Type the item’s cost. |
| 5. | Create the negative receiving document |
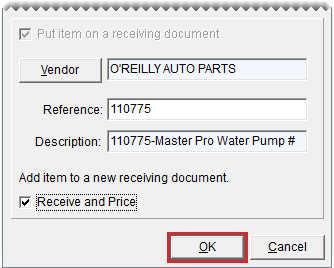
| a. | Click Vendor and search for the vendor who sold you the item. |
| b. | Select the Receive and Price check box. |
| c. | Click OK. The Receiving Document screen opens. |
| d. | Click Receive. TireMaster prompts you to price the receiving. |
| e. | Do one of the following: |
If the vendor has issued a return invoice to you, click Yes. The Vendor Invoice screen opens.
If you do not have a return invoice from the vendor, click No. The Report Window opens and displays the receiving document. Print it if needed and close the Report Window. Then go to step 8. You can price the item and create the negative charge later.
| 6. | To price the negative receiving document, click Complete. |
One of the following occurs:
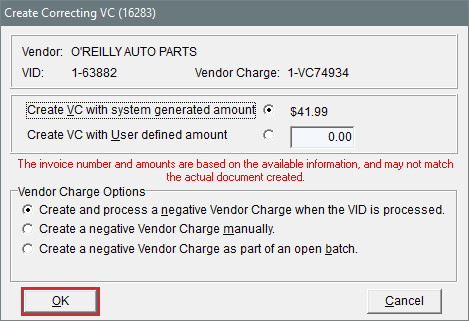
In TireMaster Plus and TireMaster Corporate, the Correcting VC screen opens.
In TireMaster Point of Sale, the Report Window opens and displays the vendor invoice document for the returned item. Print the VID if needed and close the Report Window. Then go to step 8.
| 7. | Define how to handle the negative vendor charge for the returned item. |
| a. | Indicate whether the vendor charge will be a system-generated amount or an amount of your choice: |
For a vendor charge that matches the option cost amount you defined, select Create VC with system generated amount.
For a vendor charge amount of your choice, select Create VC with User defined amount and type the charge amount.
| b. | Select a method for processing the negative vendor charge: |
To automatically create the vendor charge and post it to the vendor’s subledger, select Create and process a negative Vendor Charge when the VID is processed.
To create the vendor charge yourself, select Create a negative Vendor Charge manually. For more information, see Enter a Vendor Charge.
To automatically create the charge and add it to an open batch of charges for the vendor, select Create a negative Vendor Charge as part of an open batch. When the AP Batch Charge screen appears, choose a batch or create a new batch.
| c. | Click OK. The Report Window opens and displays the vendor invoice document (VID) for the returned item. |
| d. | Print the VID if needed, and close the Report Window. Once the negative charge is created, apply it to the vendor’s subledger to reduce the vendor’s balance. For more information, see Apply Payments and Credits to Vendor Balances. |
| 8. | Complete the return invoice. |
| a. | Click Complete. |
| b. | Process the customer’s reimbursement with the same payment method used for the original invoice. |
When a customer returns a tracked item that’s assigned the expense or relief percent costing method, the item is put on an unknown receiving document. Depending on what the item is, you could sell it to another customer or return it to the vendor.
To process tracked expense and relief percent item returns
| 1. | Review the customer’s original sale invoice and the item’s receiving document. With this information, you can: |
Confirm the item was sold to the customer.
Identify the vendor who sold you the item and the price you paid for it.
For more information, see Verify Noninventoriable Item Returns.
| 2. | Start a work order for the customer who is returning the outside purchase item. |
| 3. | Click Add and look up the item being returned. |
| 4. | Type the quantity as a negative number (-) and press Enter. |
The Customer Sales History screen opens. It lists the items the customer previously bought, returned, or traded-in. Items highlighted in yellow were flagged during previous returns.
| 5. | Select the item being returned and click Return. |
| 6. | Click OK. A message tells you that the item will be assigned to an unknown receiving document. |
| 7. | Click OK to close the message. |
| 8. | Complete the return invoice. |
| a. | Click Complete. |
| b. | Process the reimbursement with the same payment method used for the original invoice. |
