Reconciliation Codes
This help topic is applicable to the following TireMaster applications:
|
TireMaster Point of Sale |
TireMaster Plus |
TireMaster Corporate |
|---|---|---|

|

|

|
Reconciliation codes make it possible for you to track the credits you expect to receive from vendors when you perform national account, government support, and adjustment sales. They also define how these types of sales post to the general ledger.
You need to create a reconciliation code for each vendor with whom you do national account, government support, or adjustment sales. Once you create a reconciliation code for a vendor, you need to assign it to the following:
Items in the vendor’s product line
Customers who have national account or government support agreements with the vendor
Reconciliation codes are sometimes called recon codes.
Reconciliation codes define the following:
How national account, government support, and adjustment sales post to the general ledger
How credits resulting from national account, government support, and adjustment sales post to the general ledger
TireMaster Point of Sale uses preset GL accounts for reconciliation codes.
|
Major |
Minor |
Account Name |
|
2000 |
100 |
Accounts Payable - General |
|
2000 |
999 |
Accounts Payable - Expected Credits |
|
4500 |
0 |
NA/GS/ADJ Gain/Loss |
|
4510 |
0 |
NA/GS/ADJ Commission |
You also need to assign GL classes to your reconciliation codes. Depending on which GL classes you assign, you can track profit information for national account, government support, and adjustment sales separately from the profit information for the rest of your sales. The startup database for new TireMaster systems includes GL Class 3 - NA/GS/ADJ Sales. For more information, see GL Classes.
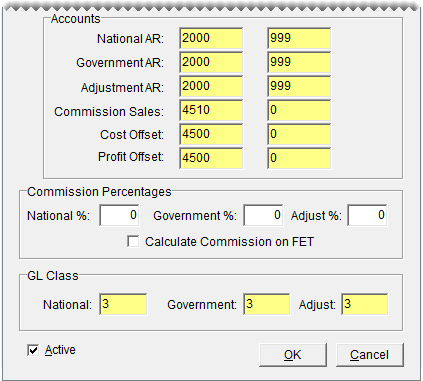
The process of setting up a reconciliation code includes assigning a vendor and defining the general ledger accounts to which national account, government support and adjustment sale activity posts.
To add a reconciliation code
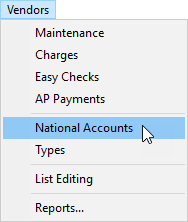
| 1. | Select Vendors > National Accounts. Then Natl/Recon Codes/Credits screen opens. |
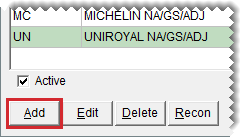
| 2. | Click Add. The National Recon Code Edit screen opens. |
| 3. | Enter the following information: |
| a. | In the RecCode field, type a unique two-character code. |
| b. | Type a description for the reconciliation code. |
| c. | Click Lookup, and search for the vendor you want to associate with the reconciliation code. For more information, see Vendor Searches. |
| 4. | Assign GL accounts to the reconciliation code. Account assignments vary, depending on your TireMaster application, |
If you're running TireMaster Point of Sale,
If you're running TireMaster Plus,
If you're running TireMaster Corporate,
| 5. | Under Commission Percentages, type the expected commission percentage for each type of sale (optional). |
| 6. | Assign GL classes to the reconciliation code. GL class assignments vary, depending on your TireMaster application: |
If you're running TireMaster Point of Sale.
If you're running TireMaster Plus,
If you're running TireMaster Corporate,
| 7. | To save the reconciliation code, click OK. |
The new code can be assigned to items in the vendor’s product line and customers who have national account or government support agreements with the vendor.
When the need arises, reconciliation codes can be updated and removed from TireMaster.
In rare instances, you might need to update the settings for a reconciliation code. Such changes are needed if a mistake was made when the code was originally set up or if a vendor’s business is renamed.
To update a reconciliation code
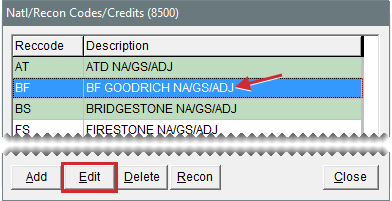
| 1. | Select Vendors > National Accounts. Then Natl/Recon Codes/Credits screen opens. |
| 2. | Select the reconciliation code you want to update, and click Edit. The National Recon Code Edit screen opens. |
| 3. | Make the needed changes. For more information, see National Recon Code Edit Screen. |
| 4. | To save your changes, click OK. |
If a reconciliation code has never been used, it can be deleted. If a reconciliation code has transaction history, you can make it inactivate. For more information, see Make a Reconciliation Code Inactive .
To delete a reconciliation code
| 1. | Select Vendors > National Accounts. Then Natl/Recon Codes/Credits screen opens. |
| 2. | Select the code you want to delete, and click Delete. Confirmation message appears. |
| 3. | Click Yes. The code is removed. |
| 4. | Close the Natl/Recon Codes/Credits screen. |
If you no longer use a reconciliation code, you can inactivate it.
To make a reconciliation code inactive
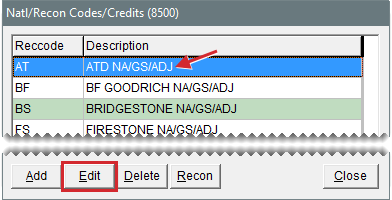
| 1. | Select Vendors > National Accounts. Then Natl/Recon Codes/Credits screen opens. |
| 2. | Select the reconciliation code you want to make inactivate, and click Edit. The National Recon Code Edit screen opens. |
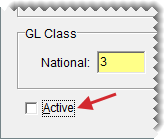
| 3. | Clear the Active check box and click OK. |
| 4. | Close the Nat’l/Recon Codes/Credits screen. |
If you assign the wrong reconciliation code to a work order in error, you can change it point of sale.
To change a work order’s reconciliation code
| 1. | Click Invoicing. The Open Work Order List opens. |
| 2. | Select the work order for which the reconciliation code needs to be changed, and click Select. The Invoice Entry screen opens. |
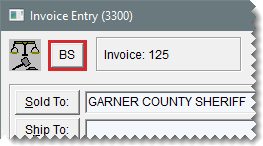
| 3. | Click the button that displays the reconciliation code (upper-left corner of the screen). The Customer Recon Codes screen opens. |
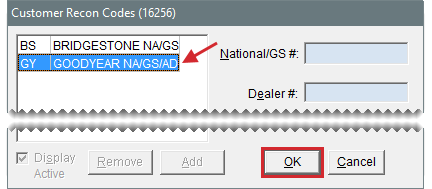
| 4. | Select the code that should be assigned to the work order, and click OK. The following message appears: “All prices will be reset to default values. Any changes you have made will be overwritten.” |
| 5. | Click OK. The new reconciliation code appears in the upper-left corner of the screen and prices for the items on the work order are recalculated. |
| 6. | Click Quit to close the work order, or complete the invoice. For more information, see Complete an Invoice. |

 , and select an account for posting expected credits, commissions, and profits or losses from the list that appears.