A–E Price Levels
This help topic is applicable to the following TireMaster applications:
|
TireMaster Point of Sale |
TireMaster Plus |
TireMaster Corporate |
|---|---|---|

|

|

|
With A–E price levels, you can assign up to five arbitrary, fixed prices to the items you sell. Then, depending on which price level is assigned to customers, you charge them price A, price B, price C, price D, or price E instead of the item’s regular price. In TireMaster, the regular price is referred to as EDL, which means everyday low price.
To set up A–E price levels, you need to do the following:
Assign A–E prices to the items for which you want to use A–E pricing.
Update the descriptions for price levels A, B, C, D, and E and define whether those price levels are global (available to all customers at point of sale).
Assign an A–E price level to customers for whom you want to use A–E pricing
Once you complete these steps, customers who are assigned price levels A, B, C, D, or E will receive special pricing.
The first step in setting up A–E price levels is to assign A–E prices to items. You can assign A–E prices to individual items or a group of items. In TireMaster Corporate environments, A–E prices can be set up at the Corporate site only and are effective at all stores.
If you need to assign A–E prices to a single item or only a few items, you can set the A–E prices for each item one at a time.
To assign A–E prices to a single item
| 1. | Search for the item to which you want to assign A–E price levels. For more information, see Inventory Searches. |
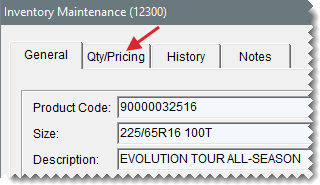
| 2. | On the Inventory Maintenance screen, click the Qty/Pricing tab. |
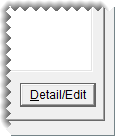
| 3. | Click Detail/Edit. The Site Prices and Quantity screen opens. |
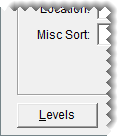
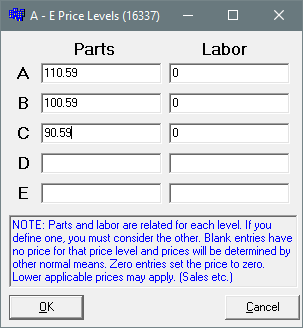
| 4. | Click Levels. The A–E Price Levels screen opens. |
| 5. | Type up to five parts and labor prices for the item. |
| 6. | Click OK. |
When you need to assign A–E prices to many items, you can use Inventory List Editing.
To assign A–E Prices to multiple items
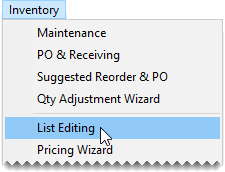
| 1. | Select Inventory > List Editing. TireMaster prompts you to search for items. |
| 2. | Look up the items whose A–E prices you want to set. For more information, see Inventory Searches. |
| 3. | When the Inventory List Editing screen opens, scroll to the A Parts column and type an item’s level A parts price. |
| 4. | Move to the A Labor price column, and type the item’s level A labor price. |
| 5. | Type parts and labor prices in the B–E columns. |
| 6. | Repeat steps 3 through 5 for each additional item whose A–E price levels you want to set. |
| 7. | Close the Inventory List Editing screen. |
When you assign A–E prices to an item, TireMaster creates up to five new price levels (named A, B, C, D, and E). For ease of use, you might want to edit the descriptions for these new price levels. You can also define whether any of your A–E price levels should be available to all customers at point of sale.
To edit A–E Price Levels
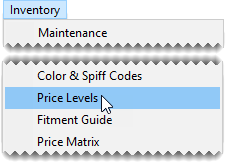
| 1. | Select Inventory > Price Levels. The Price Levels screen opens. |
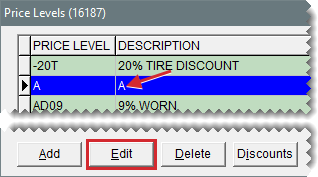
| 2. | Select price level A and click Edit. The Price Level Edit screen opens. |
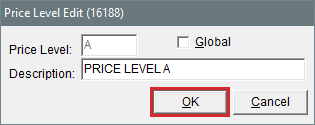
| 3. | Change the description as needed. Example:Price Level A. |
| 4. | If you want to make the price level available to all customers at point of sale, select the Global check box. Otherwise, leave it alone. |
| 5. | Click OK. |
| 6. | Repeat steps 2 through 5 for price levels B, C, D, and E. |
When you use the Pricing Wizard to update A–E price levels in a TireMaster Corporate environment, you need to define the site whose source cost or price entries will be used as the basis for the update. To do this, you need to select a base site. For more information, see Base Site.
If you need general information about using the Pricing Wizard, see Change Prices for a Group of Items and Make Multiple Changes to a Group of Items.
To update multi-store A–E price levels with the Pricing Wizard
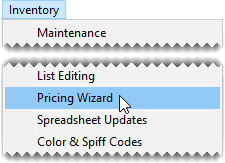
| 1. | At the corporate site, select Inventory > Pricing Wizard. |
| 2. | When the Pricing Wizard screen opens, make sure Price Change is selected. |
| 3. | Select a site from the Base Site drop-down. The source cost or price for the selected site will be used for updating the price levels. Because the corporate site does not have inventory, choose one of the store sites. |
| 4. | Under Operation 1, do the following: |
| a. | For the Source Field, select one of the cost (last, next, or standard) or price (base, parts, or labor) options from the drop-down. |
| b. | For the Field to Update, select Price Level. Then choose a price level and define whether it’s for the parts or labor price. |
| c. | Define whether the change will be a percentage or a fixed dollar amount. |
| d. | Define whether to end updated prices with the same cents amount. |
| 5. | To update additional price levels, repeat steps 4a and 4b for second and third operations, if needed. |
| 6. | Click Inventory, and search for the items whose price levels you want to update. |
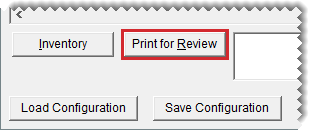
| 7. | To preview the pending changes, click Print for Review, and look over the report. |
| 8. | To implement the new price levels, click Apply. |
Occasionally, you might want to create a price level discount for one of your A–E price levels. For example, if a vendor gives you a temporary discount on several items, you can pass the savings on to your customers by setting up price level discounts for one or more of your A–E price levels. For more information, see Add Price Level Discounts.
The advantage of creating a price level discount for an A–E price level is that you don’t have to manually update the A–E prices for each of the affected items. When you want to resume using price A, price B, price C, price D, or price E, you can delete the price level discount.
When the price generated by a price level discount is less than the A–E price assigned to the item, TireMaster highlights it in yellow and displays it at the bottom of the Inventory List instead of the A–E price.
If an item has a sale price, an A–E price, and a price generated by a price level discount, the customer receives the lowest price available.
Once you’ve established your A–E price levels, you can assign them to customers. While you can assign these price levels to customers individually, it’s easier to assign them to a range of customers with Customer List Editing. For more information, see Update Customer Records.
An item’s A–E prices and best price can be displayed at the bottom of the Inventory List some of the time, all of the time, or never.
If the Show Price Level check box is included on the Inventory List, you can show or hide price levels by doing either of the following:
Selecting or clearing the check box
Clicking each of the fields for the A–E prices and the best price
You can define whether the A–E prices are included on the Inventory by setting a pair of controls. For details on setting these controls, see Show and Hide A–E Prices.
You can define when to show or hide A–E prices on the Inventory List by setting two controls.
To show or hide A–E prices
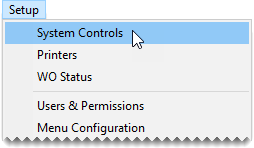
| 1. | Select Setup > System Controls. The System Controls screen opens. |
| 2. | Click the Inventory tab. |
| 3. | Depending on what you want to show or hide, set the controls Show Price Level Question and Show Price Levels in one of the following ways: |
If you want to show A–E price levels at all times, set Show Price Level Question to No and set Show Price Levels to Yes.
If you want hide price levels until the Show Price Levels check box is selected, set Show Price Level Question to Yes and set Show Price Levels to No.
If you want to show price levels until the Show Price Levels check box is cleared, set Show Price Level Question to Yes and set Show Price Levels to Yes.
If you never want to show price levels, set Show Price Level Question to No and set Show Price Levels to No.
To set a control, select it and press Enter. Then select Yes or No.
| 4. | Close the System Controls screen. |
