GL Tab Reports
This help topic is applicable to the following TireMaster applications:
|
TireMaster Point of Sale |
TireMaster Plus |
TireMaster Corporate |
|---|---|---|

|

|
This tab displays all reports that relate to the general ledger and accounting in TireMaster.
This report lets you see aged customer or vendor balances as of the end of a specific fiscal period.
To generate an AR or AP Aging Report
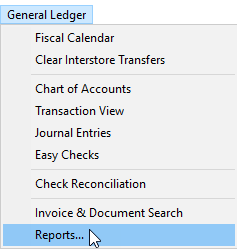
| 1. | Select General Ledger > Reports. The Report List opens with the GL tab selected. |
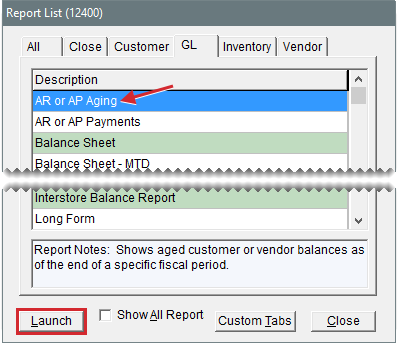
| 2. | Select AR or AP Aging and click Launch. The AR or AP Aging Report screen opens. |
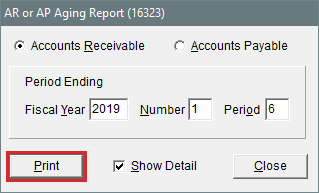
| 3. | Select one of the following: |
Accounts Receivable for a list of customer balances
Accounts Payable for a list of vendor balances
| 4. | Type the fiscal year, number, and period for which you’re generating the report. |
| 5. | To include individual customer or vendor balances, make sure the Show Detail check box is selected. For totals only, clear the check box. |
| 6. | Click Print. The Report Window opens. |
| 7. | Print the report and close the Report Window. |
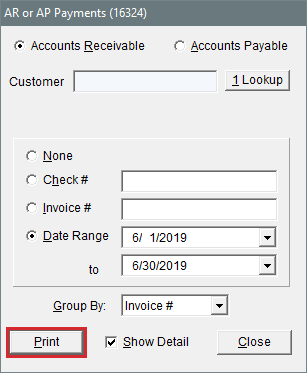
This report displays information about payments from customers or payments to vendors. For vendors, the report also lists each of the items that were applied when processing a check with the AP Payments screen or when updating the vendor’s ledger with the Payment Editing screen.
To generate an AR or AP Payments Report
| 1. | Select General Ledger > Reports. The Report List opens with the GL tab selected. |
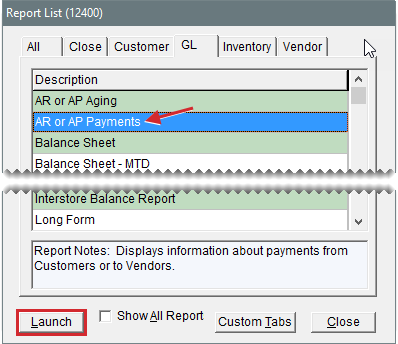
| 2. | Select AR or AP Payments and click Launch. The AR or AP Payments screen opens. |
| 3. | Select one of the following: |
Accounts Receivable for a list of payments from customers
Accounts Payable for a list of payments to vendors or a list of applied items
| 4. | Select one or more customers or vendors: |
For payments from a specific customer or vendor, click Lookup. Then look up the customer or vendor. For more information, see Customer Searches or Vendor Searches.
For payments from all customers or vendors, leave the Customer or Vendor field blank.
| 5. | Click Lookup, and select the site or sites whose information you want to retrieve |
| 6. | To limit the information retrieved by the report, do one of the following: |
For all payments, select None.
For payments that a specific check number was used for, select Check # and type the check number.
For a specific invoice that an ROA has been applied to, select Invoice #. Then type the invoice number. (AR report only.)
For a specific group of applied items from the vendor’s payment ledger, select Apply Group. Then type the apply group number. (AP report only.)
For payments that occurred during a specific date range, select Date Range. Then select the beginning and ending dates from the drop‑downs. (AR report only.)
| 7. | To define how to organize information on the report, select Check # or Invoice # from the Group By drop‑down. (AR report only.) |
| 8. | To include document numbers on the report, make sure the Show Detail check box is selected. To exclude document numbers, clear the check box. |
| 9. | Click Print. The Report Window opens. |
| 10. | Print the report. Then close the Report Window. |
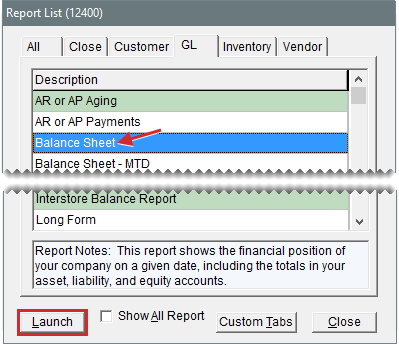
This report shows the financial position of your company on a given date, including the totals in your asset, liability, and equity accounts.
To generate a Balance Sheet
| 1. | Select General Ledger > Reports. The Report List opens with the GL tab selected. |
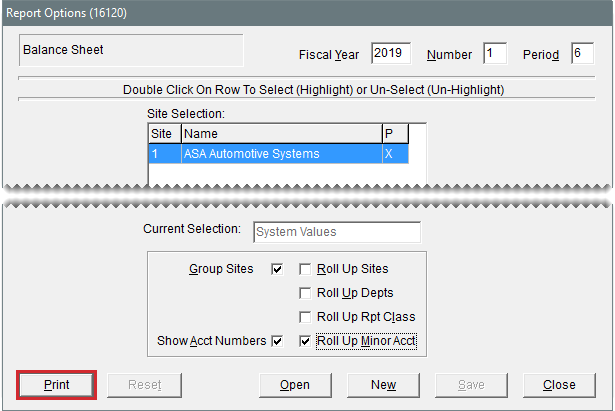
| 2. | Select Balance Sheet and click Launch. The Report Options screen opens. |
| 3. | Type the fiscal year, number, and period for the balance sheet. |
| 4. | To exclude a site from the balance sheet, double-click the row for it. All sites are included by default. |
| 5. | Do one of the following: |
To specify which information is displayed on the report, select one or more of the report option check boxes.
To print the report using a memorized setting, click Open. When the Memorized Selections screen opens, click the appropriate setting and click Select. For more information, see Financial Statement Settings.
| 6. | Click Print. The Report Window opens. |
| 7. | Print the balance sheet and close the Report Window. |
| 8. | Close the Report Options screen. |
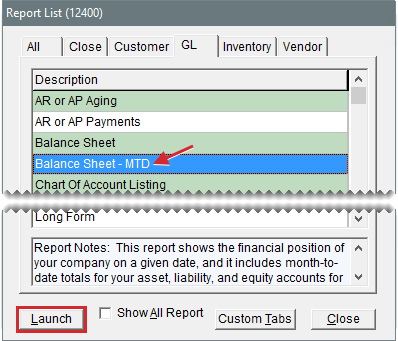
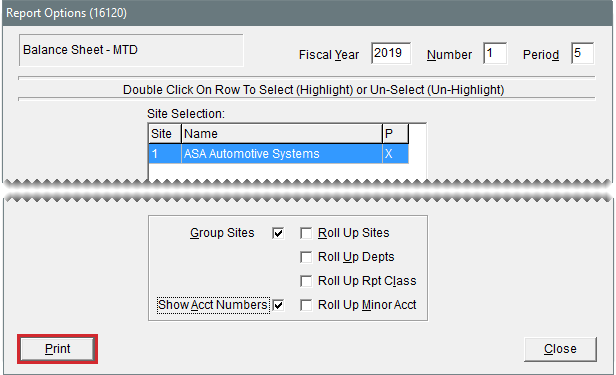
Like the regular balance sheet, this report shows the financial position of your company on a given date. Along with that information, it also includes month-to-date totals for your asset, liability, and equity accounts for the selected fiscal period.
To generate a Balance Sheet with month-to-date totals
| 1. | Select General Ledger > Reports. The Report List opens with the GL tab selected. |
| 2. | Select Balance Sheet - MTD and click Launch. The Report Options screen opens. |
| 3. | Type the fiscal year, number, and period for the balance sheet. |
| 4. | To remove a site from the balance sheet, double-click its row. All sites are selected by default. |
| 5. | Select one or more of the report option check boxes. |
| 6. | Click Print. The Report Options screen opens. |
| 7. | Print the report and close the Report Window. |
| 8. | Close the Report Options screen. |
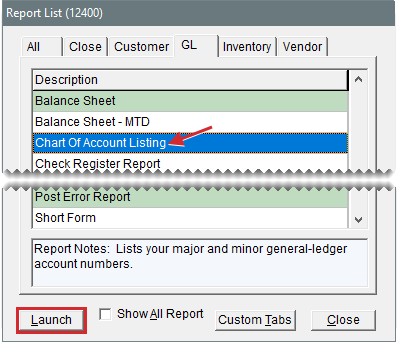
This report lists the major and minor accounts in your chart of accounts.
To generate a Chart of Accounts Listing
| 1. | Select General Ledger > Reports. The Report List opens with the GL tab selected. |
| 2. | Select Chart of Accounts Listing and click Launch. The Report Window opens. |
| 3. | Print the report and close the Report Window. |
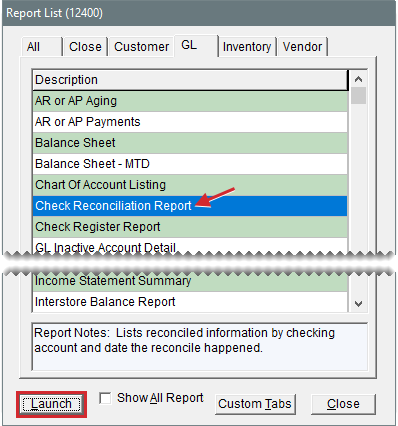
The Check Reconciliation Report lists the checks, deposits, fees, and withdrawals reconciled during a user-defined date range.
To generate a Check Reconciliation Report
| 1. | Select General Ledger > Reports. The Report List opens with the GL tab selected. |
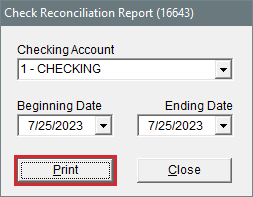
| 2. | Select Check Reconciliation Report and click Launch. The Check Reconciliation Report screen opens. |
| 3. | Define whether the report is for all bank accounts or a single account by making a selection from the Checking Account drop-down. |
| 4. | Define the date range. For a single day, enter the same date for both the beginning and end of the range. |
| 5. | Click Print. The Report Window opens. |
| 6. | Print the report and close the Report Window. |
| 7. | Close the Check Reconciliation Report screen. |
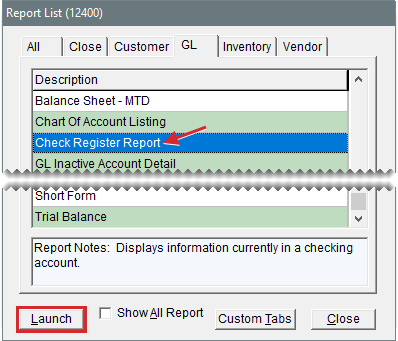
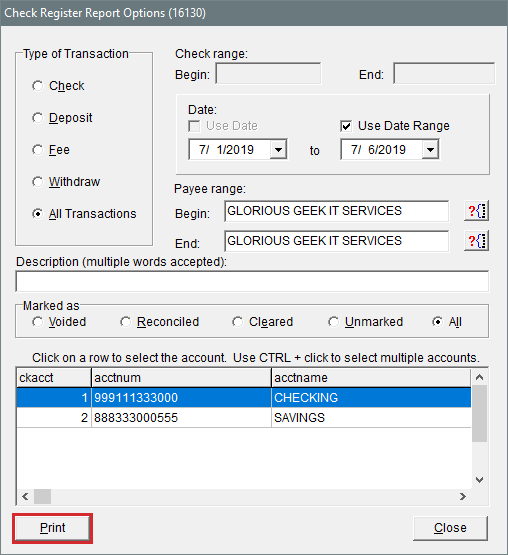
This report retrieves information from one or more checking accounts. You can generate the report based on the transaction type, check range, date range, customer range, description text, and status of your checkbook entries. For more information, see Generate AP Payments and Manage Bank Activity.
To generate a Check Register Report
| 1. | Select General Ledger > Reports. The Report List opens with the GL tab selected. |
| 2. | Select Check Register Report and click Launch. The Check Register Report Options screen opens. |
| 3. | Select the type of transaction whose information you want to retrieve: |
Check for checks drawn on the selected account or accounts
Deposit for deposits made into the selected account or accounts
Fee for fees assessed against the selected account or accounts
Withdraw for withdrawals from the selected account or accounts
All for all transactions affecting the selected account or accounts
| 4. | For checks in a specific range, type the beginning and ending check numbers. |
| 5. | If you want to retrieve transactions by date, do one of the following: |
For all transactions that occurred on a particular day, click Use Date and type the date.
For all transactions that occurred in a date range, click Use Date Range and type the beginning and ending dates.
| 6. | If you want to retrieve transactions for one or more payees do the following: |
For one payee, click  next to the Begin field and select a name from the list that opens. TireMaster displays the payee’s name in both the Begin and End fields.
For a range of payees, click  next to the Begin field and select a name from the list that opens. Then repeat this process for the End field.
| 7. | If you want to retrieve transactions based on their description on the Check Reconciliation screen, type the text in the Description field. |
| 8. | In the Marked as area, select one of the following transaction states: |
Voided for all voided transactions
Reconciled for all reconciled transactions
Cleared for all transactions that have been cleared
Unmarked for all transactions that are unmarked
All Lists all transactions regardless of their status.
| 9. | Select the account or accounts whose information you want to retrieve. |
| 10. | Click Print. The Report Window opens. |
| 11. | Print the report and close the Report Window. |
| 12. | Close the Check Register Report Options screen. |
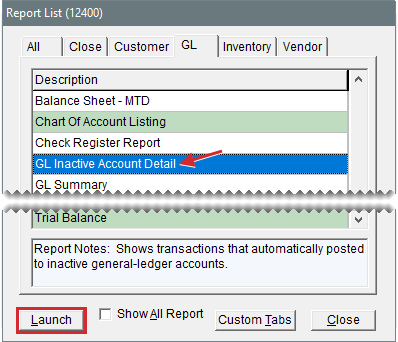
This report shows transactions that automatically posted to inactive general ledger accounts. This type of posting occurs when general ledger accounts that are set to inactive are still used in setup screens or as settings in System Controls. The report includes information such as the fiscal period, the account number, and the debit or credit amount to use to make an adjusting entry.
To generate a GL Inactive Account Detail Report
| 1. | Select General Ledger > Reports. The Report List opens with the GL tab selected. |
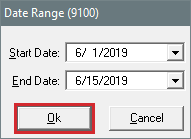
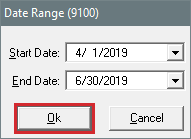
| 2. | Select GL Inactive Account Detail and click Launch. The Date Range screen opens. |
| 3. | Select the starting and ending dates for the report’s date range. |
| 4. | Click OK. The Report Window opens. |
| 5. | Print the report and close the Report Window. |
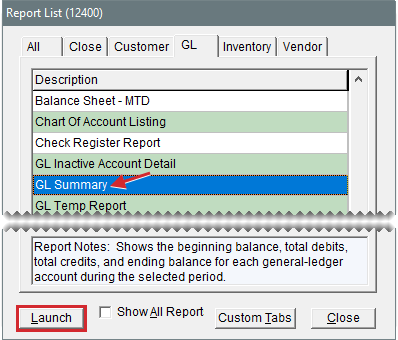
This report shows the following information for each general ledger account during the selected period:
Beginning balance
Total debits
Total credits
Ending balance
To generate a GL Summary
| 1. | Select General Ledger > Reports. The Report List opens with the GL tab selected. |
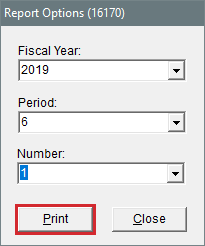
| 2. | Select GL Summary and click Launch. The Report Options screen opens. |
| 3. | Select the fiscal year, period, and number that you want a summary for from the drop-downs. |
| 4. | Click Print. The Report Window opens. |
| 5. | Print the report and close the Report Window. |
| 6. | Close the Report Options screen. |
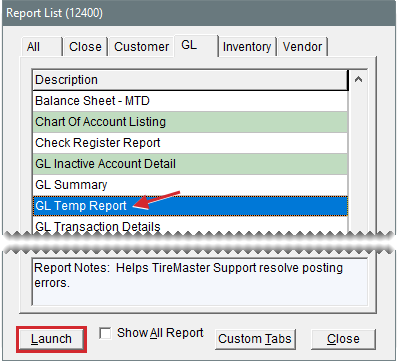
If you receive a posting error message when you log in to TireMaster, email a copy of the GL Temp Report to TireMaster Support. Also log a support call, so Support will be looking for your email. Posting errors need to be resolved before closing the month.
To generate a GL Temp Report
| 1. | Select General Ledger > Reports. The Report List opens with the GL tab selected. |
| 2. | Select GL Temp Report and click Launch. The Report Window opens. |
| 3. | Print the report and close the Report Window. |
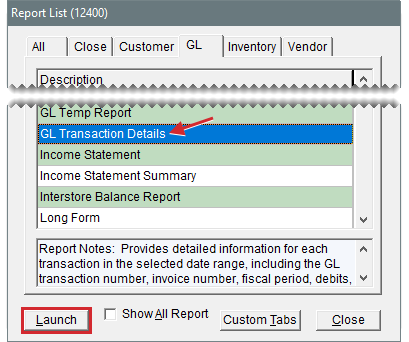
This report provides detailed information for each transaction in the selected date range, including the GL transaction number, invoice number, fiscal period, debits, credits, and description of each journal entry line. This information is grouped by the GL transaction number.
To generate a GL Transaction Details Report
| 1. | Select General Ledger > Reports. The Report List opens with the GL tab selected. |
| 2. | Select GL Transaction Details and click Launch. The Date Range screen opens. |
| 3. | Select the starting and ending dates for the report’s date range. |
| 4. | Click OK. The Report Window opens. |
| 5. | Print the report and close the Report Window. |
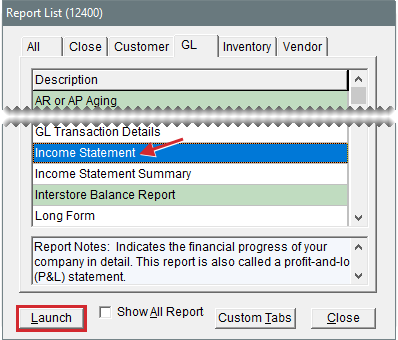
This report is one of your two main financial statements. The income statement shows the financial progress of your company in detail. It is also called a profit and loss (P&L) statement.
To generate an income statement
| 1. | Select General Ledger > Reports. The Report List opens with the GL tab selected. |
| 2. | Select Income Statement and click Launch. The Report Options screen opens. |
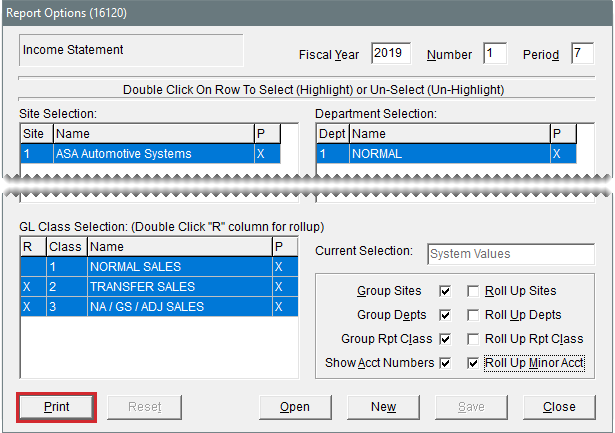
| 3. | Type the fiscal year, number, and period whose information you want to retrieve. |
| 4. | To remove a site, department, or GL class from the income statement, double-click it. By default, all sites, departments, and GL classes are selected. |
| 5. | To roll up sales for a specific GL class, double-click the R column next to the class for which you want summary information only. |
| 6. | Do one of the following: |
To specify which information is displayed on the report, select one or more of the report option check boxes.
To print the report using a memorized setting, click Open. When the Memorized Selections screen opens, click the appropriate setting and click Select. For more information, see Financial Statement Settings.
| 7. | Click Print. The Report Window opens. |
| 8. | Print the report and close the Report Window. |
| 9. | Close the Report Options screen. |
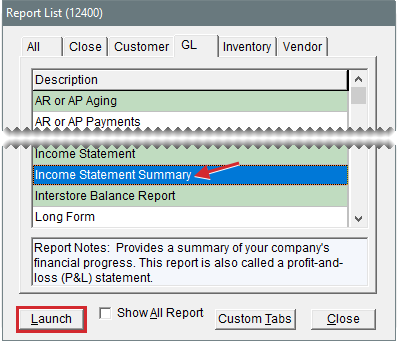
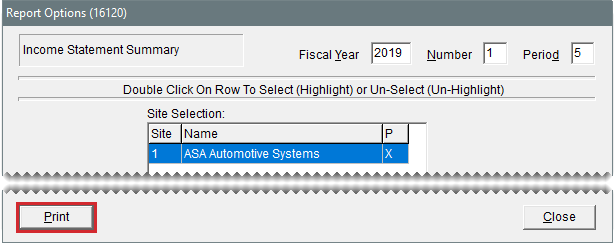
This report provides a summary of your company’s financial progress.
To generate an Income Statement Summary
| 1. | Select General Ledger > Reports. The Report List opens with the GL tab selected. |
| 2. | Select Income Statement Summary and click Launch. The Report Options screen opens. |
| 3. | Type the fiscal year, number, and period whose information you want to retrieve. |
| 4. | Click Print. The Report Window opens. |
| 5. | Print the report and close the Report Window. |
| 6. | Close the Report Options screen. |
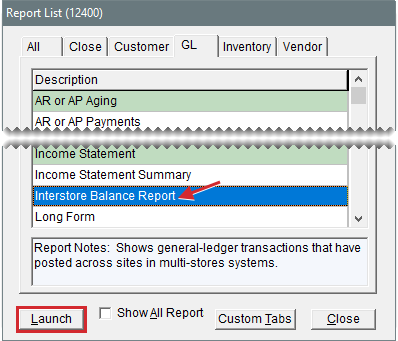
This report shows general ledger transactions that have posted across sites (in TireMaster Corporate).
To generate an Interstore Balance Report
| 1. | Select General Ledger > Reports. The Report List opens with the GL tab selected. |
| 2. | Select Interstore Balance Report and click Launch. The Date Range screen opens. |
| 3. | Click OK. The Report Window opens. |
| 4. | Print the report and close the Report Window. |
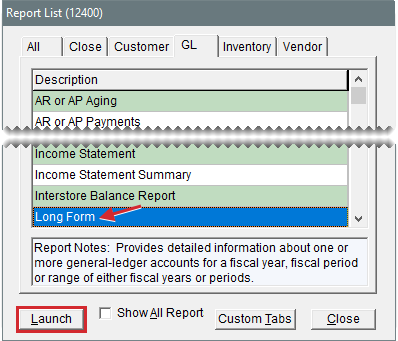
This report provides detailed information about one or more general ledger accounts for a fiscal year, fiscal period or a range of either fiscal years or periods. The report’s information is organized by general ledger account number and can include separate groupings for each fiscal year and period.
To generate a Long Form
| 1. | Select General Ledger > Reports. The Report List opens with the GL tab selected. |
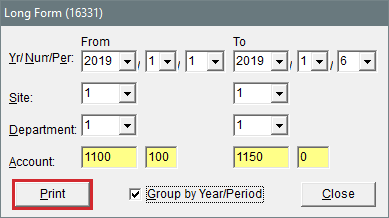
| 2. | Select Long Form and click Launch. The Long Form screen opens. |
| 3. | Select the dates for the report: |
For one fiscal year or period, select the same year, number, and period from both drop-downs.
For a range of fiscal years or periods, select different years and periods from the drop-downs.
| 4. | Select the sites to include on the report from the Site drop-downs (in TireMaster Corporate). |
| 5. | Select the accounts whose information you want to generate: |
For one account, enter the same account number for the beginning and end of the range.
For a range of accounts, enter different beginning and ending account numbers.
| 6. | To group report information by fiscal year and fiscal period, select the Group by Year/Period check box. To go without grouping, clear the check box. |
| 7. | Click Print. The Report Window opens. |
| 8. | Print the report and close the Report Window. |
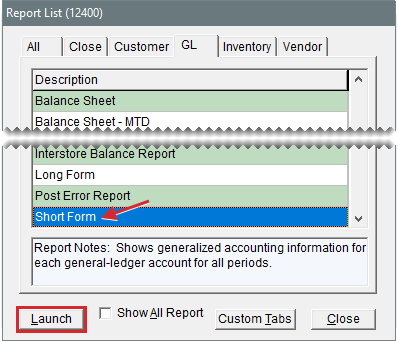
This report shows generalized accounting information for each general ledger account for all periods. For each general ledger account, the report shows all of the offsetting accounts as well as the total debit or credit amount.
To generate the Short Form
| 1. | Select General Ledger > Reports. The Report List opens with the GL tab selected. |
| 2. | Select Short Form and click Launch. The Report Window opens. |
| 3. | Print the report and close the Report Window. |
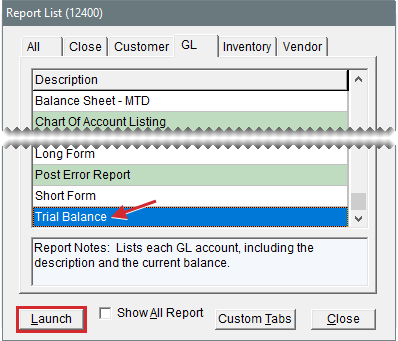
This report lists each GL account, including the description and the current balance.
To generate a Trial Balance Report
| 1. | Select General Ledger > Reports. The Report List opens with the GL tab selected. |
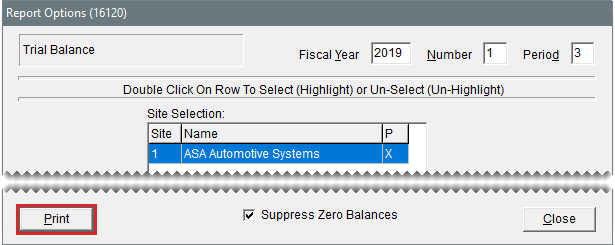
| 2. | Select Trial Balance and click Launch. The Report Options screen opens. |
| 3. | Type the fiscal year, number, and period whose trial balance you want to generate. |
| 4. | Select the sites whose balance sheets you want to generate (in TireMaster Corporate). |
| 5. | If you want to include accounts with zero balances on the report, clear the Suppress Zero Balances check box. Otherwise, leave the check box alone. |
| 6. | Click Print. The Report Window opens. |
| 7. | Print the report and close the Report Window. |
| 8. | Close the Report Options screen. |
