Add and Manage Items
This help topic is applicable to the following TireMaster applications:
|
TireMaster Point of Sale |
TireMaster Plus |
TireMaster Corporate |
|---|---|---|

|

|

|
Because tracking inventory activity is an ongoing task, TireMaster includes tools for gathering information about the products and services you sell.
When you add an item to the inventory, you need to complete settings that will help you distinguish it from the other products and services you sell. Completing all of the available inventory settings is not necessary, however, each item must be assigned the following:
A unique product code
An inventory category
A GL code
You also need to define whether an item is inventoriable or noninventoriable.
To add an item
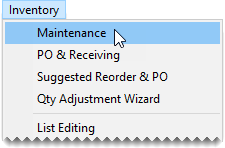
| 1. | Select Inventory > Maintenance. TireMaster prompts you to search for an item. |
| 2. | Do one of the following: |
Search for an item that’s similar to the one you’re adding. For more information, see Inventory Searches.
Click Cancel.
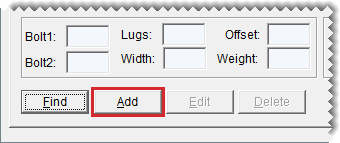
| 3. | When the Inventory Maintenance screen opens, click Add. TireMaster prompts you for a product code. |
| 4. | Type a unique product code for the new item and click OK. |
| 5. | Enter the item’s basic information: |
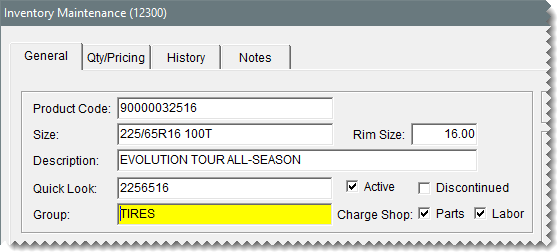
| a. | Type the size, description, and quick‑look code. For tires, also type the rim size. |
| b. | Click the Group field, press  . Then select a group from the list that appears, and click OK. . Then select a group from the list that appears, and click OK. |
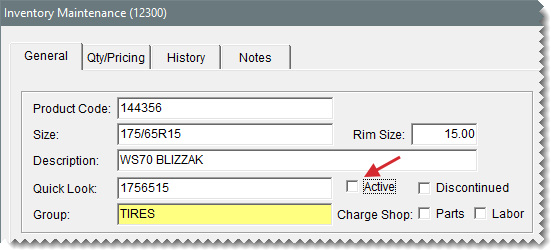
| c. | Make sure the Active check box is selected. |
| 6. | Define whether to assess shop charges for the item. |
For shop charges based on the sum of the item’s parts price and FET, select the Charge ShopParts check box.
For shop charges based on the item’s labor price, select the Charge Shop Labor check box.
For shop charges based on both the item’s parts price and labor price, select both of the Charge Shop check boxes.
| 7. | Define how the item should be handled. |
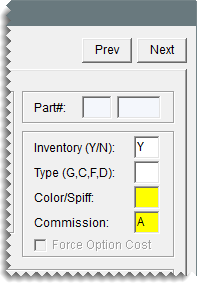
| a. | If the item is inventoriable, type the letter Y in the Inventory (Y/N) field. For noninventoriable items, type the letter N instead. For more information, see Inventoriable Items and Noninventoriable Items. |
| b. | Define the item’s type in the Type (G, C, F, D) field: |
For normal items, leave the field blank.
For gasoline, type the letter G. For more information, see Add Gasoline to the Inventory.
For consignments, type the letter C. For more information, see Set Up Consignment Items.
For fees, type the letter F. For more information, see Set Up Fees
For discounts, type the letter D. For more information, see Set Up Discounts.
| c. | If you’ll record the cost of the item at point of sale, select the Force Option Cost check box. |
| d. | If the item is noninventoriable and you want to track it, select the Track check box. For more information, see Item Tracking. |
| 8. | Enter employee incentive information (optional). |
| a. | To assign a spiff color to the item, click the Color/Spiff field and press  . Then select a color from the list that appears and click OK. . Then select a color from the list that appears and click OK. |
| b. | If you pay sales commission for the item, click the Commission field and press  . Then select the inventory commission type and click OK. . Then select the inventory commission type and click OK. |
| 9. | Enter up to three bar codes (optional). For more information, see Prepare to Use Bar Codes. |
| 10. | Enter the vendor part number and reconciliation code for the item’s main vendor or manufacturer. |
| a. | Type the part number in the Vendor Part Number 1 field. |
| b. | Click the Recon Code 1 field and press  . Then select the reconciliation code for the item’s main vendor or manufacturer and click OK. . Then select the reconciliation code for the item’s main vendor or manufacturer and click OK.
|
| 11. | Enter up to three additional vendor part numbers and reconciliation codes for other vendors who distribute the item. |
| 12. | Enter the following tire and wheel details as needed. |
| a. | For tires, enter the load index/speed rating, UTQG rating, load range, sidewall style, and treadlife warranty. For information on using the Core Item field, see Prepare to Track Core Items. |
| b. | For wheels, enter the number of lugs, the bolt pattern, the rim width, and the rim offset. |
| c. | Type a minimum weight requirement (optional). |
| 13. | Assign the following codes and tax settings: |
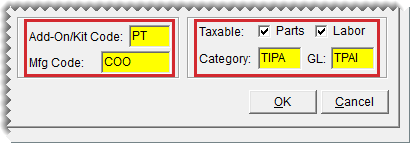
| a. | Click the Add On/Kit Code field and press  . Then select an add‑on code and click OK. . Then select an add‑on code and click OK. |
| b. | Click the Mfg Code field and press  . Then select the code for the item’s manufacturer and click OK. . Then select the code for the item’s manufacturer and click OK. |
| c. | If the item’s price excluding labor is taxable, make sure the Parts check box is selected. Otherwise, clear the check box. |
| d. | If the item’s labor price is taxable, make sure the Labor check box is selected. Otherwise, clear the check box. |
| e. | Click the Category field and press  . Then select a category code and click OK. . Then select a category code and click OK. |
| f. | Click the GL field and press  . Then select a GL code and click OK. or one of the three preset GL codes and click OK. . Then select a GL code and click OK. or one of the three preset GL codes and click OK. |
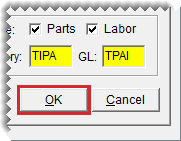
| 14. | To save the new item, click OK. TireMaster prompts you to edit the prices for the new item. |
| 15. | To add prices for the item, click Yes. For instructions, see Fixed Prices. Otherwise, click No and close the Inventory Maintenance screen. |
When you need to update information for items, you have two options. You can update items one at a time or in bulk by with Inventory List Editing.
When you need to update the information for a single item, you can make the needed changes in the record for that item.
To update an item’s settings
| 1. | Look up the item you need to update. For more information, see Inventory Searches. |
| 2. | Do one of the following on the Inventory Maintenance screen: |
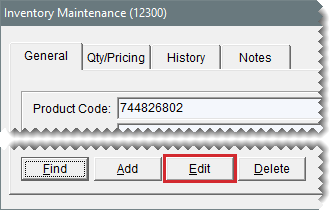
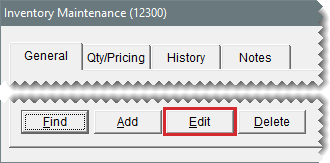
To change codes assigned to the item, make sure the General tab is selected. Then click Edit.
To change price, cost, and stocking-level settings, click the Qty/Pricing tab. Then click Detail/Edit to open the Site Prices and Quantity screen.
To change the item’s notes or link to a web site, specifications sheet, or product photo click the Notes tab. Then click Edit Note.
| 3. | Update the settings that need to be changed. |
| 4. | To save the changes, click OK. |
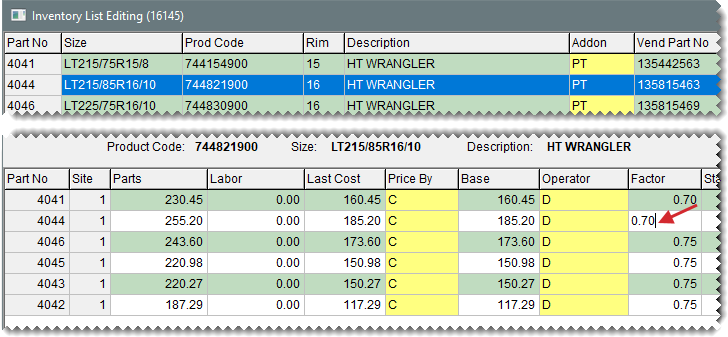
With Inventory List Editing, you can update the settings for a group of items. The Inventory List Editing screen is similar to a spreadsheet and is split into two panes. The top pane lists basic properties for items, such as size, product code, and group. The bottom pane is for price, cost, and stocking-level settings.
To update information for multiple items
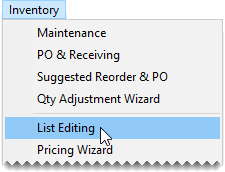
| 1. | Select Inventory > List Editing. TireMaster The Custom Inventory Lookup screen appears. |
| 2. | Search for a group of items to update. For more information, see Inventory Searches. |
| 3. | Resize screen and rearrange the columns (one on or both of the panes) if needed. For more information, see Resize Screens and Rearrange Table Columns. |
| 4. | In the top pane, select the row for the item you want to update. The corresponding row for that item is automatically selected in the bottom pane. |
| 5. | In the top pane, make changes by typing them, selecting or clearing check boxes, and selecting codes from a list. To access the various code lists, click the cells colors yellow. Then press or click  . Your changes are saved instantly. . Your changes are saved instantly. |
| 6. | In the bottom pane, click the row for the selected item and make changes as needed. In the Price By and Operator columns, press  repeatedly to see your choices. repeatedly to see your choices. |
| 7. | To change additional items, repeat steps 4 through 6. |
| 8. | If you want to edit another group of items, click Select Inventory. |
| 9. | Close Inventory List Editing screen. |
You can update price, cost, and bar code settings for existing items by importing data from an XML spreadsheet into TireMaster. Updating items in this manner helps you save time, because information for multiple items can be updated at once.
To update items with an XML spreadsheet
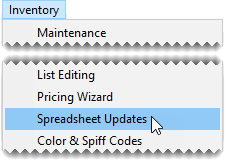
| 1. | Select Inventory > Spreadsheet Updates. TireMaster prompts you to update items with an XML spreadsheet. |
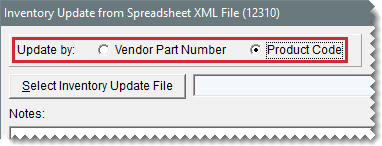
| 2. | Depending on how your spreadsheet is set up, select Vendor Part Number or Product Code. TireMaster checks your inventory for any items that have been assigned duplicate part numbers or product codes. |
| 3. | Look up the spreadsheet with the price information: |
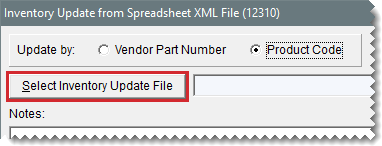
| a. | Click Select Inventory Update File. The Load Inventory Update File screen appears. |
| b. | Select the file that you want to use for the update and click Open. |
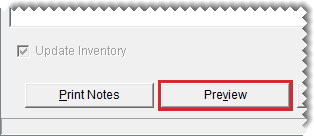
| 4. | To view the pending changes, click Preview. If TireMaster cannot access the data file, make sure the spreadsheet is no longer open in Excel. |
| 5. | To complete the update, click Process Inventory Update. The following message appears: “Inventory update is complete.” |
| 6. | Click OK to close the message. |
| 7. | Close the Inventory Update from Spreadsheet XML File screen. |
| 8. | Verify that the price, cost, or bar code fields were updated by looking up a sample of individual items or by looking up multiple items in Inventory List Editing. |
XML spreadsheets
It must be saved in the XML spreadsheet format.
Each column heading must include the TireMaster database column name in parenthesis. (For example, INVPRICE.DBILL.)
It must have a column for vendor part numbers, product codes, or both.
If an amount is 0.00, type 0.00. Cells cannot be blank.
The Pricing folder in the TireMaster program directory (c:\TireMaster\Pricing or d:\TireMaster\Pricing) includes two spreadsheets that you can modify, or you can create your own.
|
TireMaster Field Name |
Database Column Name |
|
|
Vendor Part # |
INV.VENDPARTNO |
Spreadsheets must have a column for vendor part numbers, product codes, or both. |
|
Product Code |
INV.INVNO |
|
|
Bar Code 1 |
INV.BARCODE1 |
|
|
Bar Code 2 |
INV.BARCODE2 |
|
|
Bar Code 3 |
INV.BARCODE3 |
|
|
Base Price |
INVPRICE.DBILL |
|
|
Last Cost |
INVPRICE.LASTCOST |
|
|
Labor Price |
INVPRICE.LABOR |
|
|
Everyday Low |
INVPRICE.EDL |
|
|
Price By |
INVPRICE.PRICEBY |
|
|
Factor |
INVPRICE.FACTOR |
|
|
Sale Labor |
INVPRICE.SALE_LABOR |
|
|
Sale Price |
INVPRICE.SALE_PRICE |
|
|
Sale Begin (date) |
INVPRICE.SALE_BEGIN |
|
|
Sale End (date) |
INVPRICE.SALE_END |
|
|
Last FET |
INVPRICE.LASTFETAX |
|
|
Next FET |
INVPRICE.FETAX |
|
|
Standard Cost |
INVPRICE.STANDARDCOST |
|
With the Pricing Wizard, you can assign the same minimum stocking level, the same maximum stocking level, or both to a group of items. You’ll most likely use the Pricing Wizard to assign stocking levels in conjunction with another task. For example, in one session of using the Pricing Wizard, you could do the following to the tires in a specific product line:1) set the minimum stocking level, 2) set the maximum stocking level, and 3) update the cost.
To assign stocking levels with the Pricing Wizard
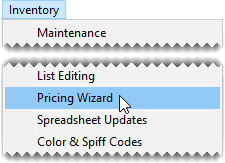
| 1. | Select Inventory > Pricing Wizard. |
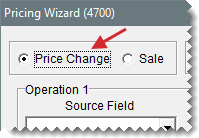
| 2. | Make sure Price Change is selected. |
| 3. | Update the minimum stocking level if needed. Otherwise, skip this step. |
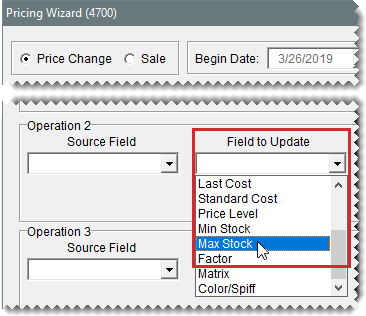
| a. | Select Min Stock from the Field to Update drop-down for the operation being used to update the minimum stocking level. The Value field appears and replaces the price change fields. |
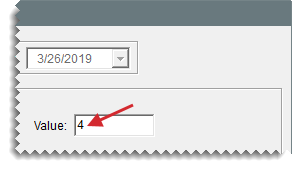
| b. | Type the number you want to assign as the minimum stocking level in the Value field. |
| 4. | Update the maximum stocking level if needed. Otherwise, skip this step. |
| a. | Select Max Stock from the Field to Update drop-down for the operation being used to update the maximum stocking level. The Value field appears and replaces the price change fields. |
| b. | Type the number you want to assign as the maximum stocking level in the Value field. |
| 5. | Click Inventory, and look up the item or items to which you want to assign stocking levels. For more information, see Inventory Searches. |
| 6. | Review the pending changes. |
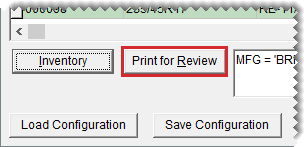
| a. | Click Print for Review. The Report Window opens and displays the Pricing Wizard Report. |
| b. | Verify that the changes you want will be made. |
| c. | Print the report if needed, and close the Report Window. |
| 7. | Click Apply. A confirmation message appears. |
| 8. | Click Yes. A second message verifies the update has been completed. |
| 9. | Click OK to close the confirmation message. |
To view the changed stocking level for a single item, look at either the Min Stock or Max Stock field on the Site Prices and Quantity screen. For multiple items, select List Editing from the Inventory menu, and look up the same items you just updated. Stocking levels are listed in the lower-right half of the Inventory List Editing screen. If you can’t see them, scroll to the right.
When you stop selling a particular item or when a manufacturer no longer makes an item, you can classify that item as discontinued. Once a discontinued item reaches a quantity of zero, TireMaster changes the item’s status to inactive when you cut off the month.
To discontinue an item
| 1. | Search for the item you want to discontinue. For more information, see Inventory Searches. |
| 2. | On the Inventory Maintenance screen, make sure the General tab is selected and click Edit. |
| 3. | Select the Discontinued check box. |
| 4. | To save you changes, click OK. |
By making an item inactive, you can exclude it from inventory searches and reports.
To make an item inactive
| 1. | Search for the item you want to discontinue. For more information, see Inventory Searches. |
| 2. | On the Inventory Maintenance screen, make sure the General tab is selected and click Edit. |
| 3. | Clear the Active check box. |
| 4. | To save you changes, click OK. |
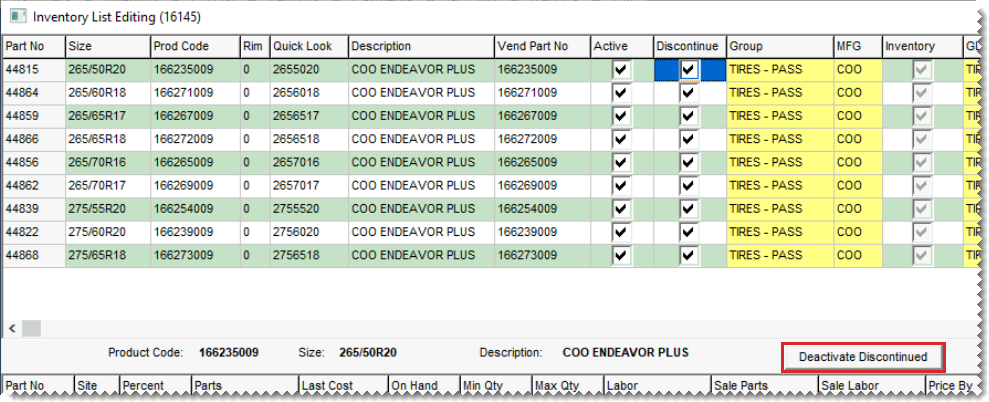
When a manufacturer discontinues a group of items that are currently an active part of your inventory, you can use Inventory List Editing to simultaneously make the entire group inactive. make the entire group inactive. Changing the status of discontinued items to inactive prevents your salespeople from attempting to sell those items, because they're excluded from inventory searches by default. For a discontinued item to become inactive, it needs to have a quantity of zero.
The means to make a group of discontinued items inactive is available in TireMaster 9.4.5 and newer.
To make a group of discontinued items in active
| 1. | Select Inventory > List Editing. The inventory lookup screen opens. |
| 2. | Search for the group of items you want to make inactive. For more information, see Inventory Searches. The Inventory List Editing screen opens. |
| 3. | If any of the items have not already been marked as discontinued, select the check boxes in the Discontinued column for those items. |
| 4. | Click Deactivate Discontinued. |
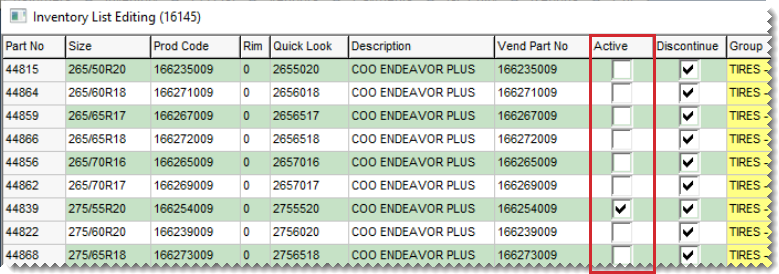
TireMaster no longer displays check marks in the Active column for the items that were just made inactive. If a check mark remains for any of the items, it's because the quantity for those items was not zero.
If you have an item that has never been used in any transactions and isn’t associated with another inventory item, such as an add-on item, you can delete it. If an item has transaction history, you can inactivate it instead. For more information, see Make an Item Inactive.
To delete an item
| 1. | Search for the item you want to discontinue. For more information, see Inventory Searches. |
| 2. | On the Inventory Maintenance screen, make sure the General tab is selected and click Edit. A confirmation message appears, |
| 3. | Click Yes. The item is removed form the database. |
